
Decadent Quinoa Crunch Peanut Butter Cups Recipe
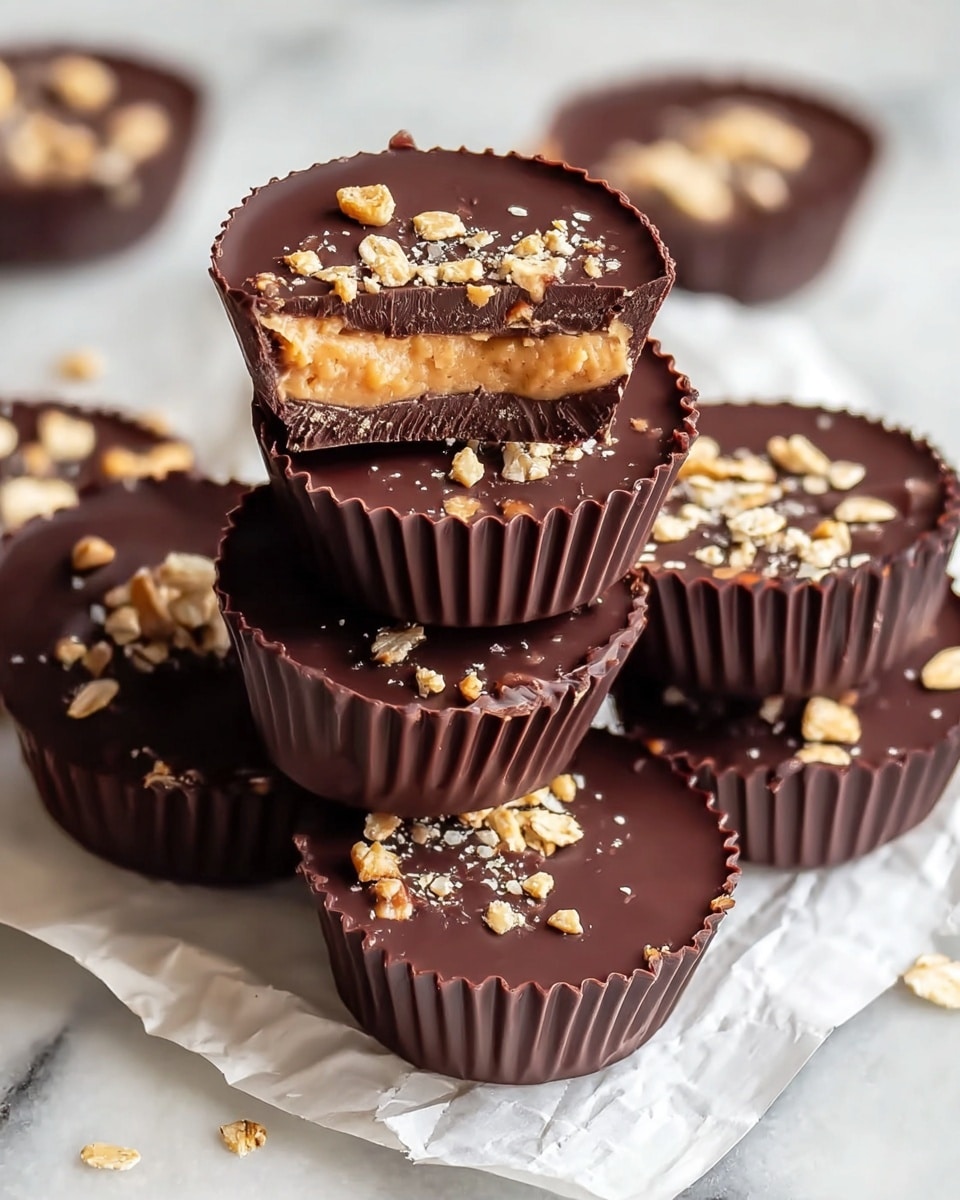
Picture this: the warm scent of dark chocolate swirling through your kitchen, mingling with the nutty aroma of roasted peanut butter and a subtle tropical hint of coconut. As you bite into these delightful cups, a satisfying crunch greets your teeth, followed by a luscious, creamy center that melts smoothly, leaving a little trail of happiness behind. These Decadent Quinoa Crunch Peanut Butter Cups are more than just a treat; they’re a magical combination of textures and flavors that feel like a warm hug on a plate. Quick to prepare, utterly impressive, and irresistibly delicious, they’re about to become your new favorite go-to dessert.
Why You’ll Love This Decadent Quinoa Crunch Peanut Butter Cups Recipe
- Ready in just 50 minutes: From start to finish, you’ll have these gorgeous peanut butter cups chilled and ready to enjoy without spending hours in the kitchen.
- Uses simple, wholesome ingredients: No need for complicated shopping lists or obscure pantry items—this recipe relies on everyday staples you probably already have.
- Perfect for beginners: The straightforward steps and forgiving technique mean anyone can whip these up and impress their loved ones.
- Impressive presentation: Each peanut butter cup looks like a gourmet confection, perfect for gifting or sharing at your next get-together.
- Customizable crunch and flavor: Swap quinoa crisps for your favorite cereal or nuts, and adjust sweetness levels to your personal taste.
Why This Decadent Quinoa Crunch Peanut Butter Cups Recipe Works
The secret to this luscious Decadent Quinoa Crunch Peanut Butter Cups Recipe lies in balancing rich, creamy, and crunchy elements perfectly. The melted dark chocolate combined with coconut oil creates a beautifully smooth and glossy shell that snaps just right. Meanwhile, folding coconut flour into the peanut butter and maple syrup mixture thickens the filling to the ideal consistency, holding the quinoa crisps without weighing it down. The quinoa crisps bring that unexpected, delightful crunch that elevates each bite beyond a typical peanut butter cup. These thoughtful details make this recipe a guaranteed crowd-pleaser.
Ingredients You’ll Need
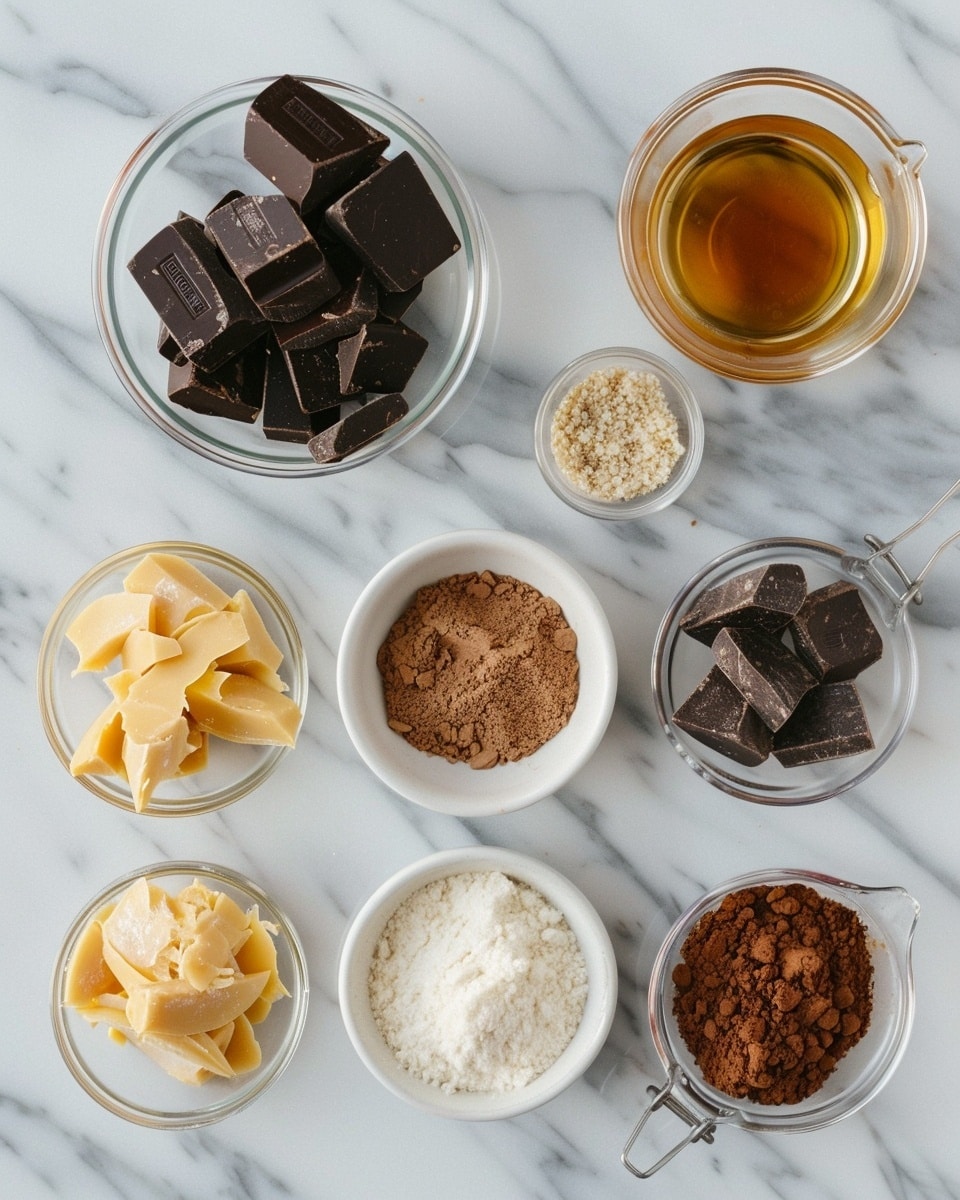
Simple ingredients come together to create a rich, textured treat with complex flavors you’ll adore. Here’s what you’ll grab from the pantry:
- Dark chocolate (1 cup): Forms the rich, glossy shell that holds everything together flawlessly.
- Coconut oil (1 tbsp): Helps melt and smooth out the chocolate for that perfect shiny finish.
- Peanut butter (2 tbsp + 1/3 cup): The creamy heart of the peanut butter cups, delivering that beloved nutty richness.
- Maple syrup (1 tbsp): Adds a subtle natural sweetness that balances the nutty and bitter notes.
- Coconut flour (1 tbsp): Thickens the peanut butter mixture and introduces a gentle coconut undertone.
- Quinoa crisps (3 tbsp): The secret surprise ingredient that lends a marvelous crunch in every bite.
Ingredient Substitutions & Tips
- Dark chocolate: Substitute with semi-sweet or milk chocolate depending on your sweetness preference.
- Coconut oil: Can swap for butter or cacao butter for a different but equally smooth finish.
- Peanut butter: Try almond butter or cashew butter as a delicious alternative.
- Quinoa crisps: Use puffed rice, crushed nuts, or cereal flakes for a similar crunchy texture.
👨🍳 Pro Tips for Perfect Results
- Use silicone molds: They make removing your peanut butter cups effortless and prevent cracking.
- Melt chocolate carefully: Use 30-second bursts in the microwave to avoid burning or seizing.
- Measure ingredients precisely: Especially the coconut flour, to keep your filling silky but firm.
- Freeze thoroughly: Give the cups at least 20 minutes to set completely before unmolding.
- Customize crunch: Experiment with different crisps or nuts for a personalized texture.
How to Make Decadent Quinoa Crunch Peanut Butter Cups Recipe
Step 1: Melt the Chocolate and Coconut Oil
Start by placing the dark chocolate and coconut oil together in a medium-sized bowl. Heat gently in the microwave in 30-second increments, stirring each time, until the mixture is luxuriously smooth and glossy. This silky chocolate base will coat your peanut butter cups and give them that irresistible shine.
💡 Pro Tip: Stirring between intervals helps distribute heat evenly and prevents the chocolate from burning.
Step 2: Mix Chocolate with Peanut Butter and Quinoa Crisps
Next, fold 2 tablespoons of peanut butter and all 3 tablespoons of quinoa crisps into the melted chocolate. Stir gently until every crispy piece is coated, creating a glorious textured chocolate mixture that will serve as your outer shell and crunchy layer.
💡 Pro Tip: Gently fold rather than stirring vigorously to preserve the crispness of the quinoa.
Step 3: Prepare the Peanut Butter Filling
In a separate small bowl, whip together the remaining peanut butter and the maple syrup until smooth and creamy. This mixture is the decadent core of your peanut butter cups, bursting with flavor and sweetness.
💡 Pro Tip: For extra creaminess, ensure your peanut butter is room temperature before mixing.
Step 4: Thicken the Filling with Coconut Flour
Carefully fold the coconut flour into the peanut butter mixture. Stir slowly until the filling starts to thicken and holds its shape better. This step is crucial to make sure your filling won’t ooze out and keeps that lovely texture.
💡 Pro Tip: Add the coconut flour gradually to monitor consistency and avoid stiffness.
Step 5: Assemble the Cups
Drop about half a tablespoon of the chocolate mixture into each silicone cupcake liner, spreading it evenly to form a solid base. Then, shape a teaspoon of the peanut butter filling into a small ball and nestle it gently in the center of each cup.
💡 Pro Tip: Press the filling lightly into the base layer so it stays snug during the final step.
Step 6: Top with Remaining Chocolate Mixture
Cover each peanut butter ball with more of the chocolate mixture, spreading carefully to fully encase the filling. This final chocolate layer seals the delicious surprise inside and gives a smooth finish.
💡 Pro Tip: Use the back of a teaspoon to smooth and level the tops of your cups.
Step 7: Chill Until Firm
Place the filled silicone liners into the freezer for about 20 minutes or until the chocolate is completely set and firm to the touch. Then, gently pop them out and get ready to enjoy!
💡 Pro Tip: Store in the fridge if you don’t want to eat them immediately, but the freezer speeds up the process.
Common Mistakes to Avoid
Learn from these common pitfalls:
- Chocolate overheating: Melting chocolate too quickly can cause it to seize, leading to a grainy texture.
- Skipping the coconut flour: Without it, the peanut butter filling can be runny and hard to work with.
- Overmixing quinoa crisps: Stirring aggressively will break down the crisps, losing that signature crunch.
- Using metal molds: These can make it difficult to remove the cups without cracking their beautiful shells.
- Not freezing long enough: Chocolate cups need full chilling time to set properly and avoid melting upon handling.
- Incorrect peanut butter consistency: Too stiff or too oily peanut butter can affect the creaminess of the filling.
Delicious Variations to Try
Once you’ve mastered the classic Decadent Quinoa Crunch Peanut Butter Cups Recipe, these fun twists will keep your taste buds intrigued.
Chocolate Hazelnut Crunch
Swap peanut butter for rich hazelnut spread and exchange quinoa crisps with toasted hazelnuts for a nutty, crunchy delight.
Salted Caramel Surprise
Add a small dollop of homemade caramel in the center before topping with chocolate for a salty-sweet contrast.
Spiced Cocoa Twist
Sprinkle cinnamon or a pinch of cayenne into your chocolate mixture to add warmth and a surprising kick.
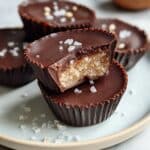
Dark Chocolate Sea Salt
Top each cup with a tiny sprinkle of flaky sea salt right before freezing to highlight the chocolate’s richness.
Vegan & Gluten-Free Version
Use almond butter, dairy-free chocolate, and gluten-free quinoa crisps for an allergy-friendly treat.
How to Serve Decadent Quinoa Crunch Peanut Butter Cups Recipe
Garnishes
Finish your cups with a sprinkle of crushed nuts, a few quinoa crisps on top, or a drizzle of melted chocolate for extra flair.
Side Dishes
Pair these peanut butter cups with a scoop of creamy vanilla ice cream or a cup of freshly brewed coffee to elevate your dessert experience.
Creative Ways to Present
Serve in mini cupcake liners on a decorative platter or stack them in a pretty box tied with a ribbon for thoughtful homemade gifts.
Make Ahead and Storage
Storing Leftovers
Keep your peanut butter cups in an airtight container in the fridge for up to one week to maintain their texture and flavor.
Freezing
Freeze for up to three months by placing the cups in a single layer on a baking sheet first, then transferring to a freezer-safe bag or container.
Reheating
Let frozen cups thaw at room temperature for 10 minutes or pop them in the fridge for a slow defrost before enjoying.
FAQs
Can I use creamy peanut butter instead of chunky?
Absolutely! Creamy peanut butter melts and blends smoothly, making your filling silky and luscious.
Are these peanut butter cups dairy-free?
They can be! Opt for dairy-free dark chocolate and coconut oil to keep the recipe vegan-friendly.
What if I don’t have quinoa crisps?
Feel free to substitute with puffed rice, crushed cornflakes, or chopped nuts for the crunch.
How long do these cups last stored in the fridge?
Properly sealed, they stay fresh and delicious for up to one week.
Can I make these ahead for a party?
Definitely! They’re great made a day or two in advance and stored in the fridge or freezer until ready.
Do I have to use coconut flour?
Coconut flour helps thicken the filling perfectly, but you can substitute with almond flour or leave it out if your peanut butter is already thick.
Is there a way to make these sugar-free?
Yes, swap maple syrup for a sugar-free sweetener like monk fruit or stevia, adjusting sweetness to taste.
Can I double this recipe?
Yes, this recipe scales well. Just ensure your mixing bowls and molds can handle the increased quantity.
Final Thoughts
These Decadent Quinoa Crunch Peanut Butter Cups Recipe are truly a celebration of textures and flavors, combining creamy peanut butter, crunchy quinoa crisps, and rich chocolate into one irresistible bite. Whether you’re crafting these for a cozy night in or as a show-stopping gift, they deliver comfort and decadence in equal measure. I hope this recipe brings as much joy to your kitchen as it has to mine.
Have you tried this Decadent Quinoa Crunch Peanut Butter Cups Recipe? I’d love to hear how it turned out! Leave a comment below. If you loved this recipe, please share it with friends and family. Happy cooking! 🍫🥜
PrintDecadent Quinoa Crunch Peanut Butter Cups Recipe
These Decadent Quinoa Crunch Peanut Butter Cups offer a perfect balance of smooth dark chocolate, creamy peanut butter filling, and a delightful quinoa crisp crunch. Rich in flavor yet naturally sweetened with maple syrup and enhanced with coconut flour for texture, these treats are an indulgent, no-bake snack perfect for satisfying your chocolate and peanut butter cravings.
- Prep Time: 15 minutes
- Cook Time: 5 minutes (melting and mixing)
- Total Time: 50 minutes (including freezing time)
- Yield: 12 servings 1x
- Category: Dessert
- Method: No-Cook
- Cuisine: American
- Diet: Vegetarian
Ingredients
Chocolate Shell and Crunch Mix
- 1 cup dark chocolate
- 1 tbsp coconut oil
- 2 tbsp peanut butter
- 3 tbsp quinoa crisps
Peanut Butter Filling
- 1/3 cup peanut butter
- 1 tbsp maple syrup
- 1 tbsp coconut flour
Instructions
- Prepare Ingredients: Gather all the ingredients and have your silicone cupcake liners ready for assembling the peanut butter cups.
- Melt Chocolate and Coconut Oil: In a medium bowl, melt the dark chocolate and coconut oil together by microwaving in 30-second increments, stirring between each until the mixture is completely smooth and glossy.
- Mix Chocolate Base: Stir the melted chocolate mixture with 2 tablespoons of peanut butter and 3 tablespoons of quinoa crisps until the quinoa crisps are evenly distributed throughout the chocolate.
- Prepare Peanut Butter Filling: In a separate small bowl, combine the remaining 1/3 cup peanut butter with the maple syrup, stirring until creamy and smooth.
- Thicken Filling: Gently fold in the coconut flour to the peanut butter mixture, mixing until the texture thickens and becomes slightly firm to help it hold shape.
- Form Chocolate Base: Scoop about half a tablespoon of the chocolate and quinoa mixture into each silicone cupcake liner, spreading it to form an even base layer.
- Add Peanut Butter Center: Shape approximately 1 teaspoon of the thickened peanut butter filling into a ball and place it gently in the center of each chocolate base layer in the liners.
- Cover with Chocolate: Spoon additional chocolate mixture over the peanut butter filling to fully encase it, smoothing the tops as needed to seal the cups.
- Freeze to Set: Place the assembled peanut butter cups into the freezer for about 20 minutes or until solid, then carefully remove the cups from the silicone liners and enjoy.
Notes
- Use good quality dark chocolate for the richest flavor and best texture.
- Silicone cupcake liners are recommended for easy removal of the peanut butter cups.
- You can substitute quinoa crisps with puffed rice or another crisped grain if quinoa is unavailable.
- Store finished cups in an airtight container in the refrigerator or freezer to maintain texture.
- For a vegan option, ensure peanut butter and chocolate are dairy-free certified.
Keywords: peanut butter cups, quinoa crisps, no-bake dessert, chocolate peanut butter treat, homemade candy, healthy peanut butter cups
