
Easy Quesadilla Recipe (Customize with Any Filling!) Recipe
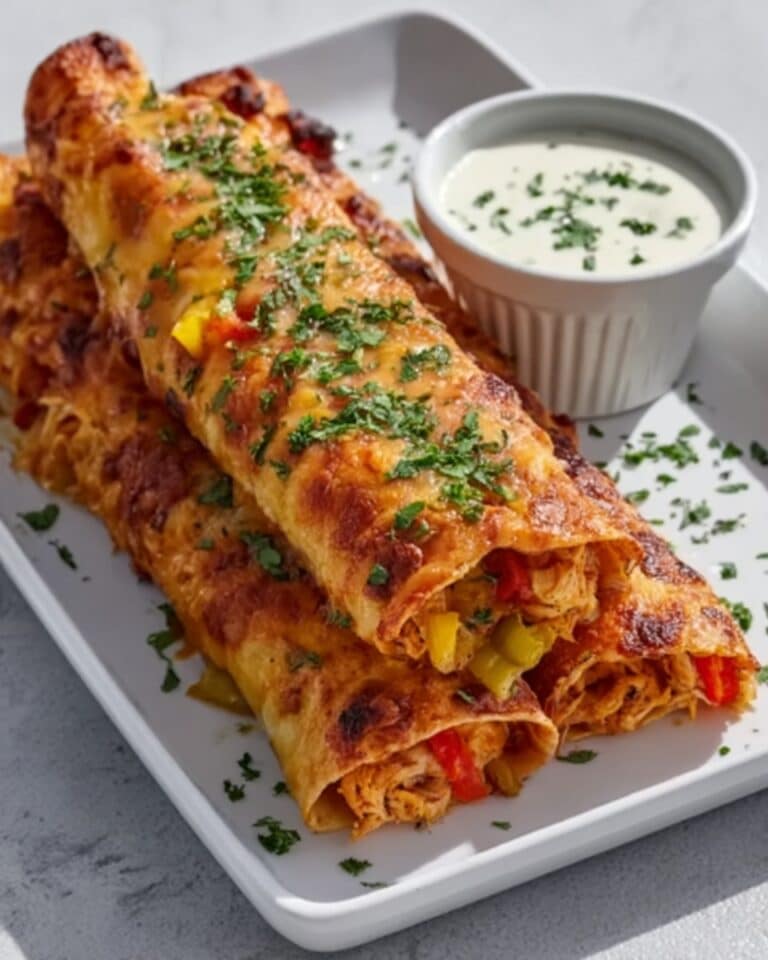
What if you could whip up a cheesy, crispy delight that you can customize in endless ways? The moment you warm that tortilla and hear the subtle sizzle as the cheese begins to melt, you know you’re in for a quick, satisfying treat. This Easy Quesadilla Recipe (Customize with Any Filling!) Recipe is your new go-to for a snack or light meal that feels indulgent but comes together effortlessly.
Why You’ll Love This Easy Quesadilla Recipe (Customize with Any Filling!) Recipe
- Deliciously melty and crispy: The balance of golden, toasty tortillas hugging gooey, freshly shredded cheese creates an irresistible combo every time.
- Simple Ingredients: Just two large flour tortillas and half a cup of your favorite cheese form the base, with the option to add whatever fillings you love—from scrambled eggs to taco-seasoned beef, or even leftover chicken.
- Perfect for any time of day: Whether it’s a quick snack or a casual meal, you’ll appreciate how this recipe fits seamlessly into your day with minimal fuss.
- Minimal fuss, maximum flavor: No need for butter or oil in the skillet—just straightforward stovetop cooking that brings out deep, toasty flavors.
- Highly customizable: Change it up with veggies, beans, meats, or keep it classic with cheese only—the possibilities are endless.
Why This Easy Quesadilla Recipe (Customize with Any Filling!) Recipe Works
This recipe’s magic lies in its simplicity and smart technique. Using a nonstick or cast iron skillet heated to medium ensures your quesadilla crisps evenly without sticking, and surprisingly, no butter or oil is needed—letting the natural toasting flavor shine through. Sprinkling the cheese evenly with a bit of a border keeps the filling contained, so each bite melts perfectly without escaping. Adding fillings on top of the cheese and layering a second tortilla pressed gently helps everything meld beautifully, creating layers of flavor and texture that are just downright comforting. This stovetop method is quick and reliable, letting you watch and flip the quesadilla with ease for that perfectly golden finish.
Ingredients You’ll Need
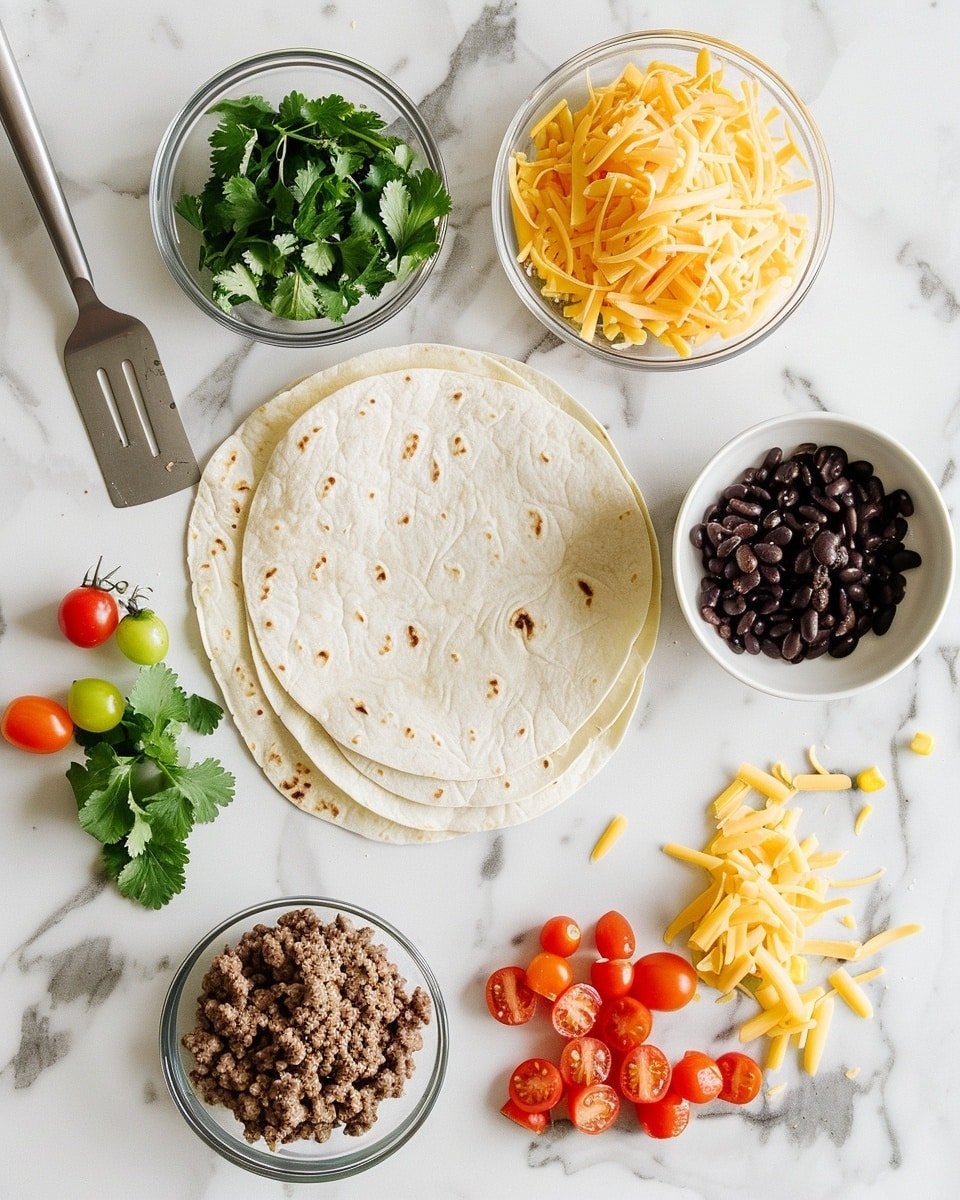
Gather your staples and let the possibilities unfold. From everyday pantry picks to your favorite fillings, this recipe welcomes all your creative cravings.
- 2 large flour tortillas (8–10 inch): These soft wraps form the crispy outer shell that holds all the melty goodness inside.
- 1/2 cup freshly shredded cheese (cheddar, Monterey Jack, or your favorite melty cheese): The star of the show that blankets every bite with luscious creaminess.
- Optional fillings: Scrambled eggs, taco-seasoned ground beef, beans, veggies, leftover chicken—you name it, this quesadilla adapts.
Ingredient Substitutions & Tips
- Flour tortillas: Try whole wheat or gluten-free tortillas for a different texture and flavor.
- Cheese: Experiment with mozzarella for stretchy cheese pulls or pepper jack for a spicy kick.
- Fillings: Swap ground beef for shredded chicken or beans for a vegetarian twist, and toss in sautéed bell peppers or spinach for extra veggies.
👨🍳 Pro Tips for Perfect Results
- Heat control is key: Use medium heat to get that perfect golden crust without burning the tortilla.
- Cheese distribution: Sprinkle the cheese evenly but leave a small border to avoid spills while flipping.
- No oil needed: Cooking in a dry skillet highlights the tortilla’s natural toasty flavor and keeps things lighter.
- Rest before slicing: Let the quesadilla sit for a minute after cooking to let the cheese set slightly—it cuts cleaner this way.
- Use a sturdy spatula: This makes flipping easier and keeps your quesadilla intact.
How to Make Easy Quesadilla Recipe (Customize with Any Filling!) Recipe
Step 1: Prepare the base
Begin by laying one of your large flour tortillas flat on a clean work surface. Sprinkle half a cup of freshly shredded cheese evenly across the surface, being sure to leave about a half-inch border so everything stays neatly inside.
💡 Pro Tip: Use freshly shredded cheese, as it melts better than pre-shredded varieties.
Step 2: Add your fillings
If you’re opting to amp up your quesadilla, layer your chosen fillings—whether that’s fluffy scrambled eggs, seasoned ground beef, hearty beans, or vibrant veggies—right on top of the cheese now, building delicious layers that will meld together as it cooks.
💡 Pro Tip: Avoid overstuffing to prevent sogginess or difficulty flipping.
Step 3: Heat your skillet
Place a nonstick or cast iron skillet over medium heat—no butter or oil needed here. The dry heat crisps up the tortilla beautifully, giving a satisfying crunch without extra fat.
💡 Pro Tip: Preheating the pan helps the quesadilla cook evenly and quickly.
Step 4: Cook the first side
Carefully transfer the tortilla with the cheese-and-filling side up into the skillet. For a cheese-only quesadilla, pop a lid over the skillet to trap heat and help melt the cheese in about 2–3 minutes. If you’ve added fillings, skip the lid to avoid moisture buildup that can make your tortilla soggy.
💡 Pro Tip: You’ll know it’s ready when the bottom turns a beautiful golden brown and the cheese begins to ooze.
Step 5: Layer and flip
Place the second tortilla gently on top and press lightly. Then, using a spatula, flip the entire quesadilla over. Let it cook uncovered another 2–3 minutes until the second side is equally crisp and golden.
💡 Pro Tip: Be patient and use a confident flip to keep everything intact.
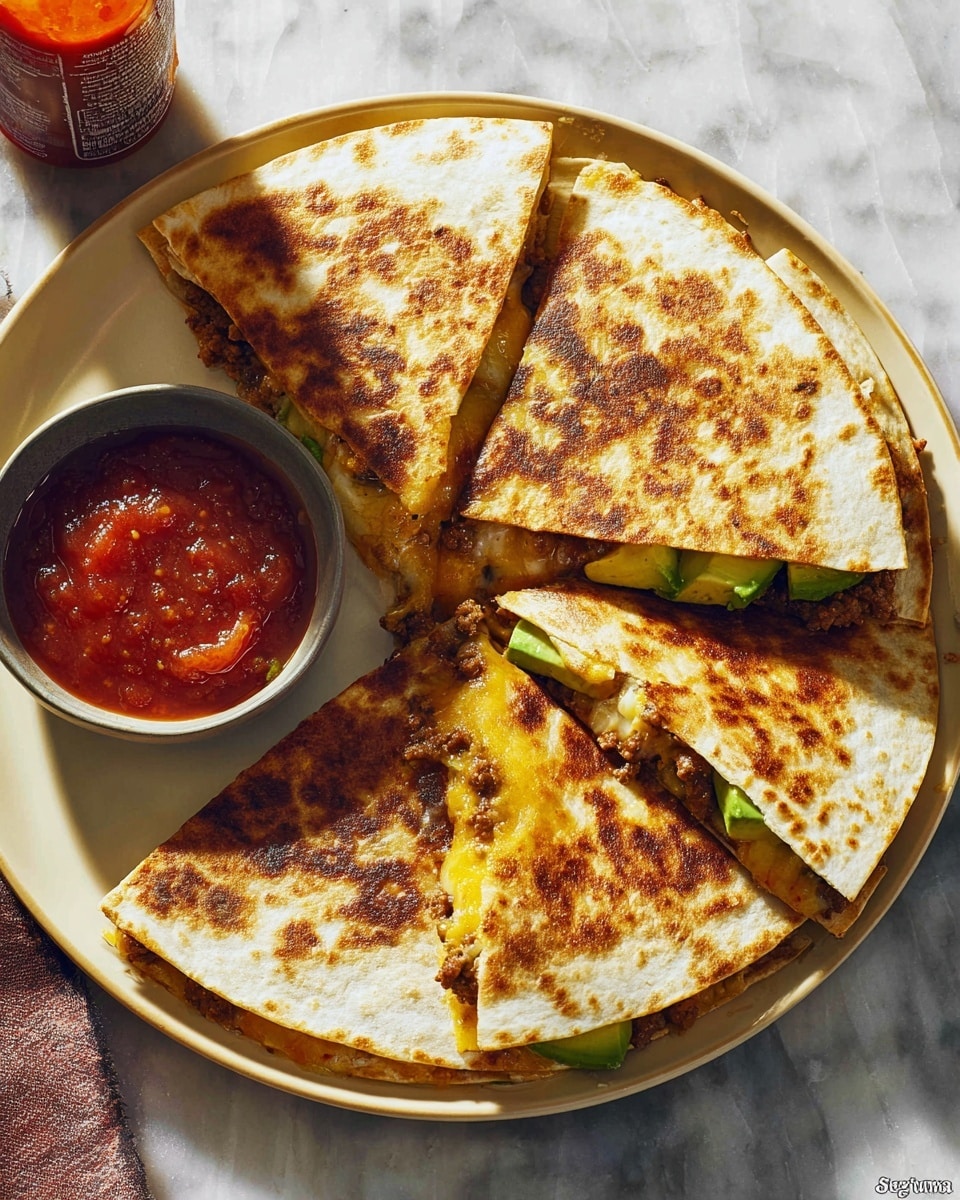
Step 6: Slice and serve
Transfer your golden masterpiece to a cutting board and let it rest for 1 minute. This brief pause lets the cheese settle so slicing creates perfect wedges ready to be dipped or enjoyed straight away.
💡 Pro Tip: Use a sharp knife or pizza cutter for clean cuts that don’t drag the filling.
Common Mistakes to Avoid
Learn from these common pitfalls:
- Overstuffing: Trying to add too many fillings leads to messy, soggy quesadillas that are tough to flip.
- Too high heat: Cooking too fast on high heat burns the tortilla before the cheese melts inside.
- Skipping the rest: Cutting immediately can cause cheese to spill everywhere and ruin the shape.
- Not leaving a border: Spreading cheese to the edge can cause it to leak and burn on the skillet.
- Using cold fillings: Fillings straight from the fridge cool down the skillet, slowing melting and the cooking process.
- Incorrect flipping technique: Trying to flip without a sturdy spatula or rushing the flip can cause the quesadilla to fall apart.
Delicious Variations to Try
Once you’ve mastered this classic Easy Quesadilla Recipe (Customize with Any Filling!) Recipe, why not mix things up with some exciting twists?
Veggie Fiesta
Load your quesadilla with sautéed bell peppers, onions, corn, and black beans for a flavorful and colorful vegetarian version bursting with textures.
Spicy Chicken
Mix shredded leftover chicken with taco seasoning and diced jalapeños for a zesty, protein-packed filling that brings a kick to every bite.
Breakfast Delight
Fill with scrambled eggs, cheddar cheese, and a sprinkle of fresh herbs for a satisfying morning twist.
Cheese Lovers’ Dream
Combine Monterey Jack, mozzarella, and cheddar cheeses for a gooey, multi-cheese explosion of flavor.
Bean and Corn Medley
Use black beans, corn kernels, and a dash of cumin for a hearty and wholesome vegetarian option that pairs wonderfully with guacamole.
For a well-rounded snack, pair this quesadilla with our Chicken, Cheese, and Zucchini Muffins, a savory companion full of cheesy goodness and tender veggies.
How to Serve Easy Quesadilla Recipe (Customize with Any Filling!) Recipe
Garnishes
Brighten your quesadilla with a dollop of sour cream or guacamole, a sprinkling of fresh cilantro, or a squeeze of tangy lime to awaken the layers of flavor.
Side Dishes
This versatile snack shines alongside a simple green salad or zesty pico de gallo. For a complete meal, serve with our Chicken, Cheese, and Zucchini Muffins to wow your family or guests.
Creative Ways to Present
Slice into small wedges for party platters or stack two quesadillas cut into triangles for a playful layered presentation that invites sharing.
Make Ahead and Storage
Make-Ahead Instructions
Assemble your quesadilla up to the filling stage, wrap tightly in plastic, and refrigerate for up to 24 hours before cooking.
Storage
Keep leftovers in an airtight container in the fridge for 2 to 3 days, perfect for a quick reheat snack.
Freezing
You can freeze cooked quesadilla wedges wrapped individually in foil. Freeze up to 1 month for easy snacks later.
Reheating
Reheat in a skillet over medium heat to restore crispiness, or pop in the oven briefly. Avoid microwaving as it can make the tortilla soggy.
Expert Tips for Success
- Always use medium heat to get evenly crisp tortillas without burning.
- Layer cheese beneath fillings to keep everything deliciously bound.
- Don’t overload with fillings for perfect structural integrity.
- Let rest before slicing to allow cheese to firm up slightly.
- Use fresh, melty cheeses for the best texture and flavor.
- Invest in a good spatula for easy flipping without breakage.
- Feel free to experiment with different fillings—it’s your quesadilla after all!
Frequently Asked Questions
Can I use whole wheat or corn tortillas instead?
Yes! Whole wheat adds a nuttier flavor and corn tortillas offer a traditional twist, though corn may be more fragile when flipping, so handle carefully.
Do I really need to rest the quesadilla before cutting?
Resting for about a minute helps the melted cheese set, preventing oozing and making slicing much cleaner.
What fillings work best with this recipe?
Almost anything! Scrambled eggs, beans, cooked chicken, sautéed veggies, and seasoned beef all shine here. Just avoid very wet fillings that might soak the tortilla.
Can I make this quesadilla vegan?
Absolutely. Substitute cheese with vegan cheese options and choose plant-based fillings like beans, tofu scramble, or veggies.
How do I prevent the quesadilla from getting soggy?
Cook uncovered when adding fillings to prevent steam buildup, and don’t overfill to keep the tortilla crisp.
Can I freeze quesadillas for later?
Yes, they freeze well. Wrap them tightly in foil or plastic wrap and freeze up to one month. Reheat in a skillet for best texture.
Is it necessary to use a lid when cooking?
Use a lid only if you’re making a cheese-only quesadilla to speed melting; otherwise, cooking uncovered keeps the tortilla crisp.
Final Thoughts
Sharing this Easy Quesadilla Recipe (Customize with Any Filling!) Recipe feels like handing over a secret weapon for quick, cozy meals that satisfy every craving. The joy of the crispy, golden tortillas encasing gooey cheese and your favorite add-ins makes every bite a little celebration. Whether it’s a solo snack or a casual dinner, this recipe invites you to be creative, comfortable, and totally content in your kitchen. So, grab those tortillas, gather your fillings, and get ready for warm, cheesy happiness on your plate!
Related Recipes You’ll Love
If you enjoyed this recipe, you’ll also love these delicious recipes:
- Crispy Baked Keto Zucchini Fries Recipe – Foodarohub – These crunchy, garlicky zucchini fries are a perfect low-carb side or snack with a satisfyingly crisp bite.
Easy Quesadilla Recipe (Customize with Any Filling!) Recipe

This easy quesadilla recipe is a quick and versatile meal that can be customized with your favorite fillings, perfect for a tasty snack or light meal in just 10 minutes.
- Prep Time: 5 minutes
- Cook Time: 6 minutes
- Total Time: 12 minutes
- Yield: 1 serving 1x
- Category: Snack
- Method: Stovetop
- Cuisine: Mexican-inspired
- Diet: Vegetarian
Ingredients
Quesadilla
- 2 large flour tortillas (8–10 inch)
- 1/2 cup freshly shredded cheese (cheddar, Monterey Jack, or your favorite melty cheese)
- Optional fillings: scrambled eggs, taco-seasoned ground beef, beans, veggies, leftover chicken, etc.
Instructions
- Prepare the base: Place one tortilla on your work surface. Sprinkle cheese evenly over the surface, leaving about a 1/2-inch border.
- Add fillings: If using any fillings, layer them over the cheese now.
- Preheat skillet: Heat a nonstick or cast iron skillet over medium heat. No butter or oil needed.
- Cook first side: Carefully transfer the tortilla (cheese side up) to the skillet. If you’re making a cheese-only quesadilla, cover with a lid and cook for 2–3 minutes, or until the bottom is golden and the cheese is melted. If you’ve added other fillings, skip the lid to prevent steam from making the tortilla soggy.
- Add second tortilla and flip: Place the second tortilla on top and gently press down. Use a spatula to flip the quesadilla, and cook uncovered for another 2–3 minutes, until the second side is golden and crisp.
- Rest and serve: Transfer to a cutting board. Let rest for 1 minute, then slice into wedges and serve warm with your favorite dips.
Notes
- No butter or oil is needed for cooking in the skillet.
- Cover the skillet lid only if making a cheese-only quesadilla to melt the cheese without sogginess.
- Customizable with various fillings like scrambled eggs, taco-seasoned beef, beans, veggies, or leftover chicken.
Keywords: easy quesadilla recipe, quick quesadilla, customizable quesadilla, cheese quesadilla, Mexican snack

