
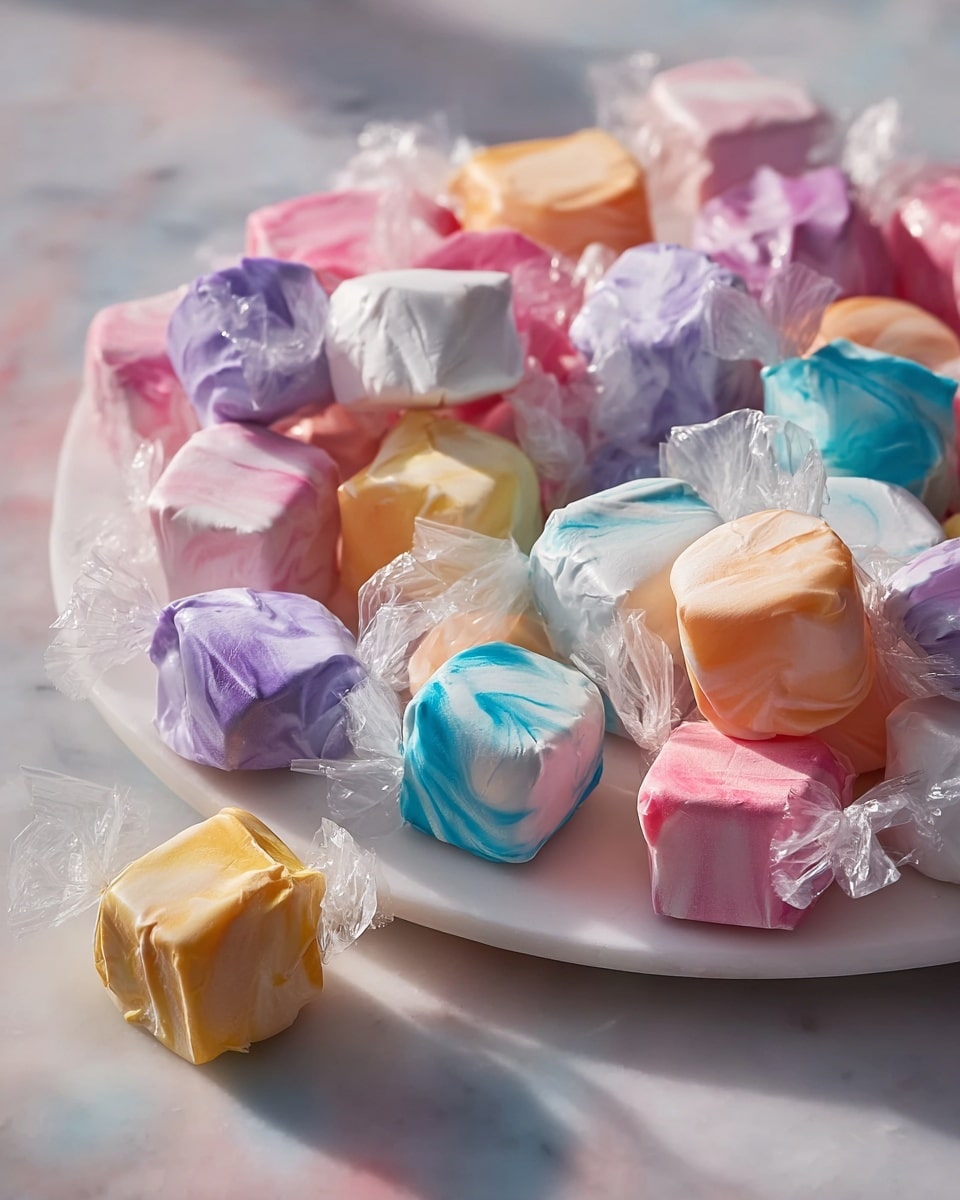
Homemade Saltwater Taffy Recipe
I never thought I’d find a homemade saltwater taffy recipe easier than this—imagine the soft, buttery chew of classic taffy melting slowly in your mouth, perfectly sweet with just a hint of vanilla. This Homemade Saltwater Taffy Recipe invites you to recreate a nostalgic candy favorite in your own kitchen, blending simple ingredients into chewy, colorful pieces that will make your heart sing and your guests smile.
Why You’ll Love This Homemade Saltwater Taffy Recipe
- Delightfully Chewy Texture: Enjoy that classic, soft yet firm chew that only perfectly pulled taffy can deliver—each bite is a little moment of pure joy.
- Simple Ingredients: This recipe uses everyday pantry staples like granulated sugar, light corn syrup, butter, and vanilla, so you won’t need to hunt down anything exotic.
- Fun Hands-On Process: The pulling and shaping of the taffy is a playful, tactile step that makes this recipe feel like a true kitchen adventure.
- Colorful and Customizable: Add your favorite food coloring and flavor extracts to create candy pieces that are as beautiful as they are delicious—perfect for gifting or parties.
- Perfect Timing: With about 10 minutes of prep, 20 minutes to cook, and 15 minutes to cool and pull, this Homemade Saltwater Taffy Recipe comes together in just 45 minutes.
Why This Homemade Saltwater Taffy Recipe Works
This Homemade Saltwater Taffy Recipe shines thanks to its careful stovetop cooking method and precise use of candy thermometer to reach the perfect soft-ball stage at around 240°F. Combining sugar, corn syrup, water, and salt creates the classic taffy base while the addition of butter and vanilla extract right after boiling adds richness and aroma. The essential pulling stage, where the cooled taffy is stretched and folded repeatedly, aerates the candy and transforms it into that delightful chewiness we all crave. Each of these steps ensures you end up with buttery, flavorful pieces that hold their shape and texture beautifully.
Ingredients You’ll Need
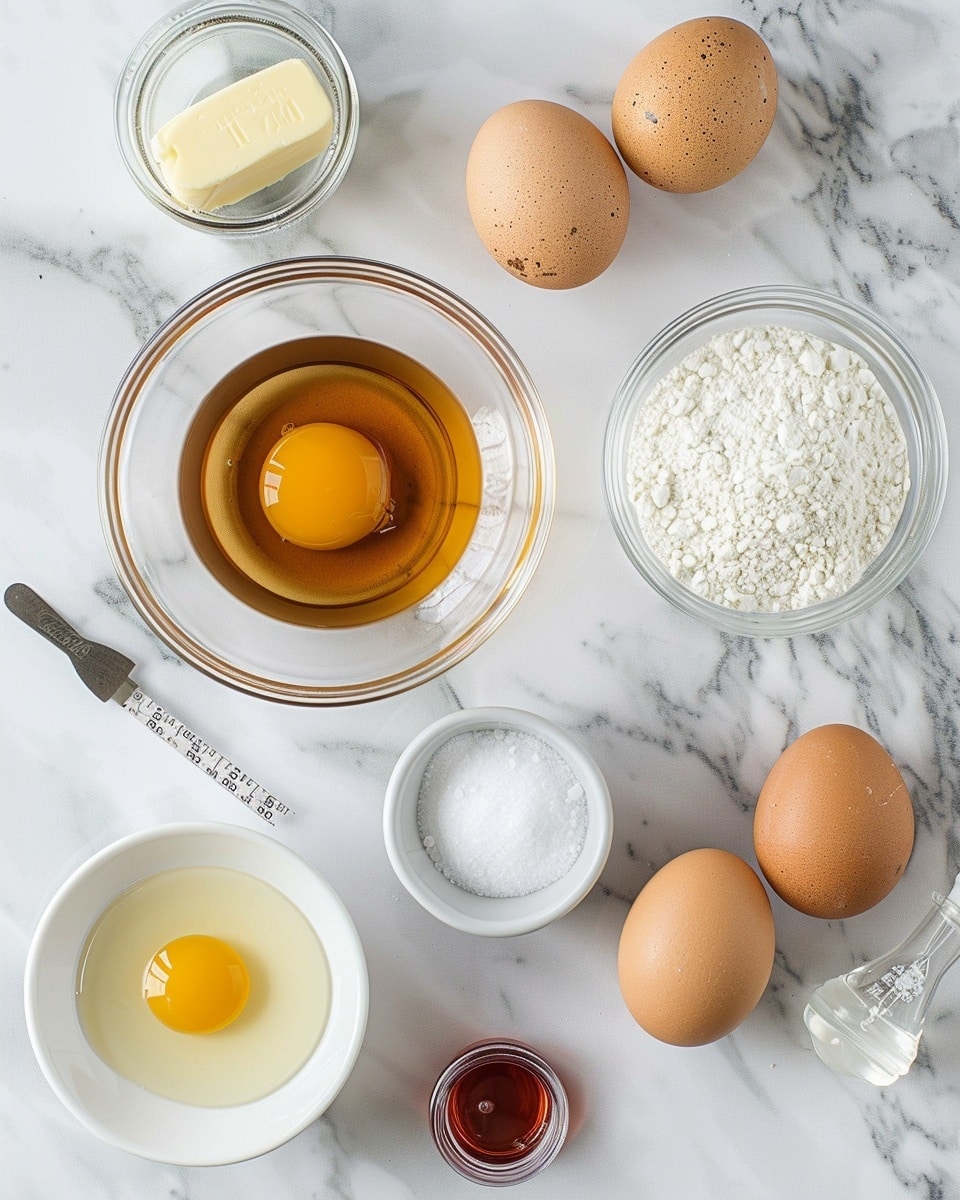
Get ready to bring a handful of classic candy essentials to life—each ingredient plays its part in creating that smooth, luscious taffy you’ll adore.
- 1 cup granulated sugar: The sweet foundation that gives taffy its rich candy flavor.
- 1/4 cup light corn syrup: Adds softness and prevents crystallization for that perfect chewy texture.
- 1/4 cup water: Helps dissolve the sugar and aids in the cooking process.
- 1/2 teaspoon salt: Balances sweetness and enhances the overall flavor profile.
- 1 tablespoon unsalted butter: Provides richness and smoothness as it’s stirred in after boiling.
- 1/2 teaspoon vanilla extract (or other flavorings): Adds aromatic warmth and a personalized touch.
- 1/2 teaspoon food coloring (optional): Brings in a pop of color for visual excitement and fun customization.
Ingredient Substitutions & Tips
- Light corn syrup: If unavailable, try glucose syrup or mild honey but expect slight texture differences.
- Butter: Unsalted is best for precise flavor control, but salted butter can work if adjusted by reducing salt.
- Vanilla extract: Substitute with almond, peppermint, or fruit extracts to match your favorite flavors.
- Food coloring: Natural alternatives like beet juice or turmeric powder can add gentle hues without artificial dyes.
👨🍳 Pro Tips for Perfect Results
- Use a reliable candy thermometer: Precision is key to hitting the soft-ball stage and avoiding gritty taffy.
- Butter your hands well: This stops the sticky sensation while pulling your taffy and helps you shape that gorgeous chewy candy.
- Pull vigorously: The longer you pull, the lighter and chewier the taffy gets, transforming its texture beautifully.
- Work on parchment: Pour the hot taffy onto a parchment-lined baking sheet to keep everything clean and make cooling easier.
- Be patient while cooling: Let the hot mixture cool just enough to handle safely before diving into the pulling step for the best results.
How to Make Homemade Saltwater Taffy Recipe
Step 1: Prepare baking sheet
Line a baking sheet with parchment paper and set it aside. This setup will catch the hot taffy, making cleanup a breeze and helping it cool evenly.
💡 Pro Tip: Have the parchment ready before you start cooking to keep your workspace smooth and organized.
Step 2: Combine ingredients
In a saucepan, gently stir together granulated sugar, light corn syrup, water, and salt over medium heat until the sugar completely dissolves. A clear, glossy mixture is your cue to proceed.
💡 Pro Tip: Stir gently to avoid splashing but ensure everything melds together perfectly.
Step 3: Boil to soft-ball stage
Attach your candy thermometer and let the mixture boil without stirring, patiently waiting for it to reach around 240°F (115°C). This is the magical soft-ball stage that guarantees a chewy texture.
💡 Pro Tip: Resist temptation to stir during boiling—this preserves the right consistency.
Step 4: Add butter and flavorings
Once you hit the perfect temperature, remove the saucepan from the heat and stir in the unsalted butter and vanilla extract. If you want to add a splash of food coloring, now’s the time to swirl it in for that classic candy charm.
💡 Pro Tip: Mix swiftly but carefully to evenly distribute color and flavors without cooling too fast.
Step 5: Pour and cool
Pour the hot, buttery mixture onto your lined baking sheet. Let it sit just a few minutes until it’s cool enough to handle comfortably without burning your fingers.
💡 Pro Tip: Watch the surface for a slight matte finish—that’s your cue that it’s ready to pull.
Step 6: Pull the taffy
Butter your hands thoroughly, then start pulling the taffy by stretching and folding it over itself. This rhythmic pulling, lasting about 10-15 minutes, aerates the candy, making the color paler and the texture delightfully chewy.
💡 Pro Tip: If the taffy starts sticking, add a touch more butter on your hands to maintain smooth pulling.
Step 7: Shape and cut
Form the pulled taffy into a log shape on your parchment. With scissors, cut it into small, bite-sized pieces—this is where your classic taffy shapes come to life!
💡 Pro Tip: Use sharp scissors for clean cuts that won’t tear the candy.
Step 8: Wrap and cool completely
Wrap each piece in wax paper or parchment to keep them from sticking together and help them cool entirely. This final step locks in freshness and makes your treats ready for sharing.
💡 Pro Tip: Twisting the ends of the wrappers gives that nostalgic candy-shop look that’s irresistible.
Common Mistakes to Avoid
Learn from these common pitfalls:
- Stirring during boiling: This can cause sugar crystals to form, making your taffy grainy instead of smooth.
- Skipping the candy thermometer: Relying on guesswork can result in taffy that’s too soft or too hard.
- Pulling too soon or too late: Pull when the taffy is just cool enough, or it might stick or resist stretching properly.
- Not buttering your hands: Sticky hands make pulling frustrating and messy.
- Using wrong type of syrup: Substitute only with similar sweeteners like glucose syrup to maintain texture integrity.
- Wrapping when warm: Wrapping taffy before it cools can cause pieces to stick and lose shape.
Delicious Variations to Try
Once you’ve mastered this classic Homemade Saltwater Taffy Recipe, have fun experimenting with flavors and colors to keep things exciting.
Minty Fresh
Add peppermint extract and a few drops of green food coloring for a cool, refreshing twist on your chewy treats.
Fruity Sunshine
Try strawberry or orange extracts with matching red or orange hues to brighten up your candy jar.
Chocolate Swirl
Mix in a teaspoon of cocoa powder before cooking and swirl in chocolate chips during pulling for a luscious chocolate version.
Rainbow Celebration
Divide the taffy into portions, coloring each with a different bright shade to create a playful, festive mix perfect for parties.
Sea Salt Caramel
Sprinkle a tiny pinch of flaky sea salt on the taffy pieces after pulling for a sophisticated balance of sweet and salty.
For a fun candy pairing, serve your taffy alongside a colorful treat like the Galaxy Candy Grapes Recipe—it’s a cosmic duo that’ll enchant any sweet tooth!
How to Serve Homemade Saltwater Taffy Recipe
Garnishes
Wrap each taffy piece in delicate wax paper twists for an extra nostalgic feel, or display them in a glass jar adorned with ribbons to impress guests.
Side Dishes
Serve with light beverages like sparkling water or herbal teas to cleanse the palate between sweet bites.
Creative Ways to Present
Arrange your homemade taffy in cute candy platters or gift boxes for parties and special occasions. Pair with a savory snack like the Cheesy Garlic Butter Corn on the Cob to create an unforgettable snack spread that balances rich flavors beautifully.
Make Ahead and Storage
Make-Ahead Instructions
You can prepare the taffy a day in advance and wrap pieces individually to keep them fresh and ready to enjoy anytime.
Storage
Store your wrapped taffy in an airtight container at room temperature or in a cool, dry place. This keeps them chewy and delicious for about two weeks.
Freezing
While it’s best enjoyed fresh, you can freeze wrapped taffy pieces for up to one month. Thaw at room temperature before serving.
Reheating
To soften taffy that’s become a bit firm, let it sit at room temperature for a while or warm gently in your hands before savoring the chewy goodness.
Expert Tips for Success
- Use fresh ingredients: Fresh butter and pure vanilla avoid off-flavors and enhance your taffy’s taste.
- Maintain consistent heat: Avoid temperature drops while boiling to ensure smooth candy texture.
- Pull until opaque: When the taffy turns pale and firmer, you know it’s pulled just right.
- Work quickly post-cook: The taffy sets fast, so be ready to move to pulling once off heat.
- Experiment with flavors: Don’t be afraid to personalize with extracts and natural dyes.
- Keep children supervised: Hot sugar mixtures can burn, so handle carefully or let adults manage the hot steps.
- Practice patience: The pulling step takes time but creates the magical texture worth the effort.
Frequently Asked Questions
Can I make this recipe without a candy thermometer?
While possible, a candy thermometer is highly recommended for accuracy. The soft-ball stage is a precise temperature that ensures perfect chewiness, so guessing can lead to unsatisfactory results.
What if my taffy is too sticky after pulling?
Butter your hands generously while pulling, and if it remains sticky, the taffy may need a bit more pulling time or was pulled before it cooled enough.
How can I add different flavors to this saltwater taffy?
Simply swap the vanilla extract for other extracts like almond, peppermint, or fruit flavors at the same quantity. Natural oils and food colorings can enhance the experience.
Is food coloring necessary?
Not at all! Food coloring is completely optional. You can enjoy your taffy in its natural creamy color or add a splash of color for festive appeal.
How long does the taffy keep?
Wrapped and stored properly, your homemade taffy stays fresh and chewy for up to two weeks at room temperature.
Can I make this recipe vegan?
Traditional butter is part of the recipe, but you can substitute vegan butter alternatives and ensure your flavorings are vegan-friendly to adapt it.
Why is pulling the taffy important?
Pulling introduces air, lightening the candy’s color and making the texture chewy and less dense—this step is key to that classic saltwater taffy bite.
Final Thoughts
Making this Homemade Saltwater Taffy Recipe is more than just a candy project—it’s a delightful journey back to those sweet childhood memories, a chance to infuse your home with buttery vanilla aromas, and a fun hands-on experience that ends with irresistible treats everyone will love. Whether you’re sharing with friends, gifting to loved ones, or simply indulging yourself, this recipe wraps simple ingredients and joyful technique into chewy, colorful bites of happiness. So go ahead, pull some taffy, and let the sweet nostalgia begin!
Related Recipes You’ll Love
If you enjoyed this recipe, you’ll also love these delicious recipes:
- Best Cheesecake Recipe – Foodarohub – Creamy, smooth, and perfectly sweet cheesecake that’s an irresistible classic dessert for any occasion.
Homemade Saltwater Taffy Recipe

This homemade saltwater taffy recipe offers a classic, chewy candy treat with customizable flavors and colors, perfect for satisfying your sweet tooth at home.
- Prep Time: 10 minutes
- Cook Time: 10 minutes
- Total Time: 40 minutes
- Yield: 4 servings 1x
- Category: Candy
- Method: Stovetop
- Cuisine: American
Ingredients
Ingredients
- 1 cup granulated sugar
- 1/4 cup light corn syrup
- 1/4 cup water
- 1/2 teaspoon salt
- 1 tablespoon unsalted butter
- 1/2 teaspoon vanilla extract (Or other flavorings.)
- 1/2 teaspoon food coloring (Optional.)
Instructions
- Prepare baking sheet: Prepare a baking sheet by lining it with parchment paper. Set aside.
- Combine ingredients: In a medium saucepan, combine granulated sugar, light corn syrup, water, and salt. Stir the mixture over medium heat until the sugar is dissolved.
- Boil mixture: Attach a candy thermometer to the saucepan and allow the mixture to boil without stirring until it reaches the soft-ball stage (around 240°F or 115°C).
- Add butter and flavoring: Once reached, remove the saucepan from the heat and carefully stir in the butter and flavoring extract. If using food coloring, add it now and stir to combine.
- Pour mixture: Pour the hot mixture onto the prepared baking sheet. Allow it to cool for a few minutes until it’s comfortable to handle.
- Pull taffy: Once the taffy is cool enough, butter your hands and start pulling the taffy. Stretch it out and fold it over itself repeatedly for about 10-15 minutes, or until it becomes light in color and firm in texture.
- Shape and cut: Once the taffy reaches the desired texture, shape it into a log and cut it into small pieces using scissors.
- Wrap pieces: Wrap each piece in wax paper or parchment paper to keep them from sticking. Allow the taffy to cool completely before serving.
Notes
- Butter your hands before pulling the taffy to prevent sticking.
- Use a candy thermometer to ensure the correct soft-ball stage is reached for the perfect texture.
- Wrap pieces individually in wax or parchment paper to keep them from sticking together.
Keywords: homemade saltwater taffy, soft-ball candy recipe, chewy taffy, classic candy recipe, easy taffy recipe
