
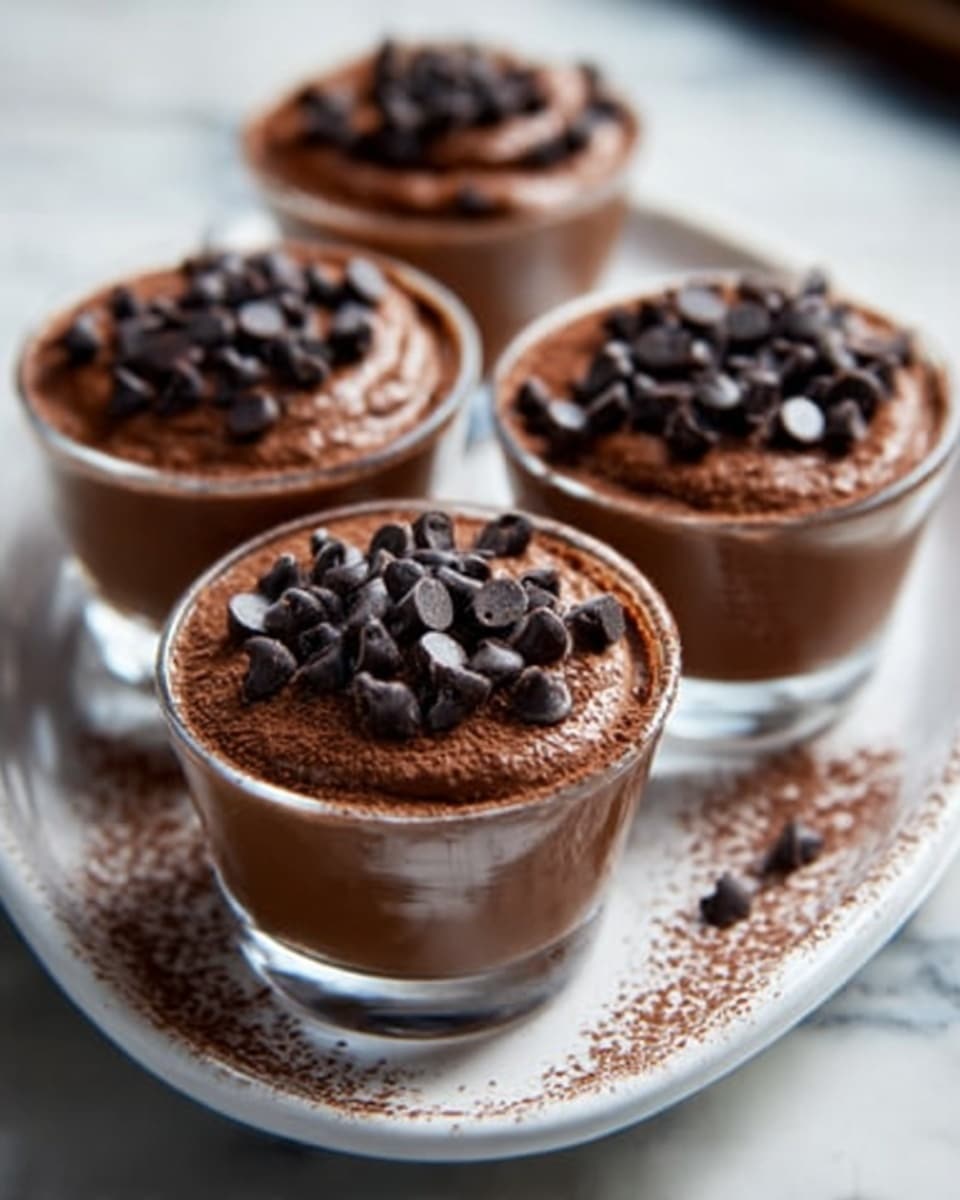
Irresistible Mini Milk Chocolate Pudding Cups in 10 Minutes! Recipe
Picture this: creamy, silky milk chocolate pudding nestled in dainty little cups, inviting you with its glossy surface and the subtle shimmer of mini chocolate chips. The rich aroma of cocoa fills your kitchen, making it impossible to resist. And the best part? These Irresistible Mini Milk Chocolate Pudding Cups come together in just 10 minutes of active cooking time, making indulgence delightfully easy and quick!
Why You’ll Love This Irresistible Mini Milk Chocolate Pudding Cups in 10 Minutes! Recipe
- Lusciously Creamy Texture: Every spoonful melts in your mouth, delivering the perfect balance of smooth milk chocolate richness and delicate sweetness.
- Simple Ingredients: You only need everyday pantry staples like whole milk, cocoa powder, and cornstarch, with a sprinkle of mini chocolate chips to elevate the flavor.
- Perfect for Busy Days: With just 10 minutes of hands-on cooking, you can whip up this dessert any time cravings hit—no complicated steps, no fuss.
- Elegant Presentation: Served in mini cups, these puddings make charming individual desserts that impress at parties or cozy family dinners.
- Flexible and Customizable: Mix in extra toppings or add a dash of vanilla extract to tailor these pudding cups to your personal taste sensation.
Why This Irresistible Mini Milk Chocolate Pudding Cups in 10 Minutes! Recipe Works
This recipe shines thanks to the stovetop method, which lets you control the gentle cooking process to achieve the perfect pudding consistency without any lumps. The magic lies in whisking together the cornstarch with cocoa powder and milk—it thickens beautifully as it heats, creating that signature velvety texture. Adding mini chocolate chips just off the heat lets them melt just enough to add bursts of intense chocolate goodness throughout each cup. With only seven straightforward ingredients and a method that never fails, these pudding cups promise both simplicity and indulgence.
Ingredients You’ll Need
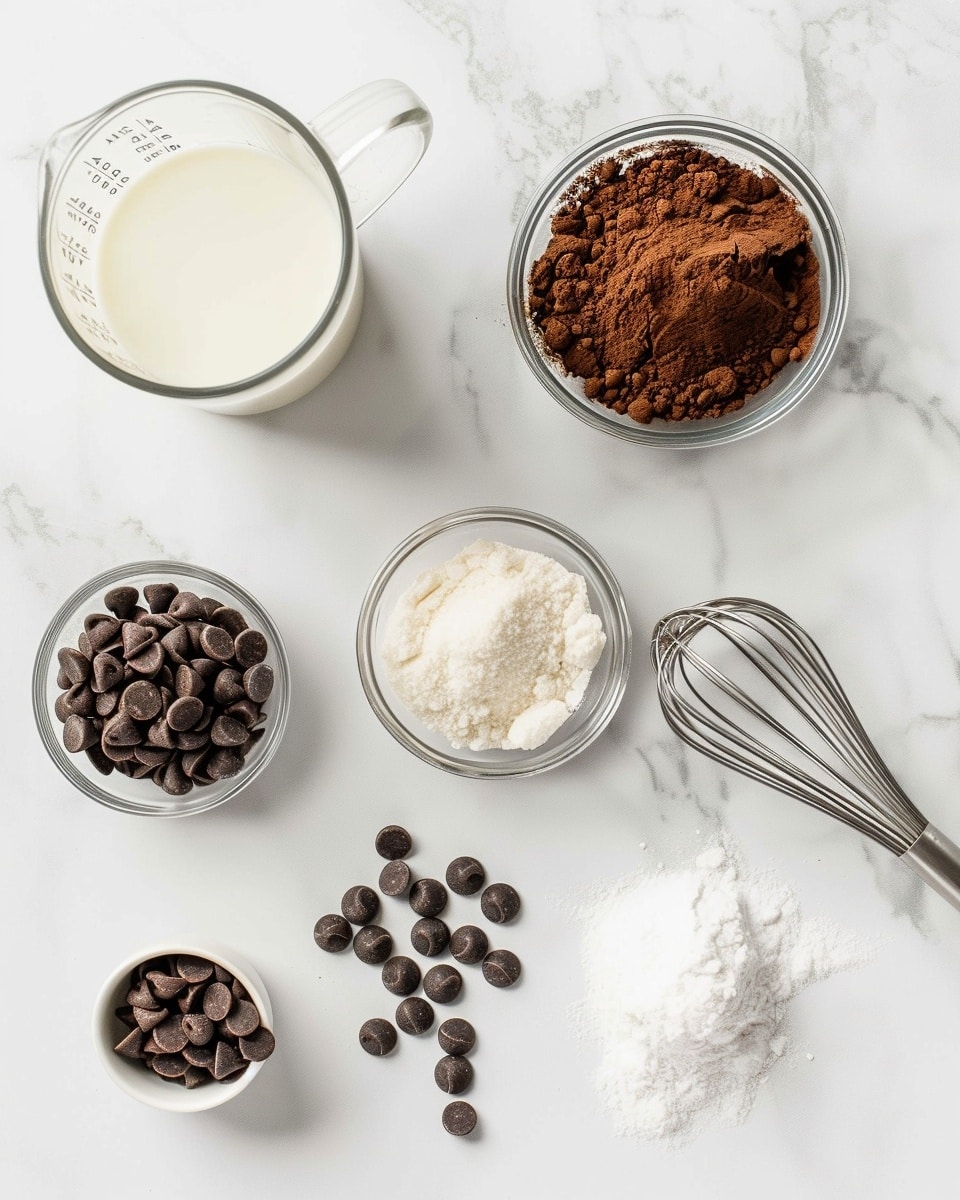
Gather these cozy comforts of the kitchen, each ingredient playing a starring role in crafting your luscious mini pudding cups:
- 2 cups whole milk: Provides the creamy base that makes the pudding rich and smooth.
- 1/2 cup granulated sugar: Balances the bitterness of cocoa with a sweet touch.
- 1/4 cup unsweetened cocoa powder: Delivers deep chocolate flavor with every bite.
- 3 tbsp cornstarch: The secret thickener that transforms the milk mixture into pudding perfection.
- 1/4 tsp salt: Enhances and rounds out the chocolate’s natural notes.
- 1 tsp vanilla extract: Adds warmth and complexity to the chocolatey goodness.
- 1/2 cup mini chocolate chips: Soft little bursts of chocolate that melt lusciously into the pudding.
Ingredient Substitutions & Tips
- Whole Milk: Use 2% milk for a lighter pudding or dairy-free milk like almond or oat for a twist (note texture will vary).
- Granulated Sugar: Substitute with coconut sugar or a natural sweetener for a less refined option.
- Unsweetened Cocoa Powder: Try Dutch-processed cocoa powder for a smoother taste.
- Mini Chocolate Chips: Swap for finely chopped dark or semi-sweet chocolate for a richer melt.
👨🍳 Pro Tips for Perfect Results
- Constant whisking: Stir the pudding continuously to avoid lumps and ensure a silky finish.
- Medium heat is key: Cooking too hot will curdle the milk, so keep it gentle and steady.
- Cool before chilling: Let the pudding come to room temperature before refrigerating to prevent condensation.
- Use little cups: Mini cups make for charming servings and help the pudding set uniformly.
- Chill at least 2 hours: Patience here yields the perfect firm yet creamy texture.
How to Make Irresistible Mini Milk Chocolate Pudding Cups in 10 Minutes! Recipe
Step 1: Combine ingredients
In a medium saucepan, whisk together 2 cups whole milk, 1/2 cup granulated sugar, 1/4 cup unsweetened cocoa powder, 3 tbsp cornstarch, and 1/4 tsp salt until smooth. This blend forms the backbone of your pudding, bringing all those luscious flavors together in harmony.
💡 Pro Tip: Make sure to sift the cocoa powder and cornstarch to keep any clumps at bay for a silky result.
Step 2: Cook pudding
Place the saucepan over medium heat and cook, stirring constantly with a whisk or wooden spoon. You’ll watch the mixture thicken gradually as the cornstarch activates—keep stirring to create a perfectly smooth, velvety pudding base without any lumps.
💡 Pro Tip: When the mixture thickens enough to coat the back of your spoon, it’s time to take it off the heat.
Step 3: Add flavorings
Remove the saucepan from heat and gently stir in 1 tsp vanilla extract along with 1/2 cup mini chocolate chips. The warmth of the pudding melts the chips just enough to add sumptuous swirls of chocolate, making each spoonful a delightful surprise.
💡 Pro Tip: Adding vanilla off-heat preserves its delicate aroma for maximum flavor impact.
Step 4: Chill
Pour the pudding into small serving cups or ramekins, then refrigerate for at least 2 hours. This chilling stage lets the pudding set perfectly, giving you that classic creamy yet firm texture that’s so satisfying to savor.
💡 Pro Tip: Cover cups loosely with plastic wrap to prevent any skin from forming on top.
Common Mistakes to Avoid
Learn from these common pitfalls:
- Not whisking constantly: This leads to clumpy pudding — keep your whisk moving!
- Cooking over high heat: Too much heat ruins the texture and can cause scorching.
- Forgetting to chill long enough: The pudding won’t set properly without adequate refrigeration time.
- Skipping straining: If your pudding has lumps despite whisking, strain it for a smooth finish.
- Adding chocolate chips too early: They might completely melt, losing that delightful texture contrast.
- Using low-fat milk only: This can result in a thinner pudding that lacks richness.
Delicious Variations to Try
Once you’ve mastered the classic version, explore these tempting takes on your Irresistible Mini Milk Chocolate Pudding Cups in 10 Minutes! Recipe:
Peanut Butter Swirl
Before chilling, dollop spoonfuls of creamy peanut butter and gently swirl it into the pudding for a decadent, nutty twist.
Mint Chocolate Delight
Add a few drops of peppermint extract in Step 3 for a refreshing mint-chocolate combo that’s irresistible after a hearty meal.
Espresso Infusion
Stir in a teaspoon of instant espresso powder with the cocoa to add a coffee kick that intensifies the chocolate flavor.
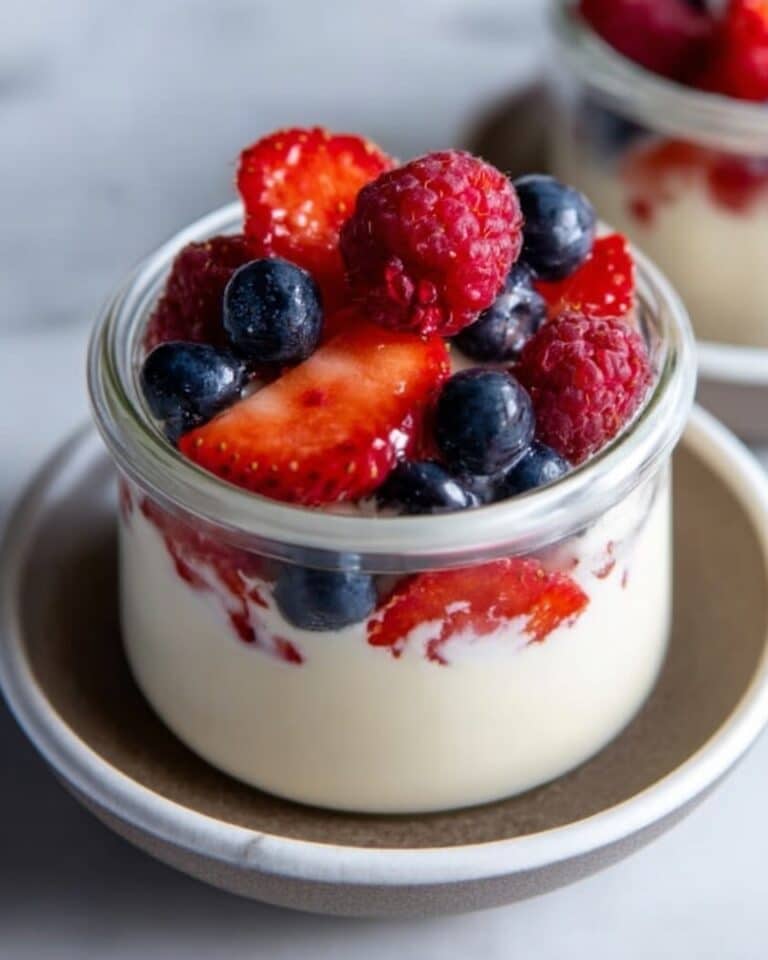
Berry Topping
Top chilled pudding cups with fresh raspberries or sliced strawberries for a burst of fruity brightness and color contrast.
Nutty Crunch
Sprinkle chopped toasted almonds or hazelnuts on top before serving to introduce a satisfying crunch.
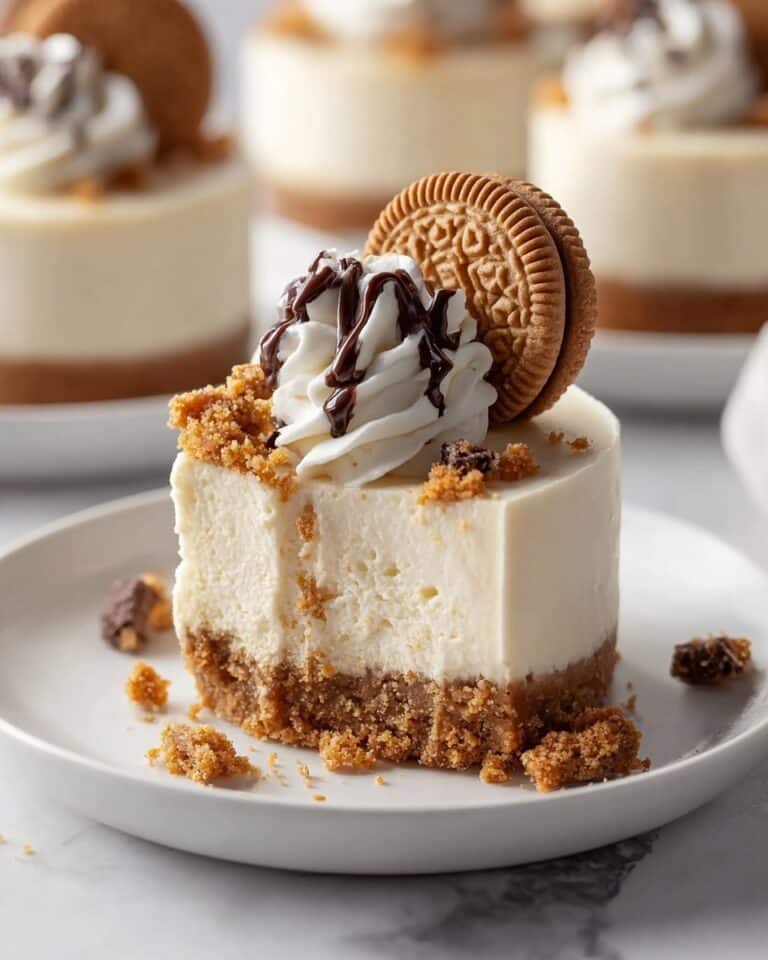
For a complete dessert spread, serve alongside a slice of Best Cheesecake Recipe – Foodarohub, pairing creamy textures and complementary flavors beautifully.
How to Serve Irresistible Mini Milk Chocolate Pudding Cups in 10 Minutes! Recipe
Garnishes
Consider dusting a little cocoa powder or powdered sugar on top, adding a dollop of whipped cream, or sprinkling extra mini chocolate chips or chocolate shavings for a pretty finish.
Side Dishes
These pudding cups make a perfect light dessert following fresh fruit salads or alongside buttery shortbread cookies. For extra indulgence, pair with a classic creamy cheesecake like the New York Cheesecake Recipe – Foodarohub.
Creative Ways to Present
Serve the puddings layered in clear glasses with crumbled cookies or cake, or top with a swirl of flavored whipped cream. Mini mason jars or small mason jars create a rustic-chic vibe that guests will adore!
Make Ahead and Storage
Make-Ahead Instructions
Prepare the pudding base up to 2 days in advance. Store it covered in the fridge, then pour into individual cups and chill until ready to serve.
Storage
Keep any leftover pudding cups refrigerated, covered tightly with plastic wrap or lids. They stay fresh for up to 3 days.
Freezing
Freezing is not recommended as the texture may change and become grainy upon thawing.
Reheating
Since pudding tastes best cold, avoid reheating. If you must warm it, do so gently in a microwave at low power, stirring to regain smoothness.
Expert Tips for Success
- Use a fine whisk: A balloon whisk helps incorporate air for a smoother pudding.
- Measure cornstarch exactly: Too much thickener can make pudding gummy; too little means under-set pudding.
- Remove from heat promptly: Residual heat finishes the thickening without overcooking.
- Don’t rush chilling: Proper refrigeration is essential for that irresistible creamy set.
- Enhance texture: Mix in a spoonful of creme fraiche or mascarpone before chilling for extra creaminess.
- Serve chilled, not frozen: Keep your pudding refreshingly smooth and delicious.
- Experiment with flavors: Vanilla, coffee, extracts, or spices can personalize your pudding each time.
Frequently Asked Questions
Can I make this pudding dairy-free?
Yes! Substitute whole milk with unsweetened almond, oat, or coconut milk, but the texture may vary slightly.
What is the best cocoa powder to use?
Unsweetened natural cocoa powder delivers robust chocolate flavor, but Dutch-processed cocoa offers a smoother, milder taste.
Can I add other mix-ins besides mini chocolate chips?
Absolutely! Chopped nuts, crushed cookies, or chocolate chunks work well and provide exciting texture contrasts.
How thick should the pudding be before removing from heat?
It should coat the back of a spoon thickly without running off easily—this ensures it will set perfectly after chilling.
Why is my pudding grainy?
This usually happens from overheating or not whisking enough. Stir constantly over medium heat and avoid boiling vigorously.
Can I double this recipe?
Yes, just use a larger saucepan and adjust the cooking time slightly to reach the right thickness.
How long will leftover pudding keep?
Stored in the fridge tightly covered, it stays delicious for up to 3 days.
Final Thoughts
There’s something truly special about a classic homemade pudding that feels both comforting and elegant. This Irresistible Mini Milk Chocolate Pudding Cups in 10 Minutes! Recipe invites you to slow down and savor a luscious, chocolatey treat that’s as simple to make as it is to enjoy. Whether tucked away for a quiet night or shared with friends at a gathering, these pudding cups are sure to bring smiles and happy sighs with every bite. I can’t wait for you to try them and make this recipe a delicious part of your own story!
Related Recipes You’ll Love
If you enjoyed this recipe, you’ll also love these delicious recipes:
- Mini Fruit Tarts with Vanilla Pudding and Fresh Fruit Recipe – Foodarohub – Fresh, fruity tarts layered with homemade vanilla pudding and a crisp pastry shell, perfect for light summertime indulgence.
Irresistible Mini Milk Chocolate Pudding Cups in 10 Minutes! Recipe

These Irresistible Mini Milk Chocolate Pudding Cups combine creamy milk chocolate pudding with melty mini chocolate chips, ready in just 10 minutes plus chilling time for a perfect sweet treat.
- Prep Time: 10 minutes
- Cook Time: 10 minutes
- Total Time: 2 hours 20 minutes
- Yield: 6 servings 1x
- Category: Dessert
- Method: Stovetop
- Cuisine: American
- Diet: Vegetarian
Ingredients
Ingredients
- 2 cups whole milk
- 1/2 cup granulated sugar
- 1/4 cup unsweetened cocoa powder
- 3 tbsp cornstarch
- 1/4 tsp salt
- 1 tsp vanilla extract
- 1/2 cup mini chocolate chips
Instructions
- Mix Ingredients: In a medium saucepan, whisk together milk, sugar, cocoa powder, cornstarch, and salt.
- Cook Pudding: Cook over medium heat, stirring constantly, until the mixture thickens.
- Add Flavor: Remove from heat and stir in vanilla extract and mini chocolate chips.
- Chill: Pour the pudding into small cups and refrigerate for at least 2 hours before serving.
Notes
- Refrigerate the pudding for at least 2 hours to ensure it sets properly before serving.
Keywords: milk chocolate pudding, mini pudding cups, easy chocolate dessert, stovetop pudding recipe, quick chocolate pudding

