
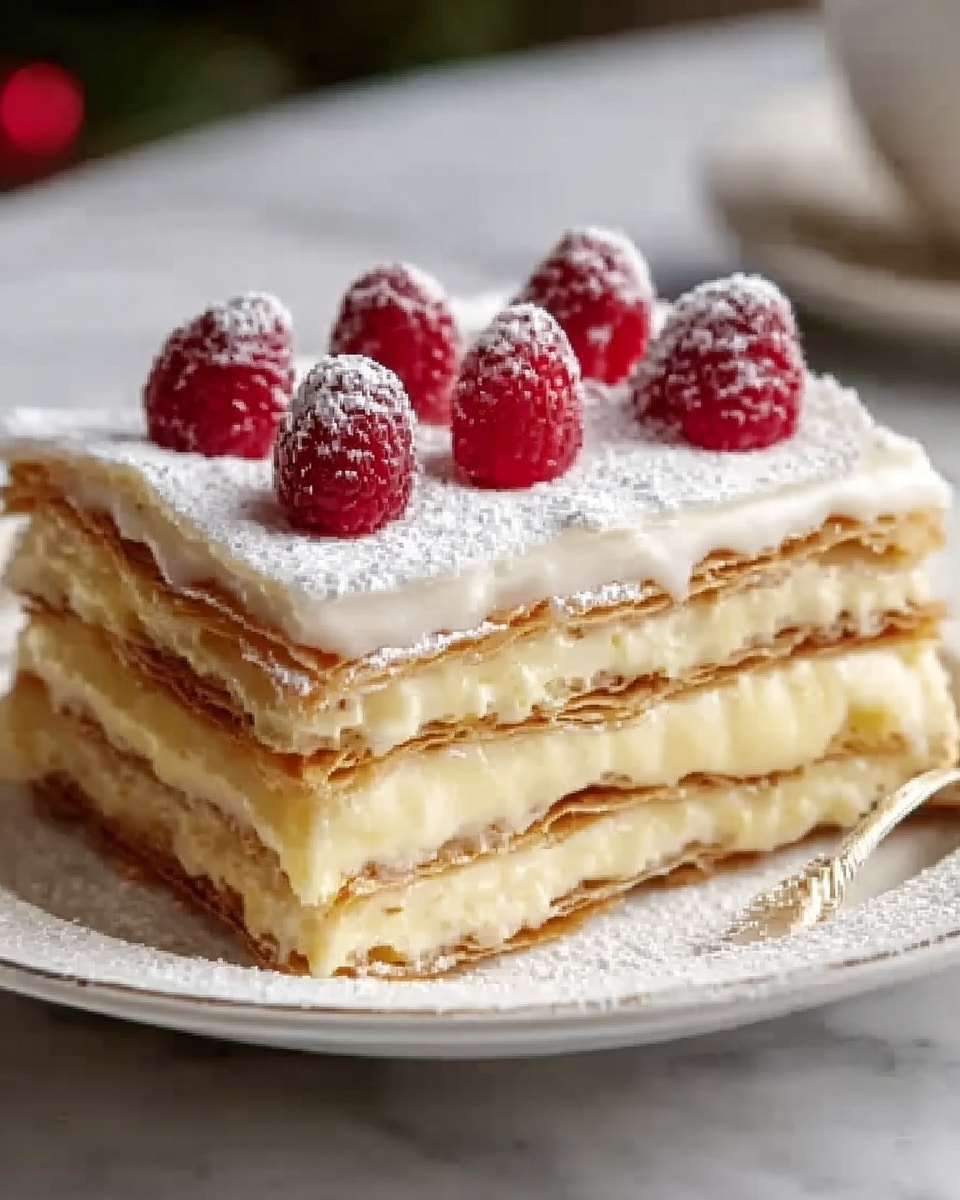
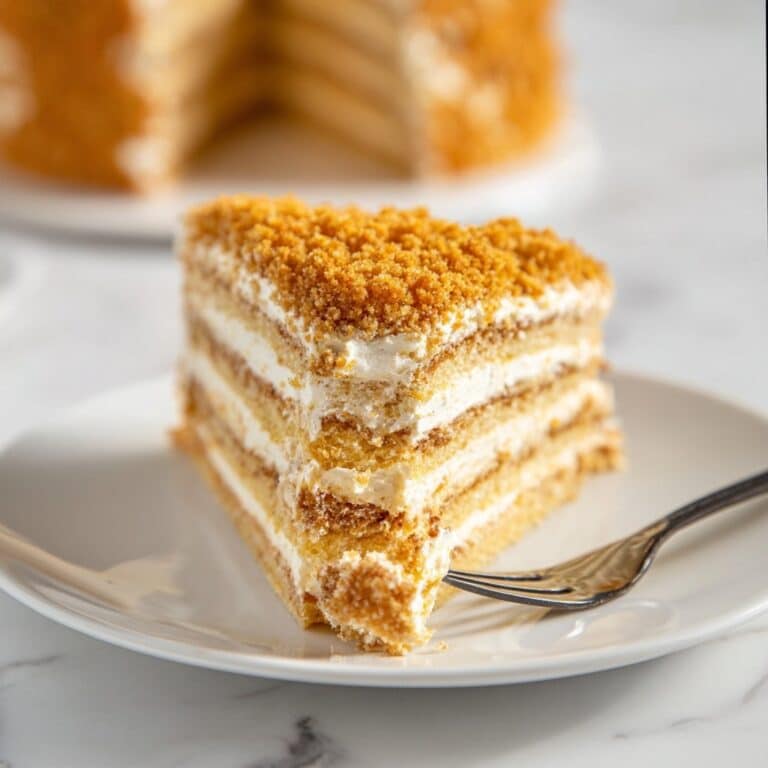
Karpatka (Polish Carpathian Cream Cake) Recipe
Picture this: flaky, golden pastry layers with a delicate crackled crust, hiding a silky, velvety custard that oozes creamy comfort with every bite. The aroma of buttery dough mingled with vanilla fills your kitchen, promising a classic indulgence that’s truly unforgettable. This Karpatka (Polish Carpathian Cream Cake) Recipe brings a taste of Polish tradition right into your home bakery, inviting you to experience a luscious treat bursting with rich textures and sweet nostalgia.
Why You’ll Love This Karpatka (Polish Carpathian Cream Cake) Recipe
- Delightfully Rich Texture: A gorgeous layering of flaky puff pastry and creamy custard creates a luscious contrast that will have everyone swooning.
- Simple Ingredients: This recipe calls for everyday pantry essentials like flour, butter, eggs, and sugar, making it accessible to bake whenever the craving hits.
- Showstopper for Gatherings: Its impressive appearance and heavenly taste make Karpatka a perfect celebratory centerpiece or a cozy weekend indulgence.
- Custard Magic: The custard filling is silky and rich, scented with vanilla, perfectly balancing the crispness of the pastry layers.
- Make-Ahead Convenience: With some chilling time, it can be prepared in advance, allowing flavors to meld beautifully before serving.
Why This Karpatka (Polish Carpathian Cream Cake) Recipe Works
The secret behind this Karpatka lies in a few key techniques that guarantee success. First, chilling the dough before rolling out ensures those signature flaky pastry layers. Then, pricking the dough with a fork prevents unwanted puffing, giving you a perfectly crisp surface. The custard is thickened patiently on the stove by whisking egg yolks tempered with warm milk, which avoids scrambling and yields a luxuriously creamy filling. Assembling the cooled layers before refrigerating for hours allows the flavors and textures to marry beautifully, making every slice a dreamy delight.
Ingredients You’ll Need
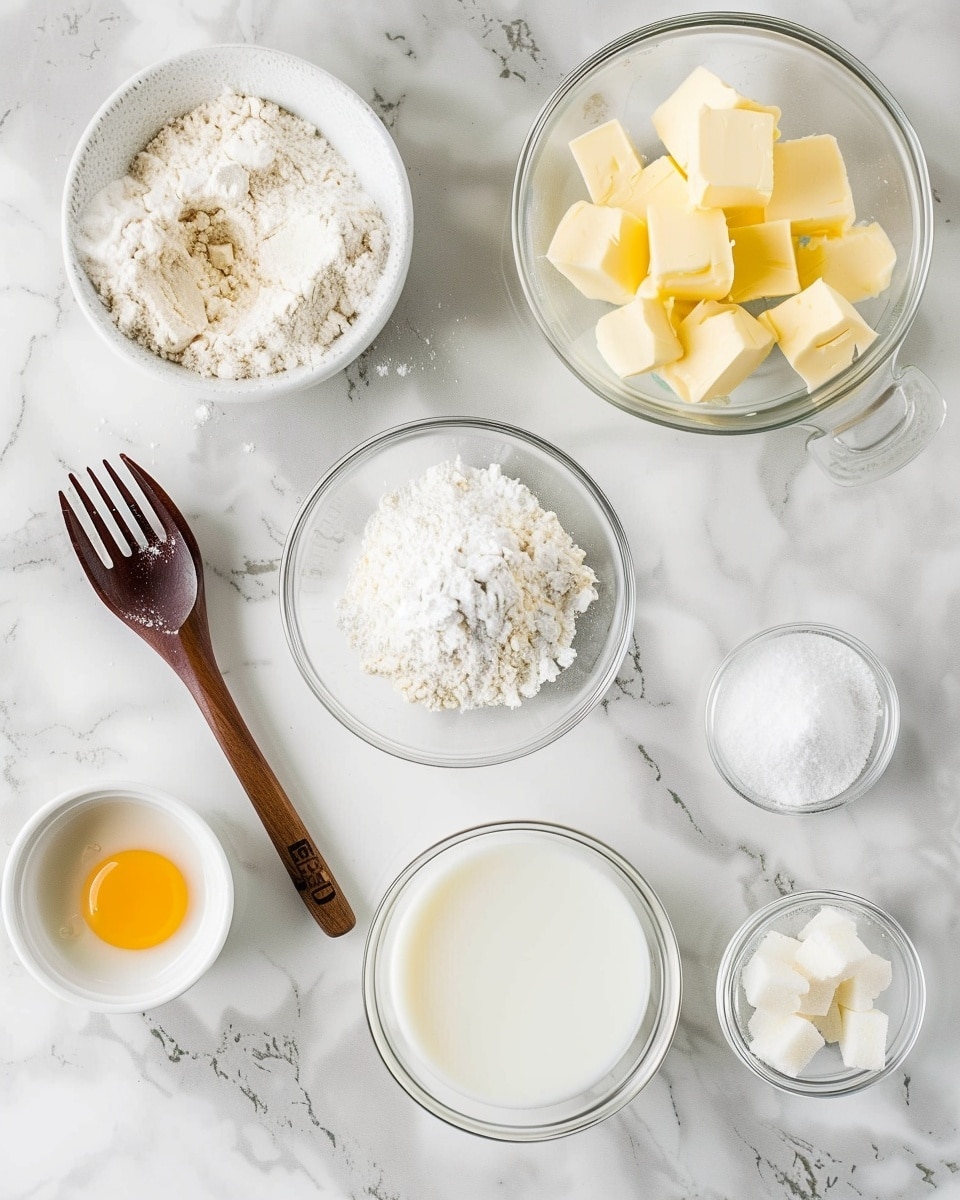
Gather a handful of ingredients that are tried-and-true essentials for classic baking, creating a cake that blends simplicity and tradition into one irresistible dessert.
- 2 cups all-purpose flour: The sturdy foundation for a tender, flaky pastry crust.
- 1 cup unsalted butter (cold and cubed): This brings rich flavor and helps create those delicate flaky layers.
- 1/2 cup water: Just enough moisture to bring your dough together without losing that perfect texture.
- 1 teaspoon sugar: A slight touch to balance the dough’s flavor.
- 1/4 teaspoon salt: Enhances the taste and balances sweetness.
- 1/2 teaspoon vanilla extract (optional): Adds a subtle fragrant note to the pastry.
- 2 cups whole milk: Creamy base for the custard that lends richness and smoothness.
- 1/2 cup sugar: Sweetens the custard just right.
- 2 tablespoons all-purpose flour and 2 tablespoons cornstarch: These thickeners ensure a custard that’s silky yet firm enough to slice.
- 4 large egg yolks: Give the custard its beautiful color and velvety texture.
- 1 teaspoon vanilla extract: Infuses the custard with warm aroma and depth.
- 1/2 cup unsalted butter (cubed and softened): Stirred in at the end, it enriches the custard to pure indulgence.
- Powdered sugar: For the final snowy dusting that makes this cake glow.
Ingredient Substitutions & Tips
- Butter: For a dairy-free twist, substitute with vegan butter but note texture changes.
- Whole milk: Try full-fat coconut milk for a luscious dairy-free custard variant.
- Flour: A gluten-free flour blend can replace the all-purpose flour, but baking times might vary.
- Vanilla extract: If you can’t find vanilla, a pinch of vanilla bean powder or a dash of almond extract will work beautifully.
👨🍳 Pro Tips for Perfect Results
- Chill the Dough: Always refrigerate the dough for at least 30 minutes for flaky puff pastry texture.
- Fork Prick the Pastry: This prevents unwanted bubbles and helps keep your layers even.
- Temper the Eggs: Slowly whisk hot milk into the egg yolks to avoid scrambling your custard.
- Cool Completely: Let both pastry layers and custard cool fully before assembling to keep layers distinct.
- Chill Before Serving: Refrigerate the cake for at least 2 hours so it sets perfectly for slicing.
How to Make Karpatka (Polish Carpathian Cream Cake) Recipe
Step 1: Make the Pastry Dough
Begin your journey with the pastry dough by blending flour, salt, and sugar in a large bowl. Introduce the cold, cubed butter and, whether wielding a pastry cutter or just your fingertips, work it into the flour until it looks like coarse crumbs. Slowly add water while mixing until the dough just comes together. Divide this dough into two equal discs, wrap tightly in plastic, and pop them into the fridge for 30 minutes. Chilling is your ticket to those signature flaky layers.
💡 Pro Tip: Cutting the butter cold and working quickly helps create layers of flaky goodness.
Step 2: Roll Out the Dough
Once your dough has had its chill, preheat your oven to 350°F (175°C) and prepare two baking sheets with parchment paper. Roll out each disc on a floured surface until it reaches roughly 11 by 15 inches, mirroring the size of your cookie sheet. Don’t forget to prick the dough with a fork – this little step stops your pastry from puffing up too much during baking. Two sheets of dough mean two perfect pastry layers ready to transform.
💡 Pro Tip: Rolling the dough evenly prevents uneven baking and helps with stacking later on.
Step 3: Bake the Pastry Layers
Slide both pastry sheets into the oven and let them bake for about 25 to 30 minutes, until their edges turn a gorgeous golden brown and their texture crisps just right. Keep a close eye near the end to avoid over-baking. Once done, transfer the layers to a wire rack to cool completely—this step is vital for preserving that delicate crunch.
💡 Pro Tip: Cooling the pastry before layering keeps the custard from making it soggy.
Step 4: Make the Custard Filling
While your pastry cools, warm whole milk and sugar over medium heat in a saucepan, stirring to dissolve the sugar. In a separate bowl, whisk together egg yolks, flour, and cornstarch until smooth. Now, gently temper the eggs by slowly whisking some hot milk into the yolks—this prevents them from scrambling. Pour it all back into the saucepan and cook, whisking constantly, until the custard thickens and bubbles. Remove from heat, then stir in vanilla and softened butter, embracing the custard in rich, velvety decadence. Let it cool to room temperature before the next step.
💡 Pro Tip: Constant whisking here avoids lumps and gives a perfectly smooth custard.
Step 5: Assemble the Cake
Place one pastry layer on your serving plate and spread the cooled custard evenly over it, smoothing gently. Lay the second pastry layer on top, pressing down lightly to set the layers together. Take care to align edges for that polished look that will impress everyone at the table.
💡 Pro Tip: Use a spatula to spread custard evenly without tearing the delicate pastry.
Step 6: Chill the Cake
Cover your assembled Karpatka with plastic wrap or a clean towel and pop it in the fridge for at least 2 hours. This resting time is crucial—it lets the custard set beautifully and makes slicing effortless.
💡 Pro Tip: Don’t rush this step; chilled cake slices cleaner and tastes even better.
Step 7: Dust with Powdered Sugar
Before serving, dust the top layer generously with powdered sugar, transforming your cake’s surface into a snowy, tempting canvas. This little flourish elevates its rustic charm and adds a touch of sweetness.
💡 Pro Tip: Use a fine mesh sieve for an even, delicate dusting.
Step 8: Serve and Enjoy
Now comes the best part—slice into your Karpatka and revel in its perfect harmony of flaky pastry and creamy custard. Whether for a festive occasion or a special treat, this Polish classic will delight every forkful.
💡 Pro Tip: Serve chilled for the best texture contrast and flavor.
Common Mistakes to Avoid
Learn from these common pitfalls to make your Karpatka flawless every time:
- Not chilling the dough: This leads to tough, dense pastry instead of flaky layers.
- Skipping fork pricks on pastry: Can cause large, uneven bubbles during baking.
- Adding hot milk too quickly to eggs: Causes scrambled custard, ruining smoothness.
- Assembling while layers are warm: This melts custard and softens pastry prematurely.
- Not chilling the final cake long enough: Makes slicing messy and flavors less melded.
- Overbaking pastry: Leads to too dark, bitter layers that overshadow custard.
Delicious Variations to Try
Once you’ve nailed the classic Karpatka, why not add your own twist? Here are some ideas:
Chocolate Swirl Custard
Gently fold melted dark chocolate into the custard before spreading. It creates an irresistible marbled effect with a rich cocoa kick.
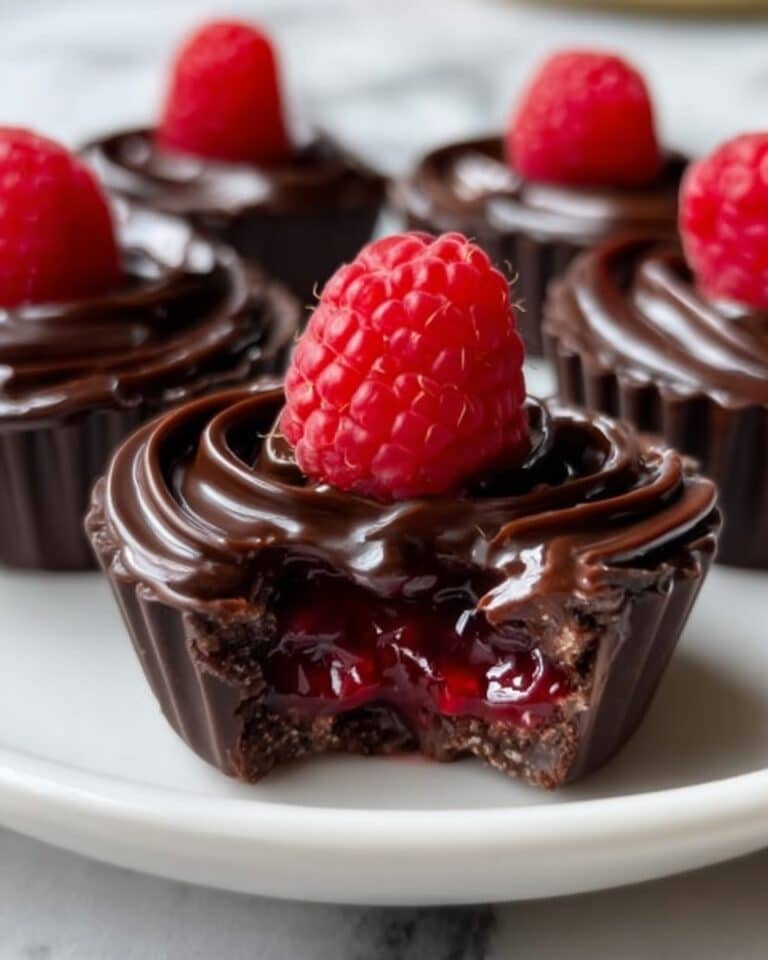
Berry Infused Cream
Add a handful of fresh raspberries or strawberries on top of the custard layer for a fresh, tart contrast to the sweetness.
Almond Crunch Topping
Sprinkle toasted, slivered almonds over the powdered sugar for a delightful nutty finish and satisfying crunch.
Citrus Zest Custard
Mix in a teaspoon of lemon or orange zest into the custard for a refreshing zing that brightens each bite.
Vanilla Pudding Fruit Tart Pairing
For a complementary treat, serve Karpatka alongside Mini Fruit Tarts with Vanilla Pudding and Fresh Fruit. The creamy contrast and fresh fruit flavors will elevate your dessert spread beautifully.
How to Serve Karpatka (Polish Carpathian Cream Cake) Recipe
Garnishes
Elevate your serving with a light dusting of powdered sugar and a few fresh mint leaves for a pop of color. A drizzle of fruit coulis or a spoonful of whipped cream can also add elegance and extra indulgence.
Side Dishes
Pair Karpatka with a cup of aromatic black tea, rich coffee, or lightly brewed herbal infusions. For a fresh contrast, a small bowl of mixed berries makes a delightful companion.
Creative Ways to Present
Try serving Karpatka in individual glass trifle cups, layering the custard and pastry pieces for personalized portions. Alternatively, put a slice on delicate china plates with a fresh berry garnish to impress guests with an elegant presentation.
Make Ahead and Storage
Make-Ahead Instructions
Karpatka benefits from preparation in advance. You can bake the pastry layers and prepare the custard a day before serving. Assemble the cake, cover it, and refrigerate to let all the flavors fully meld together overnight.
Storage
Store Karpatka covered in the refrigerator for up to 3 days. Keep it wrapped well to prevent the pastry from drying out and the custard from absorbing other fridge odors.
Freezing
This cake freezes best if disassembled: freeze the pastry layers and custard separately, then thaw before assembly. Assembled cake may lose its flaky texture after freezing.
Reheating
For best texture, serve Karpatka chilled. If desired, bring slices to room temperature for about 20 minutes prior to serving, but avoid microwaving to maintain pastry crispness.
Expert Tips for Success
- Use cold ingredients: Make sure your butter and water are chilled to achieve flaky layers.
- Work quickly: Don’t let butter soften while mixing or dough will be greasy.
- Temper eggs carefully: Gradual introducing of hot milk into yolks is key to smooth custard.
- Even rolling: Keep pastry an even thickness for uniform baking.
- Don’t skip chilling: Both dough and assembled cake need rest for ideal texture.
- Serve chilled: This enhances contrast between crisp pastry and smooth custard.
- Use parchment paper: Prevents sticking and helps with clean removal of pastry layers.
Frequently Asked Questions
Can I make Karpatka gluten-free?
You can substitute all-purpose flour with a gluten-free blend, but results may vary slightly in texture. Be sure to check your blend’s baking properties for best results.
How long does the custard need to cool before assembling?
Allow the custard to cool to room temperature, about 30 to 45 minutes, so it thickens and will not melt the pastry when layered.
Why is it important to prick the pastry dough before baking?
Pricking prevents large air bubbles from forming, keeping the pastry layers thin and even for that ideal crispness.
Can I make the custard ahead of time?
Yes! The custard can be made up to 2 days in advance if covered tightly and refrigerated.
What is the best way to store leftovers?
Cover leftover Karpatka tightly and store it in the refrigerator for up to 3 days to keep custard fresh and pastry crisp.
Is this cake suitable for vegetarians?
Yes, this Karpatka recipe uses no meat or gelatin, making it perfect for a vegetarian diet.
Can I freeze the assembled cake?
Freezing the assembled cake is not recommended as the pastry may become soggy. Instead, freeze components separately.
Final Thoughts
This Karpatka (Polish Carpathian Cream Cake) Recipe is a cherished gem, blending buttery flaky pastry and luscious custard into a dessert that feels like a warm hug. Each bite carries the authentic spirit of Polish baking, perfect for sharing with loved ones or treating yourself on a cozy afternoon. Dive into the process, savor the aromas, and delight in the beautiful textures—it’s a recipe that will earn a special spot on your family’s dessert table for years to come.
Related Recipes You’ll Love
If you enjoyed this recipe, you’ll also love these delicious recipes:
- Walnut Cookies with Dulce de Leche (Oreshki) Recipe – Foodarohub – Irresistible nutty cookies packed with creamy dulce de leche filling for a sweet Eastern European treat.
Karpatka (Polish Carpathian Cream Cake) Recipe

Karpatka is a beloved Polish dessert featuring flaky puff pastry layers filled with a luscious, creamy custard, perfect for special occasions or a sweet indulgence.
- Prep Time: 45 minutes
- Cook Time: 30 minutes
- Total Time: 3 hours 45 minutes
- Yield: Serves 8
- Category: Dessert
- Method: Baking
- Cuisine: Polish
- Diet: Vegetarian
Ingredients
For the Pastry:
- 2 cups all-purpose flour
- 1 cup unsalted butter (cold and cubed)
- 1/2 cup water
- 1 teaspoon sugar
- 1/4 teaspoon salt
- 1/2 teaspoon vanilla extract (optional)
For the Custard Filling:
- 2 cups whole milk
- 1/2 cup sugar
- 2 tablespoons all-purpose flour
- 2 tablespoons cornstarch
- 4 large egg yolks
- 1 teaspoon vanilla extract
- 1/2 cup unsalted butter (cubed and softened)
For the Topping:
- Powdered sugar (for dusting)
Instructions
- Make the Pastry Dough Begin by preparing the pastry dough. In a large mixing bowl, combine the all-purpose flour, salt, and sugar. Cut the cold butter into small cubes and add it to the flour mixture. Use a pastry cutter or your hands to work the butter into the flour until the mixture resembles coarse crumbs. If you don’t have a pastry cutter, a fork or your fingertips will work fine.
Next, add the water to the mixture, a little at a time, mixing with your hands or a spoon until the dough comes together. You may not need to use all of the water, so add it slowly. Once the dough forms, divide it into two equal portions. Shape each portion into a disc, wrap it in plastic wrap, and refrigerate it for 30 minutes. Chilling the dough helps make the pastry flaky.
- Roll Out the Dough After the dough has chilled, remove it from the refrigerator. Preheat your oven to 350°F (175°C). Line a large baking sheet with parchment paper.
Take one portion of dough and roll it out on a lightly floured surface to about the size of your baking sheet (approximately 11×15 inches). Place the rolled-out dough onto the parchment-lined baking sheet and prick it with a fork to prevent it from puffing up too much while baking.
Repeat the process with the second portion of dough, and place the second sheet of dough on a separate baking sheet. This will give you two layers of pastry, which will later be stacked with custard in between.
- Bake the Pastry Layers Place both baking sheets in the preheated oven and bake for 25-30 minutes, or until the pastry layers are golden brown and crispy. Keep an eye on them to ensure they don’t over-brown. Once baked, remove the sheets from the oven and allow the pastry layers to cool completely on a wire rack.
- Make the Custard Filling While the pastry layers are cooling, it’s time to prepare the custard filling. In a medium saucepan, heat the milk and sugar over medium heat, stirring occasionally until the sugar dissolves.
In a separate bowl, whisk together the egg yolks, flour, and cornstarch until smooth. Gradually add a little of the hot milk mixture to the egg yolk mixture, whisking constantly to temper the eggs. Slowly pour the tempered egg mixture back into the saucepan with the remaining milk and stir well.
Continue cooking over medium heat, whisking constantly, until the mixture thickens and starts to boil. Once it reaches a thick custard consistency, remove it from the heat and stir in the vanilla extract and softened butter. The butter will melt into the custard, making it rich and velvety. Allow the custard to cool to room temperature.
- Assemble the Cake Once the pastry layers and custard have cooled, it’s time to assemble Karpatka. Place one layer of the baked pastry onto a serving platter. Spread the custard filling evenly over the pastry layer, smoothing it out with a spatula. Be gentle to avoid tearing the delicate pastry.
Place the second pastry layer on top of the custard, pressing it down lightly to help the layers stick together. Make sure the top pastry layer is aligned with the bottom layer for a neat presentation.
- Chill the Cake Cover the assembled Karpatka with plastic wrap or a clean kitchen towel and refrigerate it for at least 2 hours. Chilling the cake helps the layers set and makes it easier to slice.
- Dust with Powdered Sugar Before serving, dust the top of the cake with a generous amount of powdered sugar. This adds a beautiful, snowy finish to the cake and enhances its appearance.
- Serve and Enjoy Once the cake has chilled, slice it into squares or rectangles. Serve and enjoy the delightful combination of flaky pastry and creamy custard. Karpatka is perfect for any occasion, from family gatherings to festive celebrations.
Notes
- Chilling the dough helps make the pastry flaky.
- Prick the rolled-out dough with a fork to prevent puffing up during baking.
- Keep an eye on pastry layers to avoid over-browning.
- Tempering the eggs with hot milk prevents curdling in custard.
- Chilling the assembled cake helps the layers set and makes slicing easier.
- Dust with powdered sugar before serving for a beautiful finish.
Keywords: Karpatka, Polish cream cake, puff pastry dessert, creamy custard cake, traditional Polish dessert
