
Mini Cheese Danish Recipe
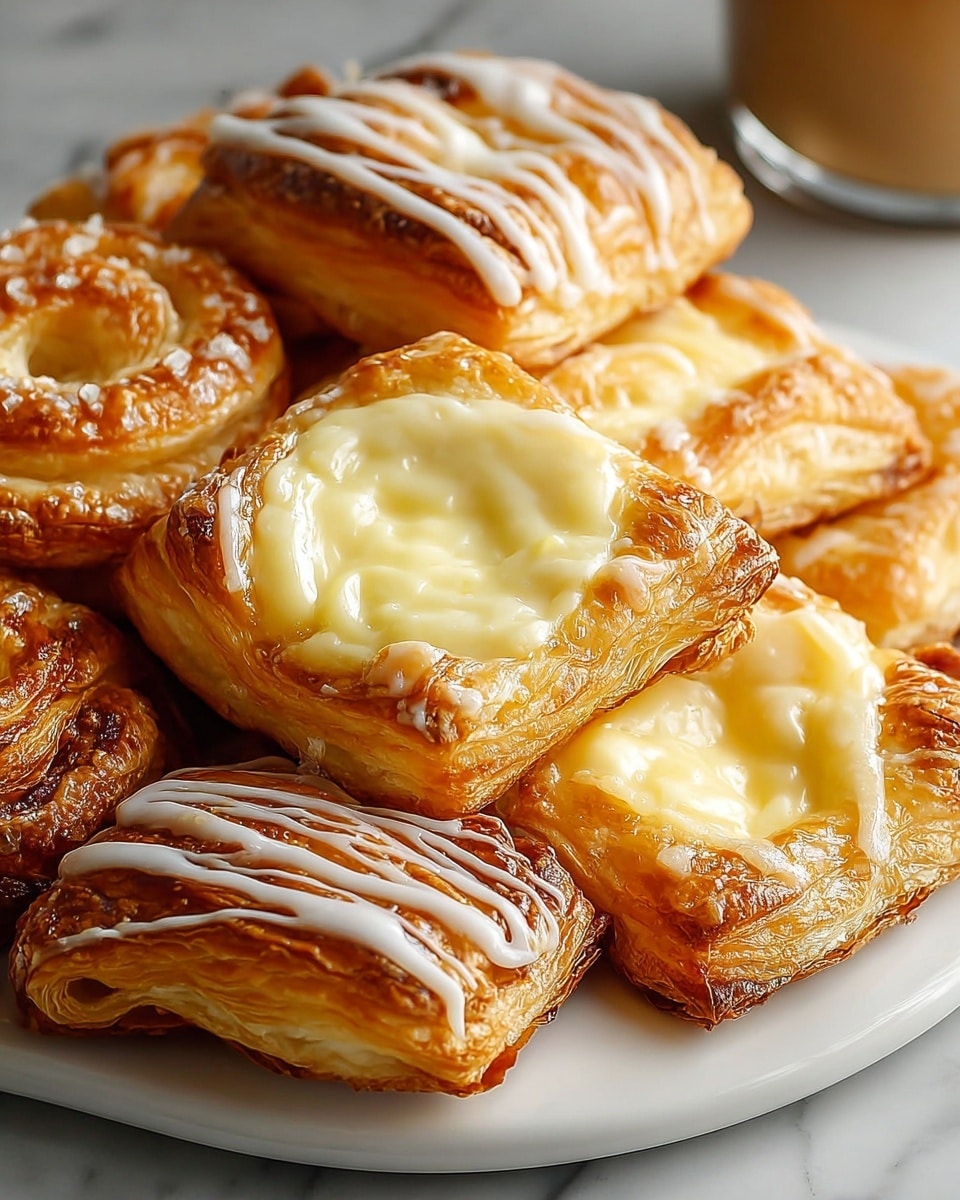
Picture this: the warm scent of buttery puff pastry filling your kitchen as golden, flaky mini cheese danishes emerge from the oven, their delicate cream cheese centers gleaming under a shiny drizzle of sweet glaze. The crisp, tender layers break apart with a gentle bite, melting into a heavenly burst of creamy sweetness. Making these beauties is surprisingly quick, and the pride you feel sharing them is priceless. Whether it’s a cozy breakfast treat or an impressive pastry to wow your guests, this Mini Cheese Danish Recipe will become your new favorite go-to for effortless indulgence.
Why You’ll Love This Mini Cheese Danish Recipe
- Ready in 28 minutes: From start to finish, these mini danishes come together in less than half an hour, perfect for busy mornings or last-minute gatherings.
- Uses simple ingredients: You probably already have most of what you need in your pantry and fridge—no complicated or hard-to-find items required.
- Perfect for beginners: Puff pastry does the heavy lifting here, making this recipe approachable even if you’re new to baking.
- Impressive presentation: These petite pastries look elegant and inviting, sure to impress family and friends with minimal effort.
- Customizable: Easily tailor the filling or toppings to suit your taste—add fruits, nuts, or spices for your personal twist.
Why This Mini Cheese Danish Recipe Works
The magic lies in a few key elements. First, using thawed puff pastry ensures those irresistibly flaky, buttery layers puff up beautifully in the oven. Then, the cream cheese filling strikes the perfect balance of smooth richness and sweetness, enhanced by a touch of vanilla and a hint of lemon juice to brighten the flavor. Lastly, the egg wash crisps the pastry edges to a golden perfection and the drizzle of glaze adds that classic shine and sweetness finishing touch. Together, these techniques guarantee a professional-quality treat made effortlessly at home.
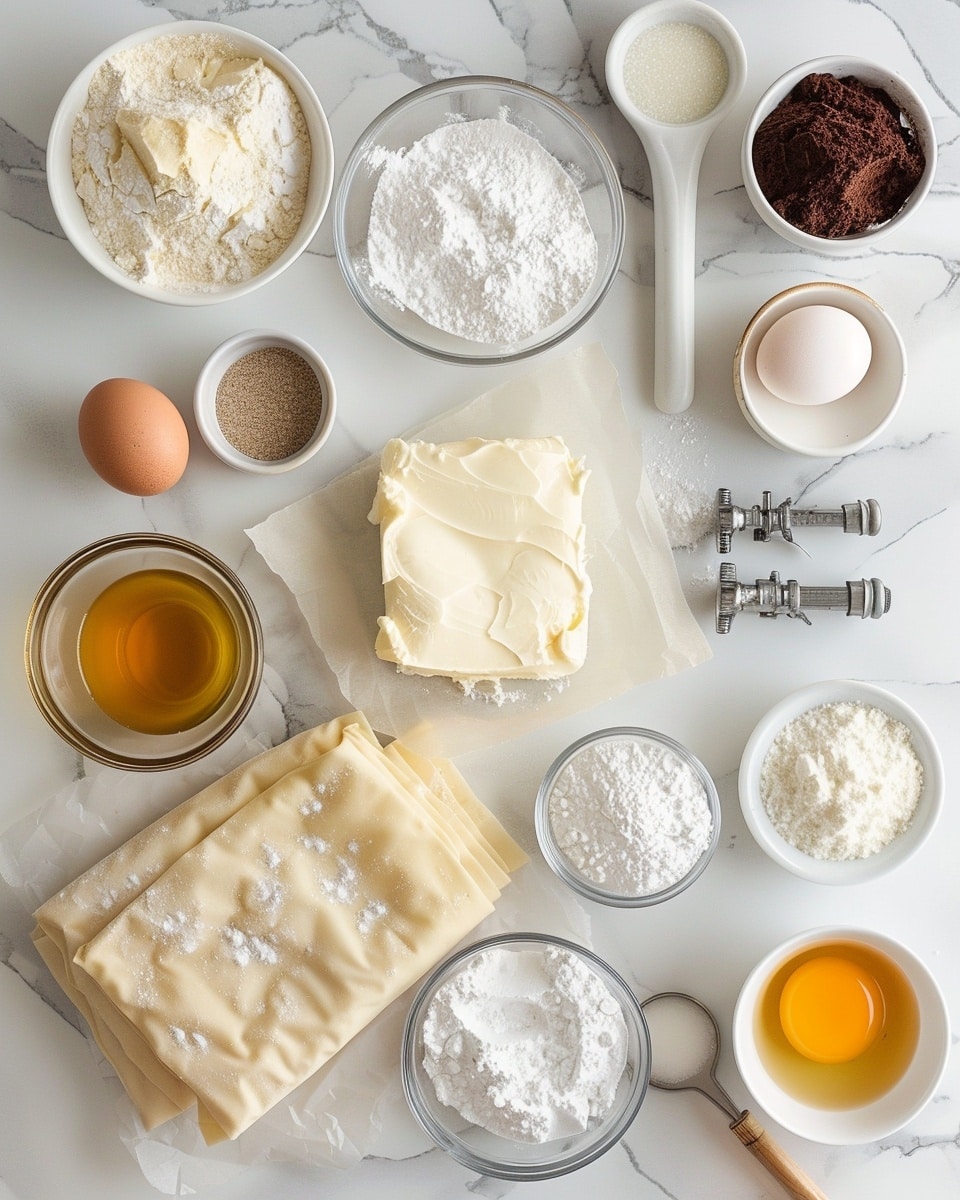
Ingredients You’ll Need
This recipe calls for a handful of simple, wholesome ingredients that come together to create pure pastry bliss.
- Puff pastry sheets: The flaky, buttery base that becomes crisp and tender when baked.
- Cream cheese: Provides that luscious, creamy filling with a slight tang.
- Granulated sugar: Sweetens the cream cheese gently without overpowering.
- Vanilla extract: Adds warm, aromatic depth to the filling.
- Lemon juice (optional): Brightens and balances the cream cheese richness.
- Egg (for egg wash): Creates a shiny, golden-brown crust.
- Powdered sugar: For the sweet, smooth glaze to finish.
- Milk or cream: Lightens the glaze to a pourable consistency.
Ingredient Substitutions & Tips
- Puff pastry sheets: Frozen store-bought works wonders, but homemade puff pastry can be used if you have the time.
- Cream cheese: For a lighter option, try mascarpone or ricotta; they will change the texture slightly but remain delicious.
- Vanilla extract: Almond extract can be a lovely substitute for a nutty twist.
- Lemon juice: Orange juice or zest can provide a different but equally delightful citrus brightness.
👨🍳 Pro Tips for Perfect Results
- Chill your puff pastry: Keep it cold until right before baking to help maintain those beautiful layers.
- Don’t overfill: About a tablespoon of cream cheese filling per square keeps your danishes neat and prevents overflow.
- Use parchment paper: Lining your baking sheet prevents sticking and helps with even baking.
- Brush edges carefully: Egg wash only on the pastry edges creates a golden sheen without gumming up the filling.
- Let cool before glazing: Warm pastries will melt the glaze and lose that gorgeous glossy finish.
How to Make Mini Cheese Danish Recipe
Step 1: Preheat and Prepare
Start by preheating your oven to 400°F (200°C) and lining a baking sheet with parchment paper. This sets the stage for even baking and easy cleanup.
💡 Pro Tip: Using parchment paper helps the bottoms crisp perfectly without sticking.
Step 2: Prepare Puff Pastry Squares
Roll out the thawed puff pastry on a lightly floured surface, smoothing out any creases. Cut each sheet into 6 even squares so your mini danishes have equal portions.
💡 Pro Tip: Keep the pastry chilled if you have pauses between cutting to maintain its flaky texture.
Step 3: Make the Cream Cheese Filling
In a bowl, whisk together softened cream cheese, granulated sugar, vanilla extract, and lemon juice until silky smooth and creamy. This luscious mixture is the heart of your danishes.
💡 Pro Tip: Use room temperature cream cheese for a smooth blend without lumps.
Step 4: Assemble the Danishes
Spoon about a tablespoon of cream cheese filling onto the center of each puff pastry square. You can leave them open or gently pinch or fold the corners for a classic framed look.
💡 Pro Tip: Don’t press the filling down; let it puff up beautifully in the oven.
Step 5: Apply the Egg Wash
Beat the egg with a tablespoon of water, then carefully brush the edges of each pastry. This egg wash gives your danishes that golden, irresistible sheen and helps them turn a perfect shade of brown.
💡 Pro Tip: Avoid getting egg wash on the filling to prevent undesirable browning.
Step 6: Bake Until Golden Perfection
Bake the assembled danishes for 15 to 18 minutes. Watch as they puff up, turning a stunning golden brown and filling your kitchen with that irresistible aroma.
💡 Pro Tip: Rotate the baking sheet halfway through for even baking.
Step 7: Cool and Glaze
Allow the danishes to rest for about 10 minutes so they cool slightly. Meanwhile, whisk powdered sugar with milk or cream until smooth, then drizzle the glaze over the pastries for a shiny, sweet finish.
💡 Pro Tip: Use a spoon or a piping bag for an elegant glaze finish.
Common Mistakes to Avoid
Learn from these common pitfalls to ensure your Mini Cheese Danish Recipe turns out perfectly every time:
- Using warm puff pastry: This can cause the layers to stick together and fail to puff up properly.
- Overfilling the pastries: Too much filling can spill over, making a mess and preventing even baking.
- Skipping the egg wash: Without it, the edges won’t get that beautiful golden color and glossy finish.
- Glazing while warm: Warm pastries melt the glaze, losing its smooth texture and shine.
- Not preheating the oven: Puff pastry needs immediate high heat to puff correctly; a cold oven leads to soggy pastry.
- Ignoring the parchment paper: Baking without it can cause sticking and uneven browning.
Delicious Variations to Try
Once you’ve mastered this classic Mini Cheese Danish Recipe, why not mix it up with some delicious twists?
Berry Burst Danish
Add a spoonful of fresh or frozen berries like blueberries or raspberries on top of the cream cheese filling before baking for a juicy pop of flavor.
Cinnamon Sugar Danish
Sprinkle cinnamon and sugar over the cream cheese filling and drizzle with a cinnamon glaze for a cozy, spiced treat.
Almond Joy Danish
Top with sliced almonds and a drizzle of almond extract in the filling for a nutty, fragrant variation.
Apricot Glaze Danish
Spread a thin layer of apricot jam under the cream cheese filling for a sweet and tangy contrast.
Chocolate Chip Danish
Fold mini chocolate chips into the cream cheese filling before spooning it onto the pastry for a decadent twist loved by kids and adults alike.
Maple Pecan Danish
Combine chopped pecans and a drizzle of maple syrup for a warm, autumn-inspired treat.
How to Serve Mini Cheese Danish Recipe
Garnishes
Top with fresh berries, a sprinkle of powdered sugar, or a light zest of lemon for a fresh and pretty touch.
Side Dishes
Pair your mini cheese danishes with a steaming cup of coffee, a pot of hot tea, or a fresh fruit salad to balance the richness.
Creative Ways to Present
Arrange them on a tiered serving stand for brunch, or place each danish in a colorful cupcake liner for a charming touch at parties.
Make Ahead and Storage
Storing Leftovers
Keep leftover mini cheese danishes in an airtight container at room temperature for up to 2 days to maintain freshness.
Freezing
Freeze unbaked assembled danishes on a baking sheet until solid, then transfer to a freezer-safe bag. Bake directly from frozen, adding a few extra minutes to baking time.
Reheating
Warm danishes in a preheated oven at 350°F (175°C) for 5-7 minutes to restore crispiness and fresh-baked aroma.
FAQs
Can I use homemade puff pastry for this recipe?
Absolutely! Homemade puff pastry will work beautifully and add a special touch, though store-bought is a great time saver.
Is it necessary to use lemon juice in the filling?
Lemon juice is optional but recommended to brighten the flavor and balance the richness of the cream cheese.
My danishes didn’t puff up fully. What went wrong?
This often happens if the puff pastry is too warm or the oven isn’t hot enough at the start. Make sure your pastry is chilled and preheat your oven thoroughly.
How can I make these danishes vegan?
Use vegan puff pastry, a plant-based cream cheese alternative, and substitute the egg wash with almond milk or aquafaba.
Can I add fruit fillings to this recipe?
Yes! Adding fresh or cooked fruit like berries or apple compote on top of or mixed into the cream cheese works wonderfully.
Why do I need to let the danishes cool before glazing?
If you glaze while warm, the glaze will melt and become runny instead of forming a pretty, sweet coating.
What is the best way to cut puff pastry?
Use a sharp knife or pizza cutter to cut clean, even squares for neat danishes.
Can I make these ahead and bake later?
Yes! Assemble danishes, freeze them on a tray, then bake straight from frozen when ready.
Final Thoughts
There’s something truly special about biting into a golden, flaky mini cheese danish fresh from your oven—the perfect blend of buttery layers and silky cream cheese that feels like a little celebration in every bite. This Mini Cheese Danish Recipe is a utterly charming and fuss-free way to bring a bakery-worthy treat into your home. Whether you’re treating yourself or sharing with loved ones, it’s guaranteed to brighten any day with sweet smiles.
Have you tried this Mini Cheese Danish Recipe? I’d love to hear how it turned out! Leave a comment below. If you loved this recipe, please share it with friends and family. Happy cooking! 🥐🍓
PrintMini Cheese Danish Recipe

Mini Cheese Danish pastries made with flaky puff pastry sheets filled with a creamy sweetened cream cheese mixture, baked to golden perfection and topped with a smooth powdered sugar glaze. Perfect for breakfast, brunch, or a delightful snack.
- Prep Time: 10 minutes
- Cook Time: 15-18 minutes
- Total Time: 28 minutes
- Yield: 12 mini cheese danishes 1x
- Category: Breakfast Pastry
- Method: Baking
- Cuisine: American
- Diet: Vegetarian
Ingredients
Puff Pastry
- 1 package puff pastry sheets, thawed
Cream Cheese Filling
- 8 oz cream cheese, softened
- 1/3 cup granulated sugar
- 1 teaspoon vanilla extract
- 1 teaspoon lemon juice (optional)
Egg Wash
- 1 egg
- 1 tablespoon water
Glaze
- 1/2 cup powdered sugar
- 1 tablespoon milk or cream
Instructions
- Preheat Oven: Preheat your oven to 400°F (200°C) and line a baking sheet with parchment paper to prevent sticking and for easy cleanup.
- Prepare Puff Pastry: On a lightly floured surface, roll out the thawed puff pastry sheets and cut each sheet into 6 even squares, ensuring uniform sizes for even baking.
- Make Filling: In a mixing bowl, combine softened cream cheese, granulated sugar, vanilla extract, and lemon juice. Mix well until the mixture is smooth and creamy without lumps.
- Fill Pastry Squares: Spoon about 1 tablespoon of the cream cheese filling into the center of each puff pastry square, distributing evenly.
- Optionally Fold or Pinch Corners: To shape the danishes, optionally fold or pinch the corners of each square towards the center to create a decorative look, then place the filled pastries on the prepared baking sheet.
- Apply Egg Wash: Beat the egg with a tablespoon of water to create an egg wash. Using a pastry brush, gently brush the edges of each pastry to promote a golden, shiny crust during baking.
- Bake: Bake the pastries in the preheated oven for 15–18 minutes or until they are puffed up and golden brown on top.
- Cool: Remove the pastries from the oven and let them cool on the baking sheet for about 10 minutes to set before glazing.
- Prepare and Drizzle Glaze: Whisk together the powdered sugar and milk or cream until smooth and runny enough to drizzle. Drizzle the glaze over the cooled danishes for a sweet finishing touch.
Notes
- Ensure puff pastry is fully thawed but still cold for easier handling and better puffing.
- Lemon juice in the filling adds a subtle brightness but is optional.
- For a more decorative danish, try folding the corners towards the center or creating a lattice on top of the filling.
- Use cold ingredients for egg wash to prevent over-softening the pastry.
- Glaze consistency can be adjusted by adding more milk to thin or more powdered sugar to thicken.
- Store leftover danishes in an airtight container at room temperature for up to 2 days or freeze unglazed danishes for longer storage.
Keywords: mini cheese danish, puff pastry dessert, cream cheese danish, breakfast pastry, easy danish recipe


