
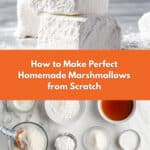
Perfect Homemade Marshmallows Recipe
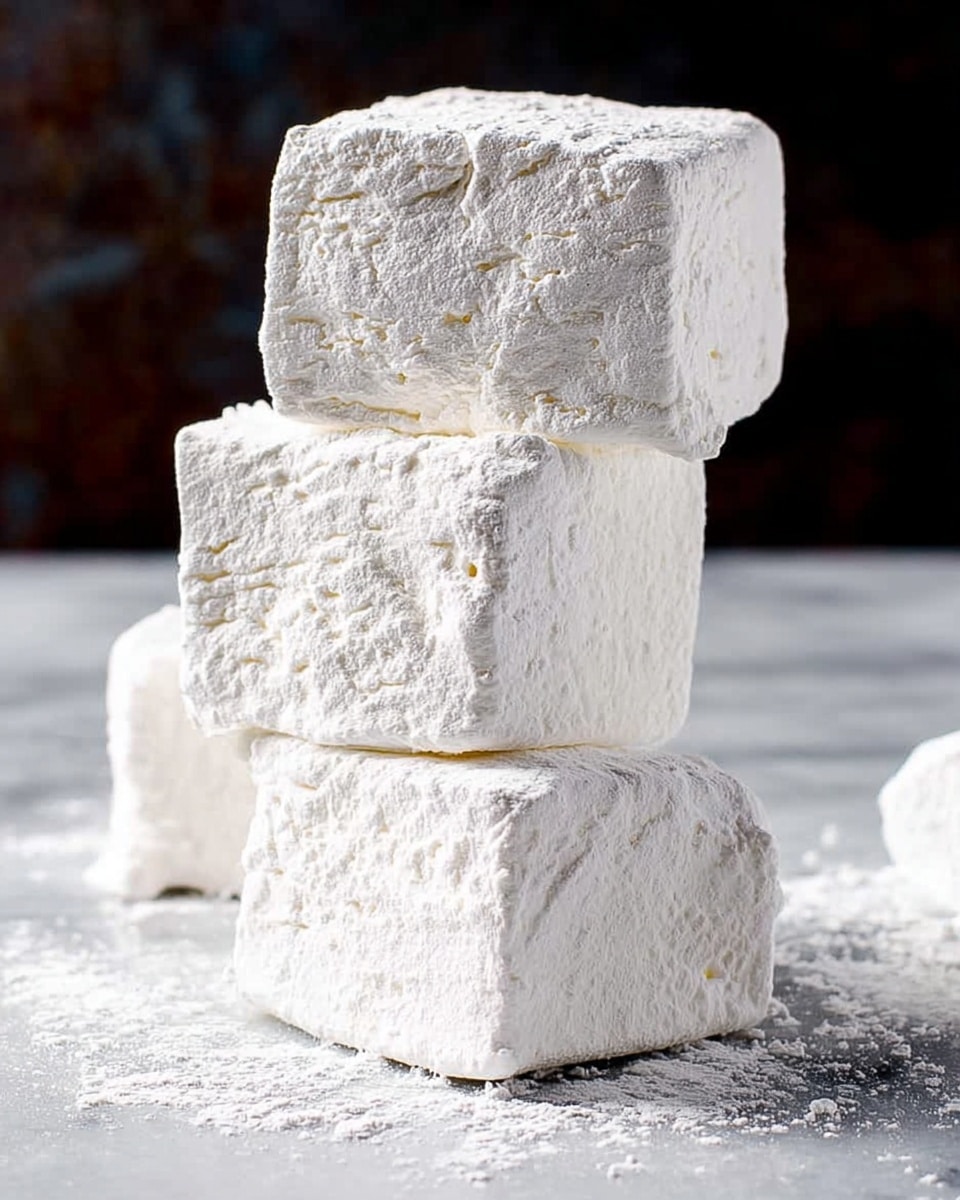
Picture this: a bowl full of fluffy, pillowy marshmallows slowly setting in your kitchen, their sweet vanilla scent filling the air and warming your heart. The light dusting of snowy sugar and cornstarch invites your fingers to gently pluck one and savor that soft, melt-in-your-mouth bliss. This Perfect Homemade Marshmallows Recipe is a revelation — a magical combination of simple ingredients that transform into a cozy treat, perfect for sharing or sneaking whenever you want. Whether for roasting by the fire, topping a luscious hot chocolate, or gifting to friends, these marshmallows impress every single time and are surprisingly straightforward to make.
Why You’ll Love This Perfect Homemade Marshmallows Recipe
- Ready in about 40 minutes active time: The hands-on portion is delightfully quick, perfect for whipping up a batch without fuss.
- Uses simple, pantry-friendly ingredients: No rare or complicated components here—just basic staples like sugar, gelatin, and vanilla.
- Perfect for beginners: Clear, step-by-step instructions guide you gently through each stage, making it feel like a fun kitchen adventure.
- Impressive and versatile presentation: Gorgeous white cubes that look professionally made, yet you molded them yourself!
- Customizable flavors and shapes: Easily add vanilla, drizzle chocolate, or cut into fun shapes for personalized treats.
Why This Perfect Homemade Marshmallows Recipe Works
What truly makes this Perfect Homemade Marshmallows Recipe shine is the care taken at every crucial step: blooming the gelatin to get that perfect bounce, cooking the sugar syrup to exactly the right temperature, and whisking the mixture to a creamy, voluminous cloud. The combination of corn syrup or honey with just a touch of vinegar gently balances sweetness and helps to craft a glossy, stable texture. By dusting with a sweet-tangy powder mix of cornstarch and confectioner’s sugar, these marshmallows maintain their softness while avoiding stickiness. Together, these techniques capture the essence of perfect marshmallows — tender, light, and simply irresistible.
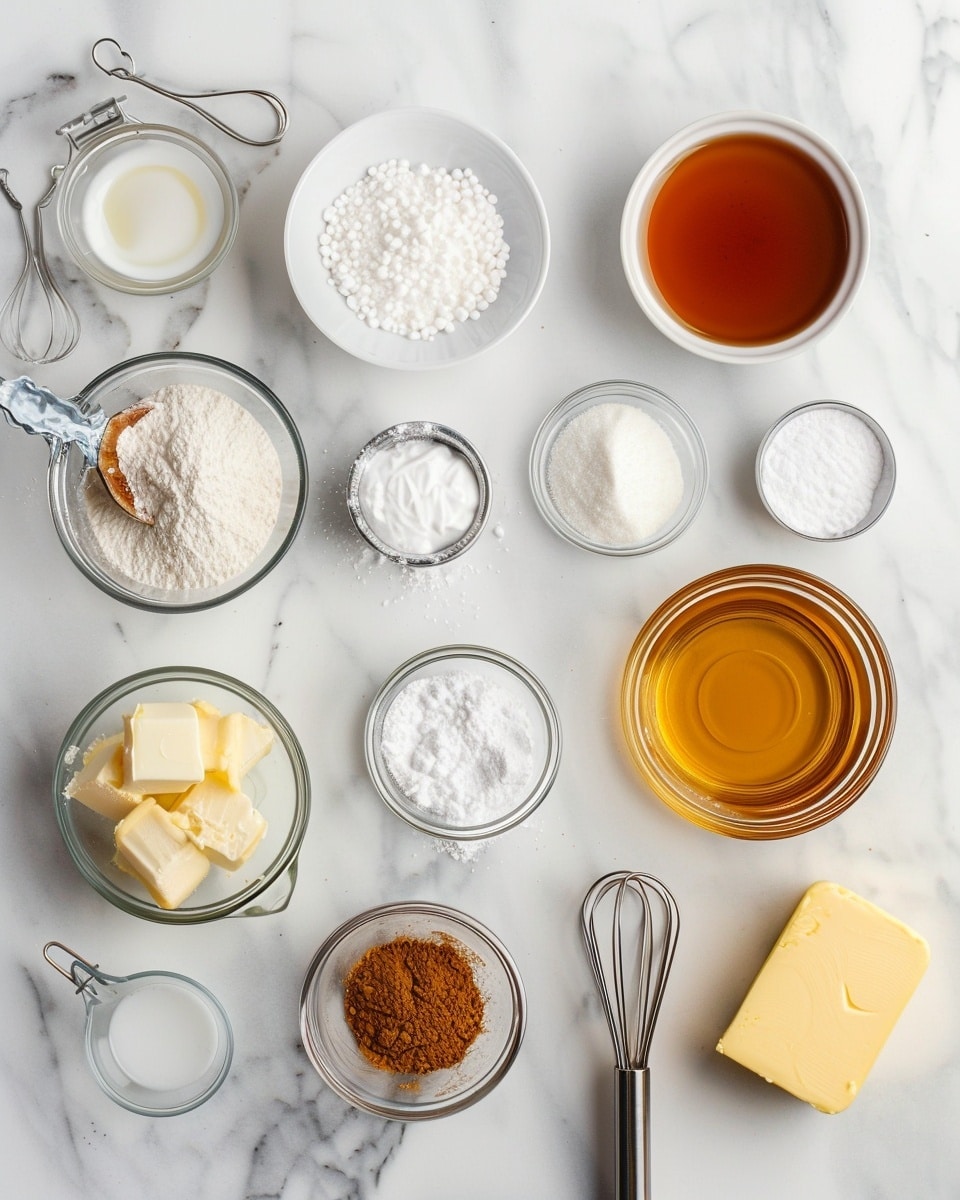
Ingredients You’ll Need
Gathering your ingredients is as simple as it is satisfying. These essentials come together harmoniously to build the perfect marshmallow foundation without fuss.
- White sugar: Sweetens and creates the structure for the syrup base.
- White vinegar: Balances the sweetness and helps prevent crystallization.
- Agave, honey, or corn syrup: Adds moisture and chewiness to the marshmallows.
- Water: Used twice; once to bloom gelatin and once for the syrup base.
- Gelatin powder: The magic ingredient that gives marshmallows their soft, bouncy texture.
- Kosher or sea salt: Enhances all flavors by balancing sweetness.
- Pure vanilla extract: Lends a warm, inviting aroma and depth.
- Cornstarch: Part of the dusting powder to keep marshmallows from sticking.
- Confectioner’s sugar: Also in the dusting powder, adding a delicate sweetness and perfect finish.
Ingredient Substitutions & Tips
- Gelatin powder: If you prefer a vegetarian option, try agar-agar but note texture differences and blooming method changes.
- Agave/honey/corn syrup: Maple syrup or golden syrup work beautifully for subtle flavor twists.
- White sugar: Fine caster sugar can be used to help dissolve faster but avoid raw sugar.
- Vanilla extract: Replace with almond or coconut extract for exciting flavor variations.
👨🍳 Pro Tips for Perfect Results
- Bloom gelatin fully: Allow it to absorb all its water so it dissolves smoothly without lumps.
- Use a candy thermometer: Monitoring syrup temperature precisely ensures perfect texture every time.
- Pour syrup slowly: Drizzle the hot syrup down the bowl’s sides to avoid splattering and clumps.
- Whisk thoroughly: Whip until fluffy and shiny for that signature marshmallow lift and pillowy softness.
- Dust with powder generously: Proper coating stops sticking and molds beautiful squares easily.
How to Make Perfect Homemade Marshmallows Recipe
Step 1: Bloom the Gelatin
Sprinkle the gelatin powder over half a cup of cold water in your mixing bowl, stirring gently to saturate it. Let this sit for at least 10 minutes. This awakening period is essential so the gelatin softens fully and dissolves evenly later.
💡 Pro Tip: Don’t rush this step; perfectly bloomed gelatin means beautifully smooth marshmallows.
Step 2: Prepare Your Pan
Generously grease a 9×9 inch pan with butter or shortening for easy marshmallow release. Alternatively, you can line it with parchment paper but be gentle when unmolding. Avoid using liquid oils like vegetable oil as they don’t spread evenly, risking sticky patches.
💡 Pro Tip: Dust the greased pan with your cornstarch and confectioner’s sugar mix to add an extra non-stick layer.
Step 3: Make the Sugar Syrup
In a saucepan, combine sugar, the rest of the water, vinegar, and your choice of agave, honey, or corn syrup. Stir gently until sugar is wet, then bring to a simmer over medium heat without stirring. Cover with a lid briefly to wash down any sugar crystals on the sides—this prevents grainy marshmallows.
💡 Pro Tip: Swirl the pan gently; don’t stir, to keep the syrup clear and smooth.
Step 4: Heat Syrup to the Right Temperature
Clip a candy thermometer inside the saucepan and cook the syrup until it hits 240 to 245°F, depending on your climate (lower for dry, higher for humid). This is the perfect stage for soft yet stable marshmallows. Remove from heat immediately and let bubbles settle for a moment.
💡 Pro Tip: No thermometer? Use the cold water test for the ‘firm ball’ stage—drop a bit into ice water, and it should form a pliable but firm ball.
Step 5: Whisk Gelatin and Syrup into Marshmallow Mixture
Begin whisking the bloomed gelatin and salt on medium speed. Slowly pour the hot syrup down the side of the bowl, avoiding the whisk to prevent splashes. Once combined, increase speed to high and whip vigorously for 5 to 8 minutes until the mixture triples in volume, turns glossy white, and feels thick and fluffy.
💡 Pro Tip: Stop whisking when the bowl remains warm to the touch for easier spreading.
Step 6: Add Vanilla and Final Whip
Add the pure vanilla extract, then whisk for another 1 to 2 minutes so the flavor infuses beautifully throughout the mixture. Use a spatula to fold in any vanilla clinging to the sides.
💡 Pro Tip: Customize this step with other extracts or zest for creative twists.
Step 7: Spread and Set Your Marshmallows
Scrape the fluffy mixture into your prepared pan, spreading evenly with a buttered spatula to prevent sticking. Sift the cornstarch and confectioner’s sugar mix evenly across the surface. Let the marshmallows set at room temperature for at least 6 hours — do not refrigerate or cover tightly before set.
💡 Pro Tip: Keep the spatula well-buttered while spreading as the mixture gets sticky quickly.
Step 8: Cut and Coat the Marshmallows
Once set, turn the marshmallow slab onto a surface dusted with your sugar-cornstarch blend. Trim edges if desired, then cut into 1-inch squares using a greased knife or scissors for clean cuts. Toss each piece lightly in the dusting powder to seal in the perfect softness and prevent sticking.
💡 Pro Tip: Keep wiping and greasing your cutting blade to maintain smooth slices.
Common Mistakes to Avoid
Learn from these common pitfalls:
- Not blooming the gelatin fully: Results in lumpy, uneven marshmallows.
- Overcooking or undercooking sugar syrup: Leads to marshmallows that are either too hard or too soft and sticky.
- Pouring syrup too quickly: Causes splashback and uneven texture.
- Not whisking long enough: Your marshmallows won’t reach that fluffy, glossy volume.
- Setting marshmallows in the fridge: Moisture causes them to become sticky and gummy.
- Using wrong oils in the pan: Liquid oils don’t prevent sticking effectively.
Delicious Variations to Try
Once you’ve mastered this Perfect Homemade Marshmallows Recipe, don’t be shy to experiment and make it your own:
Chocolate Swirl
Gently fold in melted dark or milk chocolate before allowing the marshmallows to set. It creates a luxurious marbling effect and decadent flavor.
Minty Fresh
Add a few drops of peppermint extract and coat finished marshmallows in crushed candy canes for a festive touch.
Toasted Coconut
Sprinkle toasted shredded coconut over the top of the marshmallow sheet just before setting for a tropical twist.
Berry Bliss
Mix in freeze-dried raspberry powder or puree for a colorful burst of fruity flavor that surprises and delights.
Spiced Pumpkin
Add a pinch of cinnamon, nutmeg, and pumpkin pie spice with the vanilla to capture cozy autumn vibes in every bite.
How to Serve Perfect Homemade Marshmallows Recipe
Garnishes
Dust with extra confectioner’s sugar, lightly drizzle melted chocolate, or roll in cocoa powder or crushed nuts for a gourmet presentation.
Side Dishes
Serve alongside a steaming mug of hot cocoa, creamy coffee, or even roasted sweet potatoes for unique contrasts.
Creative Ways to Present
Skewer marshmallows on sticks and toast over the fire, assemble elegant s’mores with artisanal chocolate and cookies, or gift them in decorated jars with ribbon for delightful homemade treats.
Make Ahead and Storage
Storing Leftovers
Keep cut marshmallows in an airtight container layered with dusting powder to preserve their softness. Stored in a cool, dry place, they stay fresh for up to two weeks.
Freezing
Wrap marshmallows tightly in plastic wrap and place in a freezer-safe bag. Thaw at room temperature before serving. Freshness remains intact for 3 months.
Reheating
If marshmallows become slightly firm, warm gently in a microwave for a few seconds or allow at room temperature to regain softness.
FAQs
Can I use flavored gelatin instead of plain?
It’s best to stick with flavorless gelatin so you can control the taste and add your own extracts or flavors.
What if I don’t have a candy thermometer?
Use the cold water ‘firm ball’ stage test: drop a bit of syrup into ice water, then try to shape it with your fingers—it should form a firm but pliable ball.
Why is my marshmallow sticking to the pan?
Make sure the pan is well greased and dusted generously with cornstarch and confectioner’s sugar mix to create a non-stick surface.
Can I make vegan marshmallows with this recipe?
This recipe uses gelatin which is animal-derived, but agar-agar can be tried as a substitute with adjustments to the setting process.
How do I get the marshmallows extra fluffy?
Whip the mixture on high speed for the full 5-8 minutes until it triples in volume and looks glossy and thick.
Is it possible to add colors?
Yes! Add a few drops of food coloring during the final whisks to tint your marshmallows vibrantly.
Why shouldn’t I refrigerate marshmallows when setting?
Cold air introduces moisture that makes them sticky and gummy instead of soft and airy.
How long do homemade marshmallows last?
Stored correctly in an airtight container with dusting powder, they keep up to two weeks at room temperature and up to three months frozen.
Final Thoughts
Making this Perfect Homemade Marshmallows Recipe is truly a joyful kitchen ritual that rewards you with melt-in-your-mouth sweetness and endless smiles. There’s something so satisfying about crafting your own marshmallows from scratch—the air light fluffiness, the delicate vanilla scent, and the warmth of sharing them with loved ones. It’s more than just a recipe; it’s a heartfelt edible memory in the making.
Have you tried this Perfect Homemade Marshmallows Recipe? I’d love to hear how it turned out! Leave a comment below. If you loved this recipe, please share it with friends and family. Happy cooking! 😊
PrintPerfect Homemade Marshmallows Recipe
This recipe guides you to create perfect homemade marshmallows that are fluffy, soft, and sweet with a smooth vanilla flavor. Using gelatin and a carefully prepared sugar syrup heated to the correct temperature ensures a light and airy texture. The marshmallows are dusted with a combination of confectioner’s sugar and cornstarch to prevent sticking and can be cut into small squares for easy serving. This treat is ideal for snacking, hot chocolate topping, or gifting, and making them at home allows customization to dietary preferences.
- Prep Time: 15 minutes
- Cook Time: 25 minutes
- Total Time: 6 hours 40 minutes
- Yield: 64 small marshmallows (approximately 1 inch squares) 1x
- Category: Dessert
- Method: Stovetop
- Cuisine: American
Ingredients
Marshmallow Base
- 400 g white sugar
- ½ tsp white vinegar
- 100 g agave syrup or honey or corn syrup
- 120 mL water (for sugar syrup)
- 120 mL water (for blooming the gelatin, ½ cup)
- 18 g gelatin powder (6 tsp or about 2.5 packets Knox gelatin)
- 1 pinch kosher salt or sea salt (approximately ¼ tsp)
- 2 tsp pure vanilla extract
Dusting Powder
- 120 g cornstarch (sifted, about ½ cup)
- 60 g confectioner’s sugar (sifted, about ½ cup)
Instructions
- Blooming the gelatin: Place 120 mL of water into a mixing bowl and sprinkle the gelatin powder evenly over the surface. Stir gently to saturate the gelatin and let it sit for at least 10 minutes until it blooms and softens.
- Prepping the pan: Grease a 9 x 9 inch pan thinly with butter or shortening to prevent sticking. Avoid liquid oils as they do not spread evenly. Alternatively, line the pan with parchment paper or dust lightly with the dusting powder, but note that dusting may result in sticky spots.
- Making the sugar syrup: Combine 400 g sugar, 120 mL water, ½ tsp white vinegar, and 100 g agave or honey or corn syrup in a pot. Stir gently just enough to moisten the sugar. Heat over medium to medium-high heat until simmering, then cover and reduce heat to medium or medium-low to simmer for 2 minutes.
- Removing crystals and continuing simmer: After 2 minutes, remove the lid and check for sugar crystals on the sides of the pot. If present, cover again for another minute to allow condensation to dissolve the crystals. Attach a candy thermometer and continue heating, swirling gently frequently to cook evenly.
- Heating syrup to correct temperature: Cook the sugar syrup until it reaches between 240°F and 245°F (soft ball to firm ball stage). Adjust target temperature based on climate: about 240°F for cold/dry climates, 243°F for moderate, and 245°F for hot/humid. Remove from heat and allow bubbles to settle.
- Whisking gelatin and syrup: Using a stand mixer fitted with a whisk attachment, whisk the bloomed gelatin briefly on medium speed to break it up. Add the salt to the gelatin. While mixing on medium-low, slowly pour the hot syrup down the side of the bowl to avoid splashes. Increase speed to high and continue whisking for 5 to 6 minutes until the mixture triples in volume, becomes white, fluffy, smooth, and glossy like a thick meringue.
- Adding vanilla: Add the vanilla extract to the mixture and whisk for an additional 1 to 2 minutes until well incorporated. Total whisking time should be 5 to 8 minutes. Stop whisking while the bowl is still warm to the touch to make spreading easier.
- Folding and spreading: Use a clean spatula to fold any vanilla stuck to the bowl’s sides into the marshmallow. Scrape all mixture into the prepared pan and spread evenly with an offset spatula. Keep the spatula lightly greased with butter or shortening to handle sticky marshmallow.
- Applying dusting powder and setting: Sift the dusting powder (mixture of confectioner’s sugar and cornstarch) liberally over the top of the marshmallow. Leave the marshmallow to set and cure for at least 6 hours at room temperature. Do not refrigerate. Once cooled, it can be loosely covered with plastic wrap.
- Cutting the marshmallows: Turn the set marshmallow block onto a cutting surface dusted with dusting powder. The marshmallow should release easily from the pan. Cut into 1-inch squares or any desired shape. Lightly grease the knife blade or scissors to prevent sticking, wiping off residue and re-greasing as needed.
- Coating and storing: Toss cut marshmallows in dusting powder to coat all sides and store in an airtight container with extra dusting powder to prevent sticking.
- Preparing dusting powder: Combine sifted confectioner’s sugar and cornstarch thoroughly before use. Alternatively, use only cornstarch if avoiding additional sugar.
Notes
- Adjust the sugar syrup temperature based on your local climate for best texture: lower temperatures work better in dry climates, and higher temperatures in humid climates.
- If you don’t have a candy thermometer, use the cold water test to check for the firm ball stage (drop syrup into cold water and check if it forms a firm ball).
- Avoid liquid oils for greasing as they do not coat the pan evenly, making marshmallows stickier and more difficult to remove.
- Whisk the marshmallow mixture until it triples in volume for the best texture—this usually takes 5 to 8 minutes at high speed.
- Do not refrigerate the marshmallows; curing at room temperature for 6 hours or more is essential for setting the correct texture.
- Keep the knife blade greased when cutting to achieve clean edges and prevent sticking.
- You can flavor marshmallows by substituting vanilla extract with other flavorings, but avoid adding excess liquid which can affect setting.
Keywords: homemade marshmallows, marshmallow recipe, homemade candy, vanilla marshmallows, fluffy marshmallows

