
Rosemary Garlic Pull Apart Bread Recipe: Crispy & Golden Goodness! Recipe
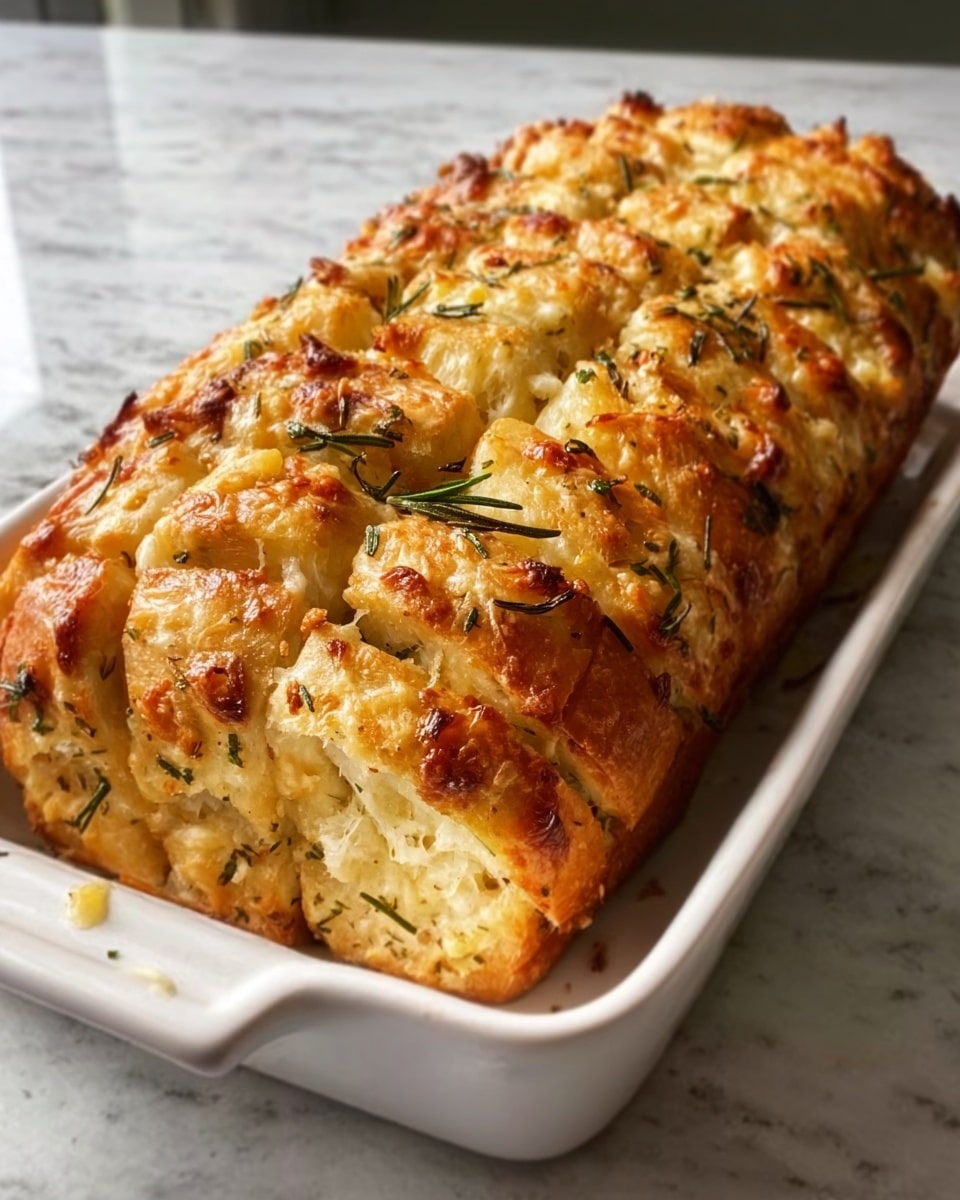
Picture this: warm, inviting aromas of golden-baked bread mingling with the earthy scent of fresh rosemary and fragrant garlic, filling your kitchen with irresistible coziness. There’s something truly magical about tearing apart soft, buttery pieces of bread, each crisped to perfection on the outside, yet pillowy tender within. This Rosemary Garlic Pull Apart Bread Recipe: Crispy & Golden Goodness! Recipe is not just a snack; it’s an experience, a celebration of comfort and home-cooked love captured in every bite.
Whether you’re aiming to impress guests, elevate your dinner table, or simply dive into a mouthwatering indulgence, this bread will charm its way into your heart. The best part? It’s a labor of love that rewards you with rich flavors and a showstopper centerpiece that everyone will be reaching for again and again.
Why You’ll Love This Rosemary Garlic Pull Apart Bread Recipe: Crispy & Golden Goodness! Recipe
- Quick and Easy: Ready in just 1 hour and 55 minutes, including rising time, this recipe fits perfectly into your weekend plan or relaxed evening baking session.
- Simple Ingredients: Uses common pantry staples like flour, yeast, olive oil, and fresh herbs, making it easy to whip up without special shopping trips.
- Perfect for Entertaining: The pull-apart style makes it irresistibly shareable, perfect for family gatherings or cozy nights with friends.
- Impressive Presentation: Served warm from a bundt pan, it showcases golden, crispy layers studded with fragrant rosemary and garlic tones that look as good as they taste.
- Customizable: You can easily adjust the herbs or add a sprinkle of parmesan, making this recipe your own canvas for flavor experimentation.
Why This Rosemary Garlic Pull Apart Bread Recipe: Crispy & Golden Goodness! Recipe Works
What makes this Rosemary Garlic Pull Apart Bread Recipe truly shine lies in its foolproof dough and its luscious garlic rosemary butter that seeps into every nook and cranny. The warm water activates the yeast perfectly to create a light, airy dough that rises beautifully. Kneading until smooth and elastic ensures the bread develops the right chewy texture. Then, dipping each piece into the melted butter infused with fresh garlic and rosemary guarantees flavor distribution that’s both intense and harmonious without overwhelming the senses. Baking at 375°F crisps the outer edges while maintaining that buttery softness inside, resulting in a crispy golden masterpiece.
Ingredients You’ll Need
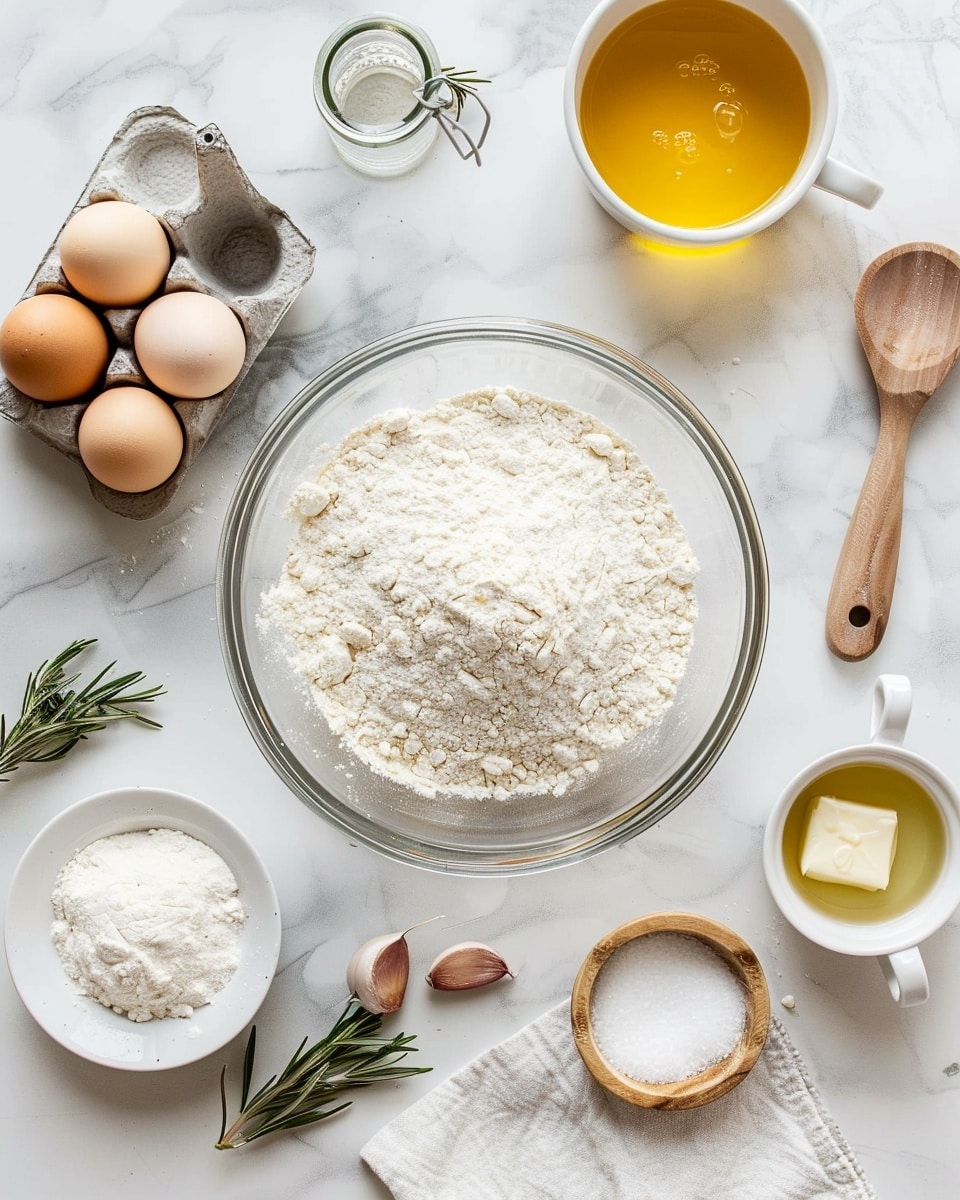
These simple ingredients combine to create a stunning bread that feels both rustic and sophisticated. Each one plays a vital role in crafting that crispy exterior and soft, fragrant crumb inside.
- All-purpose flour: The backbone of your dough, providing structure and tenderness.
- Active dry yeast: Helps your dough rise, giving you that light, airy texture.
- Warm water (110°F): Activates the yeast and hydrates the flour for perfect dough.
- Sugar: Feeds the yeast and adds a slight sweetness to balance garlic’s bite.
- Salt: Enhances flavor and controls yeast activity for balanced fermentation.
- Olive oil: Adds moisture and a subtle fruity note to the bread.
- Unsalted butter (melted): The star in soaking up garlic and rosemary flavors, giving a lush, golden finish.
- Garlic (minced): Brings aromatic pungency that sings through every pull-apart piece.
- Fresh rosemary (chopped): Adds earthiness and herbal brightness to balance the richness.
Ingredient Substitutions & Tips
- All-purpose flour: Substitute with bread flour for a chewier texture or whole wheat for a nuttier flavor, though the bread may be denser.
- Yeast: Instant yeast can be used instead of active dry yeast; reduce the proofing time slightly.
- Unsalted butter: You may swap for vegan butter to keep it dairy-free or olive oil for a lighter alternative.
- Fresh rosemary: Dried rosemary works too but reduce quantity by half since dried herbs are more potent.
👨🍳 Pro Tips for Perfect Results
- Use warm water, not hot: Ensures yeast activates without dying, for perfect dough rising.
- Knead thoroughly: Aim for a smooth, elastic dough for the best texture.
- Don’t rush the rising: Let the dough double in size for lightness and flavor development.
- Generously butter each piece: This locks in moisture and infuses every bite with garlic-rosemary aroma.
- Let it cool slightly before pulling apart: Prevents tears and keeps your bread beautifully intact.
How to Make Rosemary Garlic Pull Apart Bread Recipe: Crispy & Golden Goodness! Recipe
Step 1: Activate the Yeast
Start by combining the warm water at 110°F with sugar and active dry yeast in a small bowl. Watch as tiny bubbles begin forming, turning the mix frothy within 5 to 10 minutes. This bubbling magic tells you the yeast is alive and ready to work its leavening wonders on your dough.
💡 Pro Tip: If your yeast doesn’t foam, it might be expired or water too hot — start fresh to avoid dense bread.
Step 2: Mix Dough Ingredients
In a large bowl, whisk together the flour and salt before pouring in the bubbly yeast mixture along with the olive oil. Stir until a sticky dough begins to form, getting ready for kneading.
💡 Pro Tip: Use a wooden spoon or your hands for a tactile feel of the transformation from flour to dough.
Step 3: Knead to Perfection
Turn the dough onto a lightly floured surface and knead with steady pressure for 8 to 10 minutes. You’ll notice it become smoother, stretchy, and no longer sticks excessively to your fingers—a sign it’s ready to rise.
💡 Pro Tip: If your dough feels dry or crumbly, sprinkle a touch more water; too sticky, add a bit more flour.
Step 4: Let It Rise
Place the dough in a greased bowl, cover it with a damp cloth, and tuck it away in a warm spot. Let it double in size, about 1 hour, as the yeast works its magic behind the scenes.
💡 Pro Tip: An oven with just the light on makes a consistent warm spot for rising.
Step 5: Prepare Garlic Rosemary Butter
While the dough rises, blend the melted butter with the minced garlic, chopped rosemary, and salt in a separate bowl. This fragrant, flavorful liquid will soak into each dough piece, transforming your bread into a garlicky herb feast.
💡 Pro Tip: Use fresh garlic; it delivers a more vibrant flavor punch than pre-minced jarred garlic.
Step 6: Shape the Dough Pieces
Punch down the risen dough, breaking out the built-up gas. Then cut it into small chunks that will be dipped into the garlicky butter and layered in a greased bundt pan, creating that signature pull-apart design.
💡 Pro Tip: Ensure your dough pieces are evenly sized for uniform baking and pulling.
Step 7: Add Butter and Second Rise
Dip each piece into the garlic rosemary butter, coating generously before layering. Once all pieces are nestled in the pan, pour any leftover butter on top for extra richness. Cover again and let the dough rise another 30 minutes until puffy.
💡 Pro Tip: This second rise is crucial for a light, fluffy final texture.
Step 8: Bake to Golden Perfection
Pop the bundt pan into a preheated oven at 375°F (190°C). Bake for 25 to 30 minutes until the bread is gloriously golden and crispy on the outside, tender inside, and your kitchen smells absolutely heavenly.
💡 Pro Tip: If the top browns too fast, tent with foil for the last 10 minutes.
Step 9: Cool and Enjoy
Allow the pull apart bread to cool slightly before serving—this sets the texture and lets those flavors settle. Then grab a chunk and enjoy the crispy, garlicky, rosemary-rich heaven with your hands.
Common Mistakes to Avoid
Learn from these common pitfalls:
- Using water that’s too hot: Kills yeast and prevents dough from rising properly.
- Skipping the kneading step: Leads to dense, tough bread rather than light and airy.
- Not letting dough rise enough: Results in a heavy, compact loaf.
- Overloading with garlic butter: Can make the bread soggy instead of crispy.
- Uneven dough pieces: Cause uneven baking and texture inconsistencies.
- Removing bread too soon from oven: Leads to doughy center instead of golden crust.
Delicious Variations to Try
Once you’ve mastered this classic Rosemary Garlic Pull Apart Bread Recipe: Crispy & Golden Goodness! Recipe, layer on creative tweaks to make it your own.
Cheesy Herb Pull Apart
Sprinkle shredded mozzarella or parmesan between dough pieces along with rosemary for a gooey, savory upgrade.
Spicy Chili Garlic
Add chopped fresh chili or a pinch of crushed red pepper to your garlic butter for a fiery kick that pairs beautifully with the herbaceous rosemary.
Lemon Zest Delight
Incorporate finely grated lemon zest into the butter mixture to brighten the flavors with a fresh citrus spark.
Olive and Sun-dried Tomato
Fold chopped black olives and sun-dried tomatoes into the dough pieces before dipping to bring Mediterranean vibes to the table.
Vegan Version
Use vegan butter and skip any dairy-based toppings, keeping the recipe 100% plant-based while still packed with punchy flavor.
How to Serve Rosemary Garlic Pull Apart Bread Recipe: Crispy & Golden Goodness! Recipe
Garnishes
Finish with a sprinkle of flaky sea salt or fresh rosemary needles for a rustic, elegant touch right before serving.
Side Dishes
Pairs wonderfully with hearty soups, fresh salads, or a flavorful roasted vegetable platter to complement the herbaceous bread.
Creative Ways to Present
Serve warm straight from the bundt pan on a wooden board with small bowls of olive oil and balsamic vinegar for dipping. Or slice and use as a base for savory bruschetta toppings during your next gathering.
Make Ahead and Storage
Storing Leftovers
Wrap leftover bread tightly in foil or an airtight container to keep it soft and flavorful for up to 2 days at room temperature.
Freezing
Freeze cooled bread wrapped well in plastic wrap and foil for up to 3 months. Thaw at room temperature, then warm in the oven before serving.
Reheating
Reheat at 350°F (175°C) for 10-15 minutes, wrapped in foil, to restore its crispy golden crust and warm, buttery interior.
FAQs
Can I use dried rosemary instead of fresh?
Yes! Use half the amount of dried rosemary as it is more concentrated to avoid overpowering the bread.
Is it possible to make this bread gluten-free?
Gluten-free baking requires different flours and additional binding agents; this recipe isn’t directly adaptable but you can experiment with gluten-free flour blends designed for bread.
Can I make the dough in a bread machine?
Absolutely! Use the dough cycle for mixing and kneading, then proceed with shaping, butter dipping, and baking as described.
What if my dough doesn’t rise properly?
Common reasons include old yeast, water temperature too hot or cold, or a cold environment. Ensure warm conditions and fresh yeast for best results.
How long does the bread stay fresh?
Stored properly at room temperature, it stays fresh for 2-3 days. After that, it’s best reheated or toasted.
Can I add other herbs?
Yes, herbs like thyme, oregano, or basil can be fantastic alongside or instead of rosemary for a different flavor twist.
Is this recipe suitable for kids?
Definitely! The mild garlic and fresh herb flavors, combined with soft, pull-apart bread, make it a kid-friendly favorite.
Can I make smaller batches?
Yes, simply halve the ingredients to make fewer servings, adjusting rising and baking times accordingly.
Final Thoughts
Baking this Rosemary Garlic Pull Apart Bread Recipe: Crispy & Golden Goodness! Recipe is more than just making bread—it’s creating moments of warmth and togetherness filled with aroma, flavor, and happiness. The thrill of pulling apart each buttery, garlicky piece keeps everyone reaching for more, making it a timeless family favorite. Whether you serve it as an appetizer, side, or snack, it brings an unbeatable charm to your table.
Have you tried this Rosemary Garlic Pull Apart Bread Recipe: Crispy & Golden Goodness! Recipe? I’d love to hear how it turned out! Leave a comment below. If you loved this recipe, please share it with friends and family. Happy cooking! 😊
PrintRosemary Garlic Pull Apart Bread Recipe: Crispy & Golden Goodness! Recipe
This Rosemary Garlic Pull Apart Bread is a delicious and aromatic loaf featuring tender dough infused with fresh rosemary and garlic butter. Perfectly crispy and golden on the outside, this bread is a terrific addition to any meal or a savory snack on its own. Made from scratch, it offers a delightful pull-apart texture that’s ideal for sharing.
- Prep Time: 25 minutes
- Cook Time: 30 minutes
- Total Time: 1 hour 55 minutes
- Yield: 12 servings 1x
- Category: Bread
- Method: Baking
- Cuisine: American
Ingredients
For the Dough:
- 4 cups all-purpose flour
- 1 packet (2 1/4 tsp) active dry yeast
- 1 1/2 cups warm water (110°F)
- 2 tbsp sugar
- 1 tsp salt
- 2 tbsp olive oil
For the Garlic Rosemary Butter:
- 1/2 cup unsalted butter, melted
- 4 cloves garlic, minced
- 2 tbsp fresh rosemary, chopped
- 1/2 tsp salt
Instructions
- Proof the Yeast: In a small bowl, combine the warm water, sugar, and active dry yeast. Let the mixture sit for 5-10 minutes until it becomes frothy, indicating that the yeast is active.
- Make the Dough: In a large mixing bowl, mix together the flour and salt. Add the yeast mixture and olive oil, stirring until a dough starts to form.
- Knead the Dough: Turn the dough onto a floured surface and knead it for 8-10 minutes until it becomes smooth and elastic, which develops the gluten for a nice bread structure.
- First Rise: Place the dough into a greased bowl, cover it with a damp cloth, and allow it to rise in a warm place for about 1 hour or until it doubles in size.
- Preheat Oven: Set your oven to 375°F (190°C) so it will be ready when the dough is prepared.
- Prepare Garlic Rosemary Butter: In a small bowl, combine the melted butter with the minced garlic, chopped rosemary, and salt, mixing well to infuse flavors.
- Shape the Bread: Once the dough has risen, punch it down and divide it into small pieces. Dip each piece into the garlic rosemary butter, then arrange the pieces in a greased bundt pan to create the pull-apart effect.
- Second Rise: After arranging all the dough pieces, pour any remaining garlic rosemary butter over the top. Cover and let the dough pieces rise for another 30 minutes until slightly puffed.
- Bake the Bread: Bake the pull-apart bread in the preheated oven for 25-30 minutes, or until the bread turns golden brown and is cooked through.
- Cool and Serve: Allow the bread to cool slightly in the pan before serving, so the butter sets and the bread can be pulled apart easily.
Notes
- Ensure the water is warm but not hot to avoid killing the yeast.
- Fresh rosemary is preferred for the best flavor, but dried rosemary can be used in a pinch (reduce quantity by half).
- This bread is best served warm and fresh, but leftovers can be reheated.
- For a sharper garlic flavor, you can increase the amount of garlic in the butter mixture.
- Use a bundt pan or a similar round pan to achieve the classic pull-apart shape.
Keywords: Rosemary Garlic Bread, Pull Apart Bread, Homemade Bread, Garlic Butter Bread, Soft Bread Recipe
