
Russian Honey Cake (Medovik) Recipe
Picture this: the rich, golden aroma of honey filling your kitchen, the soft, velvety layers of cake gently pressing together with luscious cream, creating a dessert so divine it feels like a warm hug from a dear friend. Making this Russian Honey Cake (Medovik) is like stepping into a storybook of sweet memories, where every bite melts away the day’s worries. It’s impressively elegant yet surprisingly simple to master, turning you into a dessert hero in under two hours. Trust me, once you try this, it will become your go-to celebration treat.
Why You’ll Love This Russian Honey Cake (Medovik) Recipe
- Ready in 75 minutes: From mixing to layering, this recipe brings a stunning cake to your table in just over an hour, perfect for those last-minute gatherings.
- Uses simple ingredients: Honey, eggs, flour, and a few pantry staples come together in a magical symphony—no complicated or costly ingredients needed.
- Perfect for beginners: Each step is straightforward, making it easy for even kitchen novices to create a masterpiece.
- Impressive presentation: The delicate layers and crumb-coated sides look beautifully rustic and indulgent, guaranteed to wow your guests.
- Customizable: You can tweak the cream, add nuts, or infuse spices for your own unique twist on this traditional favorite.
Why This Russian Honey Cake (Medovik) Recipe Works
The magic of this Russian Honey Cake (Medovik) Recipe lies in its tender sponge layers and the luscious cream that soaks into them just enough to create a moist yet structured cake. The key technique is baking ultra-thin cake layers on parchment paper, giving you that signature flaky texture. The use of baking soda activated by vinegar ensures an airy rise while complementing the honey’s rich flavor perfectly. Combining Cool Whip and sour cream for the frosting keeps the cake delightfully light but creamy—a balance that’s hard to beat.
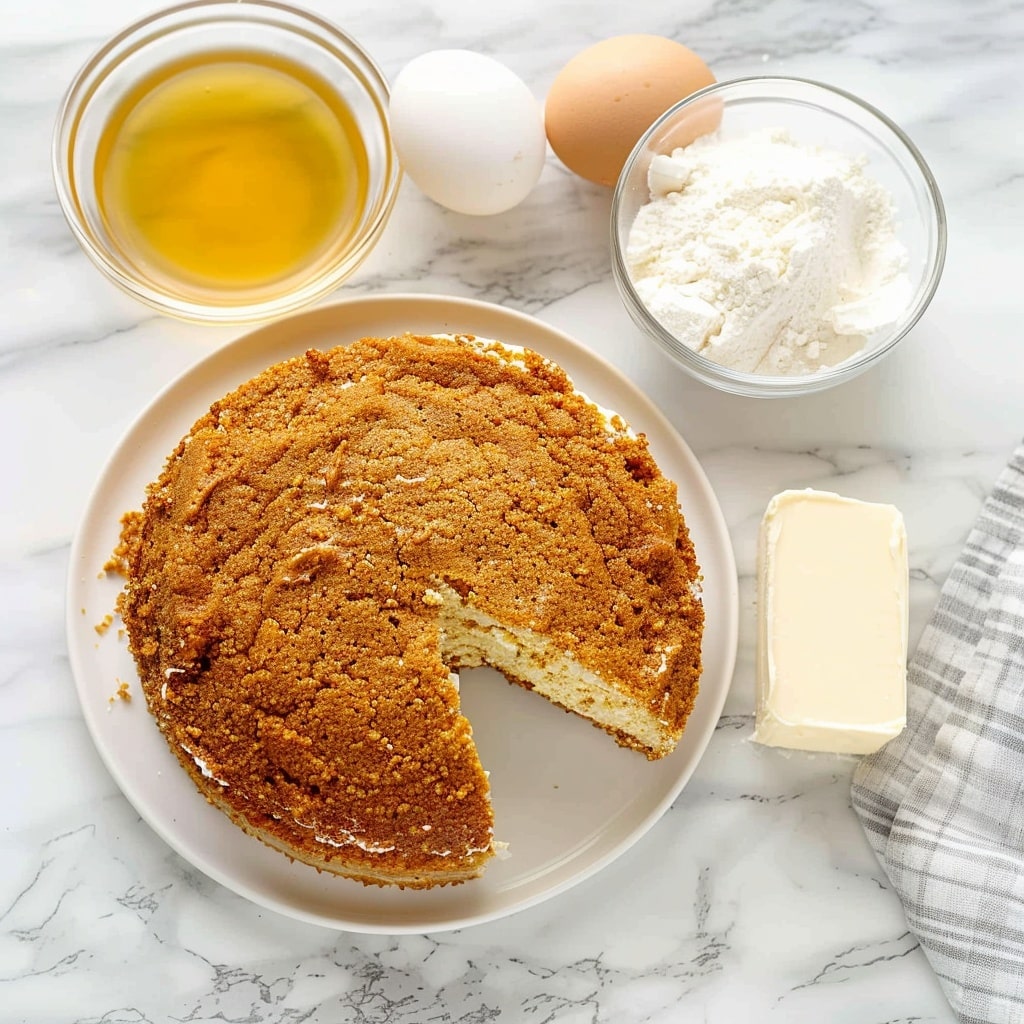
Ingredients You’ll Need
Each ingredient in this Russian Honey Cake (Medovik) Recipe is carefully chosen to build deep flavor layers while keeping the cake light and tender. Simple, familiar components blend beautifully to create something extraordinary.
- 3 eggs: Provide structure and richness to the sponge.
- 1 cup clover honey: The star flavor—sweet, floral, and aromatic.
- 2 cups all-purpose flour: Forms the cake’s delicate base layers.
- 2 tsp baking soda: Helps the cake rise and stay airy.
- 1 tbsp white distilled vinegar: Activates the baking soda for a perfect lift.
- 8 oz Cool Whip (thawed): Adds a creamy, fluffy texture to the frosting.
- 1 cup sour cream (Daisy brand recommended): Gives the frosting a tangy, smooth balance against the sweet honey.
Ingredient Substitutions & Tips
- Clover honey: Try wildflower or orange blossom honey for a subtle flavor change.
- All-purpose flour: You can substitute with cake flour for an even lighter texture.
- Cool Whip: Use homemade whipped cream or mascarpone for a richer cream.
- Sour cream: Greek yogurt can be a tangy alternative.
👨🍳 Pro Tips for Perfect Results
- Tip 1: Use room temperature eggs for easy blending and smoother batter.
- Tip 2: Roll the batter as thin as possible—around 1/16 inch—to get delicate layers.
- Tip 3: Don’t skip chilling the cake overnight; it lets the flavors marry and the layers soften beautifully.
- Tip 4: Save your scraps to make the crunchy crumb topping—nothing goes to waste!
- Tip 5: Use a sharp knife heated briefly under hot water for cleaner cake layer cuts.
How to Make Russian Honey Cake (Medovik) Recipe
Step 1: Prep Your Baking Sheet
Begin by gathering an inverted 18″ by 13″ baking sheet and cut four pieces of parchment paper just large enough to cover it with some overhang for easy removal.
💡 Pro Tip: Make sure the parchment fits snugly but can be lifted easily when the cake layers are baked.
Step 2: Preheat Your Oven
Set your oven to 350° F so it’s nice and ready when you start baking your delicate layers.
Step 3: Beat the Honey Sponge Cake Batter
Whisk together your eggs and honey for about 2 minutes until glossy and well incorporated. Next, dissolve the baking soda in the vinegar—this activates the rising power—and quickly fold it into your eggs mixture. Finally, gently stir in the flour until your batter is smooth.
💡 Pro Tip: Work quickly once the vinegar and soda combine to keep the batter lively and light.
Step 4: Spread the Batter on Parchment
Take about ½ cup of batter and thinly spread it over the parchment-covered baking sheet, extending all the way to the edges for even layers. This thinness is what gives each layer its signature delicate texture.
💡 Pro Tip: Use an offset spatula for smooth, even spreading.
Step 5: Bake the Layers
Bake each thin layer for 7 minutes. You’ll repeat this four times, so have your parchment ready. Once baked, allow them to cool completely before handling.
💡 Pro Tip: Watch carefully; the layers should be light golden but not browned.
Step 6: Cut Out Cake Circles
Peel the cooled layers off the parchment and place a 7 to 8-inch plate on top. Use a sharp knife to cut round cake circles from each layer. This recipe yields eight beautiful cake circles. Don’t toss your scraps—reserve them for later.
💡 Pro Tip: Save your crumbs for a crunchy, decorative finish.
Step 7: Prepare the Cake Crumbs
Gather the leftover scraps, spread them on a baking sheet, and bake them again at 275° F for 5 to 8 minutes to dry out. Once cool, crush into fine crumbs inside a zip-lock bag using your hands or a rolling pin.
Step 8: Make the Cream and Assemble
Mix the thawed Cool Whip and sour cream in a bowl until smooth and creamy. Spread a generous layer of this delicious frosting between each cake circle and over the entire cake. Press the crumbs onto the sides and top, creating that iconic crumb-coated finish. Refrigerate the cake for at least an hour or overnight for the best flavor and texture.
💡 Pro Tip: Chilling helps the honey soak into each layer, enhancing moistness and flavor harmony.
Common Mistakes to Avoid
Learn from these common pitfalls:
- Overbaking layers: This leads to dry, brittle cake pieces that don’t layer well.
- Spreading batter too thick: Layers will be cakey and heavy, losing Medovik’s signature tenderness.
- Not activating baking soda correctly: Omitting vinegar or delays reduce rising and texture quality.
- Skipping refrigerator time: Results in less cohesive flavors and a crumblier cake.
- Cold eggs: Can cause batter separation and inconsistent texture.
- Using the wrong honey: Strongly flavored honeys can overpower the cake’s balance.
Delicious Variations to Try
Once you’ve mastered the classic Russian Honey Cake (Medovik) Recipe, why not experiment with these tempting takes?
Nutty Crunch Medovik
Add finely chopped toasted walnuts or hazelnuts between layers and sprinkle some on top for a toasty contrast that pairs beautifully with honey.
Spiced Honey Cake
Infuse your batter with a pinch of cinnamon and ground cardamom to add warmth and a subtle holiday flair.
Chocolate Honey Cake
Mix cocoa powder into half of your batter and layer alternating chocolate and classic honey sponge circles for a dramatic, decadent twist.
Berry Medovik
Spread a thin layer of raspberry or strawberry jam between the cake layers before adding the cream to introduce fresh fruity brightness.
Orange Zest Delight
Add freshly grated orange zest into the cream for a lively citrus note that cuts through the sweetness and adds zing.
How to Serve Russian Honey Cake (Medovik) Recipe

Garnishes
Decorate with a sprinkle of crushed cake crumbs for texture, edible gold flakes for elegance, or a drizzle of warmed honey to amplify the floral notes.
Side Dishes
Serve alongside a cup of rich black tea, a bold coffee, or a tart berry compote to balance the cake’s sweetness.
Creative Ways to Present
Layer in a glass trifle bowl for a stunning visual or arrange individual mini Medovik cakes on dessert plates topped with a fresh mint leaf and a raspberry.
Make Ahead and Storage
Storing Leftovers
Wrap the cake tightly with plastic wrap and store in the refrigerator for up to 3 days. The flavors deepen as it sits, making leftovers even better!
Freezing
For longer storage, freeze the assembled cake wrapped securely in plastic and foil for up to 1 month. Thaw overnight in the fridge before serving.
Reheating
This cake is best served chilled or at room temperature. Avoid microwaving to maintain its delicate texture and creaminess.
FAQs
Can I use other types of honey for Russian Honey Cake (Medovik) Recipe?
Absolutely! While clover honey is traditional for its mild flavor, wildflower or orange blossom honeys work wonderfully and bring subtle new nuances.
Is Cool Whip necessary? Can I use fresh cream?
Cool Whip makes assembly easier and the cake lighter, but you can use freshly whipped cream or mascarpone instead for richer frosting.
How long does it take for the cake to soften properly?
Refrigerating the cake overnight or at least one hour lets the cream soak into the layers, giving you the perfect soft and melt-in-your-mouth texture.
Can I make this cake gluten-free?
Yes, swap out the all-purpose flour for a gluten-free blend designed for baking, but expect slight texture differences in the layers.
How thin should I spread each cake layer?
Try to make each layer about 1/16 inch thick for delicate, flaky layers that stack beautifully.
What is the purpose of vinegar in this recipe?
Vinegar activates the baking soda, helping the cake rise and stay tender without any sour taste.
Can I assemble the Medovik in advance?
Definitely! It actually tastes better after sitting at least a few hours as the flavors blend beautifully.
What’s the best way to cut this cake?
Use a sharp knife dipped in hot water and wiped dry for smooth, clean slices without cracking the layers.
Final Thoughts
This Russian Honey Cake (Medovik) Recipe is more than just a dessert; it’s an invitation to slow down and savor tradition with each luscious bite. Whether you’re making it for a special occasion or just to bring a bit of joy into a regular day, this cake promises delight from the very first slice. The light honey flavor paired with creamy layers will win hearts and create lasting memories at any gathering.
Have you tried this Russian Honey Cake (Medovik) Recipe? I’d love to hear how it turned out! Leave a comment below. If you loved this recipe, please share it with friends and family. Happy cooking! 🍯🎂
PrintRussian Honey Cake (Medovik) Recipe

This traditional Russian Honey Cake, also known as Medovik, features multiple thin layers of honey-infused sponge cake layered and frosted with a smooth and creamy mixture of sour cream and whipped topping. The cake is finished with finely crushed cake crumbs for added texture and a beautiful presentation. A perfect dessert to prepare in advance, allowing the flavors to meld together overnight.
- Prep Time: 25 minutes
- Cook Time: 50 minutes
- Total Time: 1 hour 15 minutes
- Yield: 16 servings 1x
- Category: Dessert
- Method: Baking
- Cuisine: Russian
Ingredients
For the Cake Layers
- 3 eggs
- 1 cup clover honey
- 2 cups all-purpose flour
- 2 tsp baking soda
- 1 tbsp white distilled vinegar
For the Cream Frosting
- 8 oz Cool Whip, thawed
- 1 cup sour cream (Daisy brand recommended)
Instructions
- Preheat oven and prepare baking sheets: Preheat your oven to 350°F (175°C). Cut 4 pieces of parchment paper to fit an inverted 18″ by 13″ baking sheet, allowing the paper to overhang. This will be used for baking the thin sponge cake layers.
- Make the honey sponge batter: In a mixing bowl, beat together the 3 eggs and 1 cup clover honey for 2 minutes until well combined and slightly fluffy. Dissolve 2 tsp baking soda in 1 tbsp white distilled vinegar and add to the egg and honey mixture. Gradually incorporate 2 cups all-purpose flour, mixing well to form a smooth batter.
- Bake the cake layers: Spread about 1/2 cup of the batter thinly and evenly over one piece of the prepared parchment paper on the inverted baking sheet, making sure to spread the batter to the edges and corners. Bake the layer for 7 minutes. Repeat this process to bake all 4 thin cake layers.
- Cool and shape the layers: Allow the cake layers to cool completely on the parchment paper. Carefully peel off the parchment and use a 7-8 inch plate as a template to cut out two round circles from each cake layer, resulting in a total of 8 round layers. Keep the leftover scraps for decoration.
- Prepare cake crumbs: Spread the leftover cake scraps on a baking sheet and bake at 275°F (135°C) for 5-8 minutes until dry. Once cooled, transfer the scraps to a zip-lock bag and crush them finely to use as garnish.
- Make the cream frosting: In a bowl, mix together 8 oz thawed Cool Whip and 1 cup sour cream until smooth and well combined.
- Assemble the cake: Place one cake layer on a serving plate and spread a generous layer of the cream frosting over it. Continue layering all 8 cake rounds, frosting each layer. Finish frosting the top and sides of the cake evenly.
- Decorate and chill: Sprinkle the finely crushed cake crumbs over the top and sides of the frosted cake. Refrigerate the cake overnight or for at least 1 hour before serving to allow the layers to set and the flavors to develop.
Notes
- Using clover honey is recommended for its mild, sweet flavor that complements the cake beautifully.
- Ensure cake layers are thin and baked quickly to keep them tender and flexible for layering.
- Cut the cake circles carefully to maintain uniform layers for the best presentation.
- Chilling the cake overnight enhances the taste and texture as the cream soaks into the cake layers.
- Could be served with fresh berries or a dusting of powdered sugar for extra flair.
Keywords: Russian honey cake, Medovik, layered cake, honey sponge, sour cream frosting, traditional Russian dessert


