
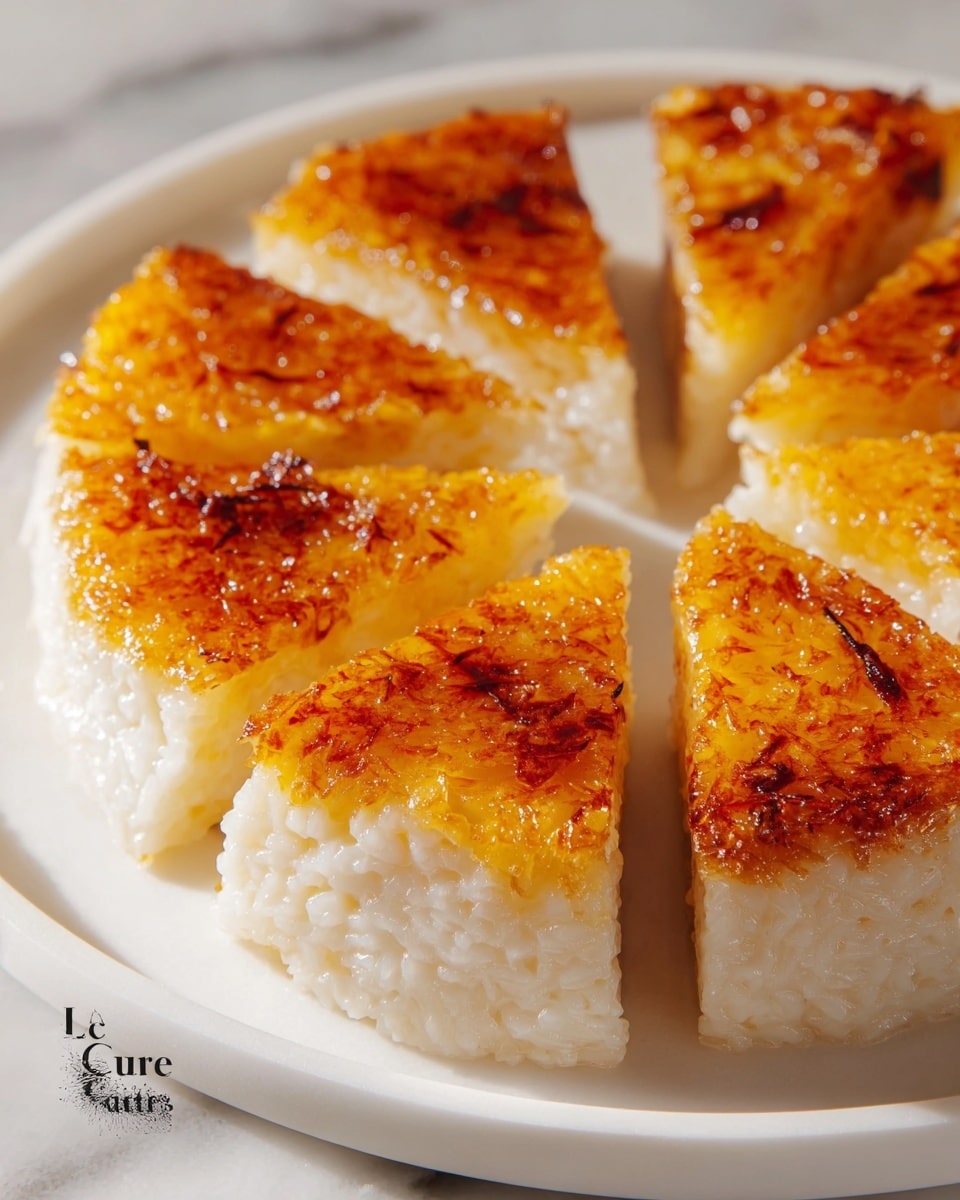
Sticky Coconut Cake Recipe
I never thought I’d find a Sticky Coconut Cake recipe easier than this—especially one that combines the rich creaminess of coconut milk with the chewy delight of glutinous rice flour. The moment it starts baking, your kitchen fills with an inviting tropical aroma that promises a textured, sticky-sweet treat. Get ready for a dessert that’s as unique in flavor as it is in its melt-in-the-mouth texture!
Why You’ll Love This Sticky Coconut Cake Recipe
- Irresistibly Rich Flavor: This cake features full-fat canned coconut milk and shredded sweetened coconut, bringing both creaminess and natural sweetness into every bite.
- Simple Ingredients: You’ll only need pantry staples like granulated sugar, eggs, glutinous rice flour, and vanilla extract to create this luscious dessert.
- Advanced Textural Delight: Thanks to a unique two-step baking and broiling process, this cake boasts a perfectly golden top with a satisfyingly sticky interior.
- Chilling Brings It Together: Letting it rest overnight in the fridge locks in flavors and ensures the cake sets with the ideal chewiness you’re craving.
- Generous Yield: With around 18 servings, this recipe is perfect for family gatherings or for sharing with friends who appreciate an exotic twist on classic cake.
Why This Sticky Coconut Cake Recipe Works
This Sticky Coconut Cake shines because it thoughtfully combines the richness of coconut milk with the sticky chewiness of glutinous rice flour. The recipe’s two-phase baking process—first baking then broiling—creates a beautifully caramelized crust, while brushing egg yolk on top gives the cake that irresistible glossy finish. Cooling and overnight chilling are crucial; they allow the cake’s texture to set perfectly, giving you slices that hold together but still deliver that signature stickiness with every forkful. Using only a few ingredients keeps it authentic and simple, yet impactful.
Ingredients You’ll Need
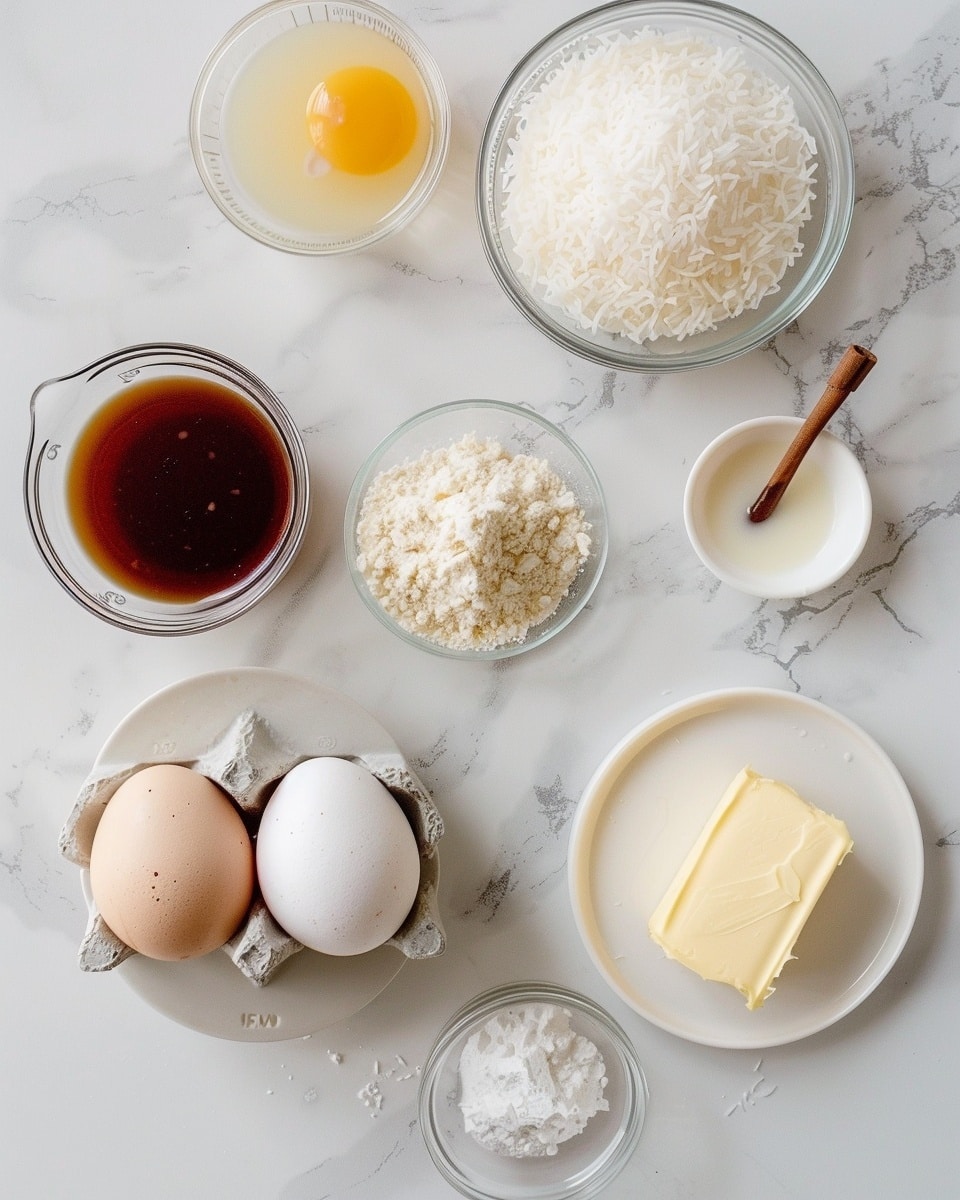
Gather these tropical-inspired ingredients that blend seamlessly to give you the sticky, sweet, and rich coconut cake you’ll adore.
- 2 eggs (separated): The egg whites help add lightness while the yolks create the beautiful golden glaze atop the cake.
- 1¼ cup granulated sugar: Sweetens the batter and caramelizes nicely during broiling for that golden finish.
- 2¼ cup full fat canned coconut milk: Brings creaminess and authentic coconut flavor that soaks into every bite.
- 3 cups shredded sweetened coconut: Adds texture and bursts of chewy sweetness throughout the cake.
- 1½ cup glutinous rice flour: Essential for the signature sticky and dense texture unique to this dessert.
- 1 teaspoon vanilla extract: A subtle flavor enhancer that rounds out the tropical coconut richness.
Ingredient Substitutions & Tips
- Shredded sweetened coconut: You can swap for unsweetened shredded coconut but add an extra 2 tablespoons of sugar to balance sweetness.
- Glutinous rice flour: Do not substitute with regular rice flour; it’s the key to that sticky, mochi-like texture.
- Coconut milk: Use full-fat canned for best richness; avoid light versions which can make the cake less creamy.
- Vanilla extract: Can be replaced with almond extract for a different but complementary flavor twist.
👨🍳 Pro Tips for Perfect Results
- Whisk egg whites until stiff peaks form to ensure the batter is light and airy before mixing.
- Keep a close eye while broiling because the top can brown from golden to burnt in minutes.
- Use an 8×8 inch baking pan for an even bake and perfect thickness.
- Don’t skip overnight chilling – it’s essential for the cake to set into that sticky texture everyone loves.
- Brush egg yolks evenly to get a gorgeous shiny, golden-buttery crust after broiling.
How to Make Sticky Coconut Cake Recipe
Step 1: Preheat Oven
Kick off by setting your oven to a toasty 350° F. This warm-up ensures an even and steady baking temperature that works magic on our cake’s unique texture.
💡 Pro Tip: Let the oven come to full heat before putting your cake in — patience here makes all the difference.
Step 2: Mix Ingredients
Begin by whisking the egg whites and granulated sugar together until they reach a glossy finish. Slowly pour in the coconut milk, shredded coconut, glutinous rice flour, and that fragrant splash of vanilla. Stir gently, making sure your batter is smooth with no coconut lumps lurking around. Expect a wonderfully thin and liquidy batter—as if it’s whispering, ‘This will be delicious.’
💡 Pro Tip: Use a spatula to fold in ingredients gently to keep the lightness from the egg whites.
Step 3: Bake Batter
Pour your luscious batter carefully into an 8×8-inch baking pan and slide it into the oven. The 350° F heat works its magic over these 45 minutes, transforming the liquid batter into a soft, sticky cake with delicious body.
💡 Pro Tip: For even baking, place the pan in the middle rack of your oven.
Step 4: Broil Topping
Here comes my secret: taking the cake out gently and brushing those precious egg yolks all over the top adds a slick finish. Switch your oven to broil, then keep a vigilant watch as the cake’s surface crisps and turns golden brown in about 5 to 10 minutes. This step creates an irresistible caramelized crown on your Sticky Coconut Cake.
💡 Pro Tip: Keep the oven door slightly ajar while broiling to prevent overheating and burning.
Step 5: Cool and Chill
Once out of the oven, place your cake pan on a wire rack and let it cool completely to room temperature. Then, cover it snugly with plastic wrap and pop it in the fridge overnight or for at least 8 hours. This patient chill is what sets the cake’s signature sticky texture, making it perfect for slicing into squares or triangles to serve cold or room temp.
💡 Pro Tip: Cutting the cake cold helps maintain clean edges and keeps the sticky texture intact.
Common Mistakes to Avoid
Learn from these common pitfalls:
- Skipping chilling time: Without that overnight rest, the cake won’t set properly and will be too soft to cut neatly.
- Over-broiling: Leaving the cake too long under the broiler can quickly burn the delicate coconut topping.
- Using regular rice flour: Avoid substituting glutinous rice flour, which is essential for the cake’s sticky chew.
- Not separating eggs: Whipping the whites separately is critical to achieve the right texture.
- Ignoring oven temperature: Baking at lower or higher temps alters the cake’s consistency and cooking time.
- Not mixing well: Lumps of coconut can spoil the texture, so ensure thorough blending.
Delicious Variations to Try
Once you’ve mastered the classic Sticky Coconut Cake recipe, why not experiment with these tasty twists to elevate your dessert game?
Matcha Coconut Cake
Add 1 to 2 teaspoons of matcha powder to the batter for an earthy, green tea flavor that contrasts beautifully with the sweetness of the coconut.
Chocolate Coconut Delight
Fold in half a cup of finely chopped dark chocolate or cocoa powder to introduce a rich chocolate undertone alongside the tropical coconut notes.
Mango Coconut Dream
Incorporate chopped ripe mangoes or swirl in some mango puree for a fresh, fruity lift that breathes new life into this Asian-inspired treat.
Nutty Coconut Crunch
Sprinkle toasted chopped almonds or macadamia nuts on top before broiling to add an irresistible crunch.
Classic Cheesecake Twist
Serve this alongside a creamy cheesecake for a festive dessert spread. Try pairing with our Best Cheesecake Recipe – Foodarohub for a rich, creamy complement or the tangy New York Cheesecake Recipe – Foodarohub for a classic flavor contrast.
How to Serve Sticky Coconut Cake Recipe
Garnishes
Fresh shredded coconut, a dusting of powdered sugar, or a drizzle of coconut cream bring an elegant finishing touch to your cake slices.
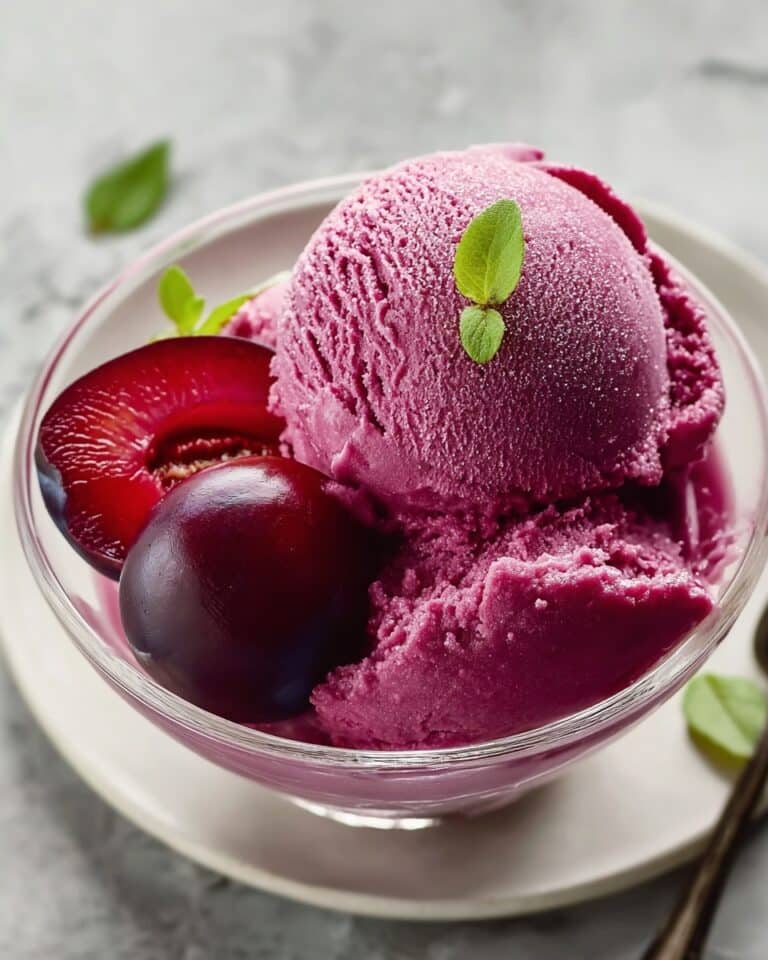
Side Dishes
Serve with tropical fresh fruit like pineapple or mango slices, or pair with a scoop of vanilla or coconut ice cream for an indulgent dessert experience.
Creative Ways to Present
Cut into neat squares or triangles and arrange on a wooden platter with edible flowers and toasted coconut flakes for a visually stunning dessert centerpiece perfect for gatherings.
Make Ahead and Storage
Make-Ahead Instructions
This cake is a dream to prepare ahead of time. Bake and broil as instructed, then chill overnight for effortless serving the next day.
Storage
Keep refrigerated covered tightly with plastic wrap or in an airtight container for up to 3 days to maintain freshness and moisture.
Freezing
Yes, you can freeze this cake! Wrap tightly in plastic wrap and foil, then freeze for up to 1 month. Thaw overnight in the fridge before serving.
Reheating
Enjoy at room temperature or give it a quick 10-15 second zap in the microwave to soften slightly without losing that famed sticky texture.
Expert Tips for Success
- Use full-fat coconut milk for optimal creaminess and richness.
- Ensure eggs are at room temperature for easier whipping and better integration.
- Carefully monitor broiling time for that perfect golden crust without burning.
- Mix batter gently but thoroughly to keep airiness without lumps.
- Chill sufficiently—this step is indispensable for the signature sticky texture.
- Slice cold with a sharp knife for tidy pieces that hold their shape.
- Experiment with toppings like toasted coconut or fresh fruit for added flair.
Frequently Asked Questions
Can I make this cake without glutinous rice flour?
Glutinous rice flour is key to the cake’s sticky texture, so it’s best not to substitute it. Regular rice flour won’t give the same chewy, dense consistency.
Why does the cake need to chill overnight?
Chilling allows the coconut milk and rice flour to set, giving the cake its signature sticky, dense texture that slices cleanly.
Can I use fresh coconut instead of shredded sweetened coconut?
Fresh coconut will alter the sweetness and texture. If using fresh, you might want to add a bit more sugar to compensate.
How do I store leftovers?
Store in an airtight container in the fridge for up to 3 days. For longer storage, freeze tightly wrapped.
Is this recipe suitable for vegetarians?
Yes! It contains no meat or gelatin and uses only vegetarian-friendly ingredients.
Can I bake this cake in a different sized pan?
Use an 8×8-inch pan for best results. Larger pans will make the cake thinner and may affect baking time and texture.
What’s the purpose of brushing egg yolks on top?
The egg yolks create a glossy, golden-brown crust when broiled, adding beautiful color and subtle richness to the cake’s top layer.
Final Thoughts
There’s something deeply satisfying about a dessert that feels both exotic and comforting, and this Sticky Coconut Cake hits that sweet spot beautifully. With its luscious coconut flavor, unique texture, and simple ingredient list, it has become a treasure in my recipe collection. Whether you slice it cold from the fridge or bring it to room temperature, every bite is a luscious, tender delight that’s sure to bring smiles all around. Dive in and savor each moment of making this cake—it’s a tropical treat worthy of your next gathering or quiet indulgence.
Related Recipes You’ll Love
If you enjoyed this recipe, you’ll also love these delicious recipes:
- Tropical Mango Cheesecake Recipe – Foodarohub – A luscious blend of creamy cheesecake and fruity mango that’s perfect for tropical dessert lovers craving a new favorite.
Sticky Coconut Cake Recipe
This Sticky Coconut Cake is a luscious, moist dessert featuring rich coconut milk, sweet shredded coconut, and a tender glutinous rice flour base. Perfectly broiled for a golden finish and served chilled, this cake offers a delightful tropical treat.
- Prep Time: 15 minutes
- Cook Time: 55 minutes
- Total Time: 9 hours 25 minutes
- Yield: 18 servings 1x
- Category: Dessert
- Method: Baking
- Cuisine: Asian-inspired
- Diet: Gluten Free
Ingredients
Ingredients
- 2 eggs (separated)
- 1¼ cup granulated sugar
- 2¼ cup full fat canned coconut milk
- 3 cups shredded sweetened coconut
- 1½ cup glutinous rice flour
- 1 teaspoon vanilla extract
Instructions
- Preheat Oven: Preheat oven to 350° F.
- Mix Ingredients: Whisk the egg whites and the sugar together in a medium bowl. Slowly mix in the coconut milk, shredded coconut, rice flour, and vanilla. Make sure that all the ingredients are well combined and that there are no lumps of coconut. The batter will be thin and liquidy.
- Bake Cake: Pour the batter into an 8×8-inch baking pan and bake it in the preheated 350° F oven for 45 minutes.
- Broil with Egg Yolks: Carefully take out the pan and brush the egg yolks on top of the cake. Set the oven to broil and broil the cake for 5-10 minutes. Keep a close eye on it, as it will brown quickly, and take it out when the turns golden brown.
- Cool and Chill: Set the cake in the pan on a wire rack to cool completely to room temperature. Then, place the cake in the pan, covered with plastic wrap, in the fridge overnight or for 8 hours before cutting and serving, to ensure that the cake has set. Cut cake into squares or triangles, and serve cold from the fridge or at room temperature.
Notes
- Keep a close eye while broiling as the cake will brown quickly.
- Chill the cake overnight or for 8 hours to allow it to set perfectly before serving.
Keywords: Sticky Coconut Cake, coconut dessert recipe, glutinous rice cake, tropical cake, baked coconut cake


