
No-Bake Japanese Spicy Tuna Crispy Rice Bites Recipe
Picture this: the sizzling sound of golden rice crisps hitting a hot pan, the tantalizing aroma of toasted sesame, and the creamy, spicy tuna just waiting to crown each perfect bite. These No-Bake Japanese Spicy Tuna Crispy Rice Bites Recipe transform simple ingredients into an appetizer that’s as exciting to make as it is to eat—a mouthwatering fusion that will captivate your senses and wow your guests.
Why You’ll Love This No-Bake Japanese Spicy Tuna Crispy Rice Bites Recipe
- Bold Flavor Explosion: The creamy Japanese mayo combined with a spicy kick of sriracha perfectly complements the delicate sushi-grade tuna, creating a taste that’s unforgettable.
- Simple Ingredients: This recipe uses everyday pantry staples—sushi rice, rice vinegar, green onions, and toasted sesame seeds—making it accessible for any home cook.
- Ideal for Entertaining: With hands-on prep around 30 minutes and just 6 minutes of crisping, these bites come together beautifully without keeping you tied to the kitchen.
- Impressive Presentation: The crisp, golden edges of the sushi rice bites with a luscious dollop of spicy tuna on top make for an eye-catching appetizer that looks straight out of a gourmet restaurant.
- Customizable Spice Level: Whether you like it mild or fiery, adjust the sriracha from 1 to 2 tablespoons to tailor the heat exactly to your liking.
Why This No-Bake Japanese Spicy Tuna Crispy Rice Bites Recipe Works
The magic behind this recipe lies in key techniques like perfectly seasoning the sushi rice with rice vinegar, which adds a subtle tang and sticky texture ideal for forming the rice bites. Creating the spicy tuna mixture combines tender, fresh sushi-grade tuna with creamy Japanese mayonnaise and a balanced splash of soy sauce and sriracha, melding smoothness with heat. The final step of crisping the rice bites in hot oil until golden ensures a delightful crunch that contrasts beautifully with the creamy topping, making each bite a delightful harmony of textures.
Ingredients You’ll Need
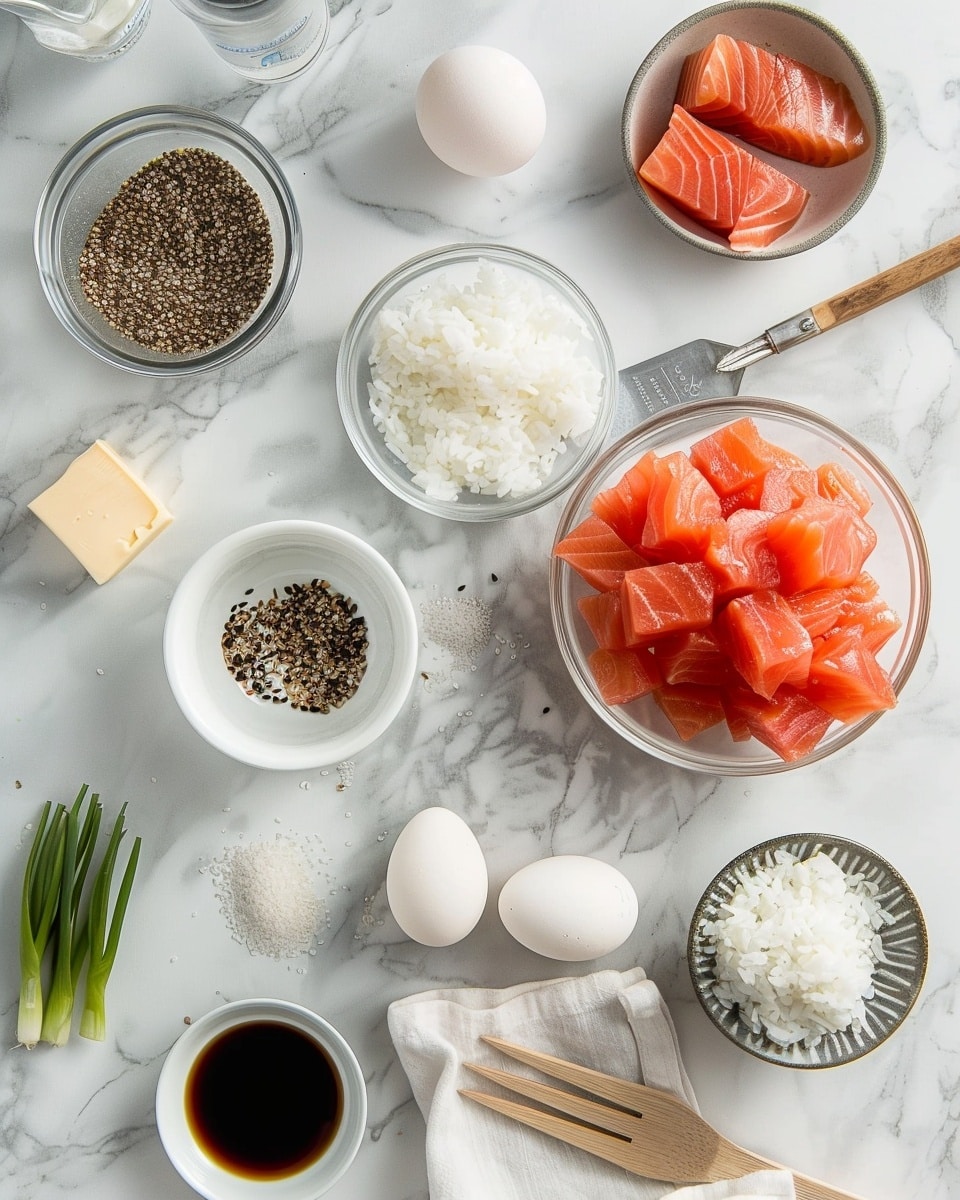
Gather a colorful palette of fresh and pantry ingredients that tell a story of vibrant Japanese flavors in every bite.
- 2 cups cooked sushi rice (400g): The sticky foundation that forms the crispy bites.
- 2 tbsp rice vinegar (30 ml): Adds a gentle tang and shine to the rice.
- 6 oz sushi-grade fresh tuna, finely diced (170g): The star protein, fresh and tender.
- 3 tbsp Japanese mayonnaise (45 ml): Creaminess that binds the tuna and spices.
- 1–2 tbsp sriracha (15–30 ml), adjust to taste: The spicy spark that awakens the palate.
- 2 green onions, thinly sliced: A fresh, mild onion crunch to brighten flavors.
- 1 tbsp toasted sesame seeds (9g): Nutty aroma and subtle crunch.
- 1 tsp soy sauce (5 ml): Depth and umami to the spicy tuna mix.
- Vegetable or canola oil for frying: For crisping the rice bites perfectly golden.
Ingredient Substitutions & Tips
- Sushi-grade tuna: Can be swapped for sashimi-grade salmon or cooked shrimp for a different but equally delicious twist.
- Japanese mayonnaise: If you don’t have Kewpie mayo, a good quality mayo mixed with a little rice vinegar can work well.
- Sriracha: Adjust spiciness by using less or swap for a milder chili sauce if preferred.
- Rice vinegar: White vinegar is a decent substitute, but the distinct mild sweetness of rice vinegar is best.
👨🍳 Pro Tips for Perfect Results
- Use freshly cooked sushi rice: Warm rice absorbs the rice vinegar better, giving it that classic sticky texture.
- Wet your hands when shaping: This prevents the rice from sticking and helps form neat, compact shapes.
- Fry over medium-high heat: Ensures crispy edges without burning before the rice is cooked through.
- Refrigerate tuna mixture: Letting it chill enhances flavor melding and helps it firm up slightly for easier assembly.
- Don’t overcrowd the pan: Fry rice bites in batches for even crispiness on all sides.
How to Make No-Bake Japanese Spicy Tuna Crispy Rice Bites Recipe
Step 1: Cook and Season the Rice (20 minutes)
Begin by rinsing 1 cup of sushi rice under cold water until the water runs clear—this washes away excess starch for a perfect texture. Cook the rice following package directions, typically around 15 minutes. While the rice is still warm, gently fold in 2 tablespoons of rice vinegar, infusing it with subtle tang and shine. Spread the rice out to cool to room temperature or refrigerate for 15 minutes to help it firm up, which makes shaping much easier.
💡 Pro Tip: Cooling the rice before shaping helps create rice bites that hold their shape while frying.
Step 2: Prepare the Spicy Tuna Mix (10 minutes)
In a mixing bowl, combine 6 ounces of finely diced sushi-grade tuna with 3 tablespoons Japanese mayonnaise, 1 to 2 tablespoons sriracha adjusted to your heat preference, 1 teaspoon soy sauce, the delicate crunch of sliced green onions, and 1 tablespoon toasted sesame seeds. Stir gently to blend all the flavors without breaking up the tuna pieces. Cover the bowl and refrigerate to let the flavors harmonize while you prepare the rice bites.
💡 Pro Tip: Refrigerate this mixture to let the heat mellow and the flavors marry wonderfully.
Step 3: Shape the Rice Bites (10 minutes)
Wet your hands with water to keep the sushi rice from sticking. Scoop about 2 tablespoons of rice and press it firmly into compact rectangular or oval shapes around 2 inches long and 1 inch wide. Place each formed rice bite on a parchment-lined tray. Repeat until all the rice is shaped, creating a tempting army of golden potential.
💡 Pro Tip: Press firmly but gently to avoid squashing the grains.
Step 4: Crisp the Rice Bites (6-8 minutes)
Heat 2 to 3 tablespoons of vegetable oil in a non-stick skillet over medium-high heat. Carefully place the rice bites into the hot oil, spacing them so each side crisps evenly. Press down gently with a spatula to encourage contact with the pan. Cook undisturbed for 3 to 4 minutes, watching for that beautiful golden crust to form. Flip each bite and crisp the other side for about 3 minutes. Drain the crispy rice bites on paper towels to remove excess oil.
💡 Pro Tip: Resist flipping too soon; a good crust takes time to develop.
Step 5: Assemble and Serve (5 minutes)
Top each crispy rice base with about 1 tablespoon of your chilled spicy tuna mixture. Garnish with extra sliced green onions, a drizzle of sriracha for flair, or extra toasted sesame seeds for crunch. Serve immediately to delight in the crispy, creamy, and spicy layers coming alive in every bite.
💡 Pro Tip: Serve fresh for the ultimate contrast between crisp rice and cool tuna.
Common Mistakes to Avoid
Learn from these common pitfalls:
- Using regular rice: Sushi rice’s sticky texture is crucial—avoid substituting with long-grain or basmati.
- Not seasoning rice properly: Skipping rice vinegar leads to bland rice bites lacking the classic sushi tang.
- Overhandling the tuna: Dicing too roughly or mixing too vigorously can mush the delicate fish.
- Frying at too high heat: Rice bites can burn on the outside before crisping through.
- Skipping the chilling step: Both rice and tuna mixtures benefit from resting to improve texture and flavor melding.
- Assembling too early and storing: This causes sogginess; serve promptly after assembly.
Delicious Variations to Try
Once you’ve mastered the classic No-Bake Japanese Spicy Tuna Crispy Rice Bites Recipe, why not experiment with some exciting twists?
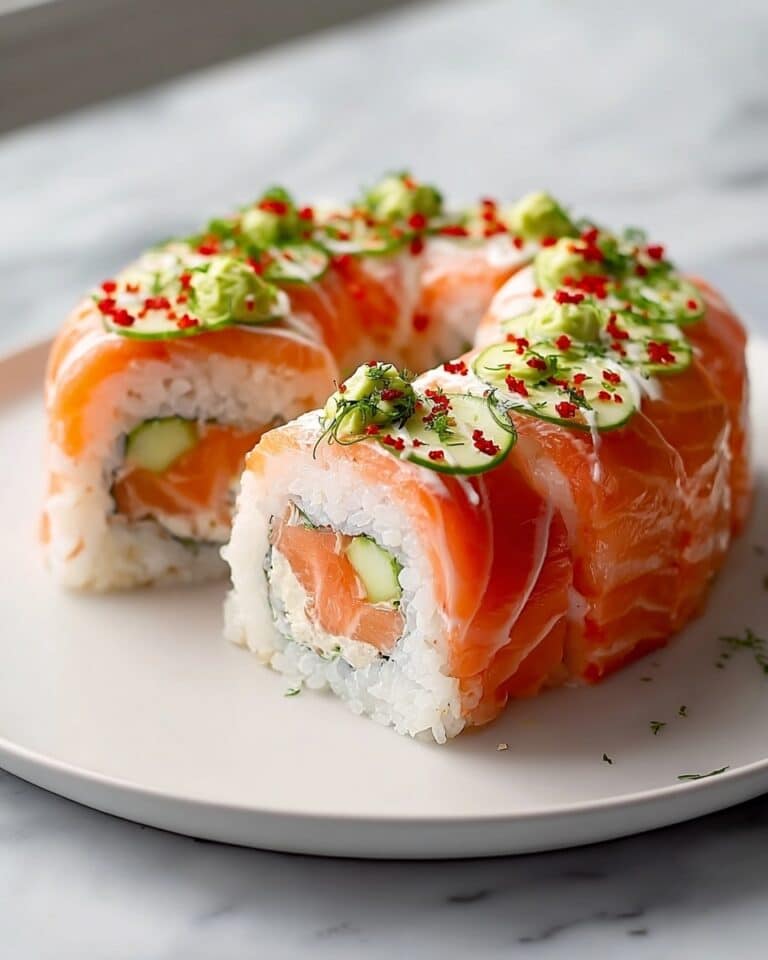
Spicy Salmon Crispy Rice
Swap out the tuna for fresh salmon, diced and mixed with Japanese mayo and chili sauce for a slightly sweeter, rich flavor that’s just as addictive.
Avocado and Cucumber Topping
For a vegetarian spin, top crispy rice with mashed avocado mixed with soy sauce and freshly diced cucumber for crunch and freshness.
Soy-Ginger Glazed Rice Bites
Brush the rice bites with a warm soy-ginger glaze after frying to add a shiny, sweet-savory layer that pairs beautifully with the spicy tuna.
Crispy Rice with Tempura Shrimp
Add a cooked tempura shrimp on top of each rice bite, then dollop spicy mayo for a crispy, crunchy delight.
Try Our Cheesy Fried Rice Balls with Broccoli Recipe
If you love crispy rice treats, try our savory Cheesy Fried Rice Balls with Broccoli Recipe for a comforting American twist packed with cheese and veggies.
How to Serve No-Bake Japanese Spicy Tuna Crispy Rice Bites Recipe

Garnishes
Enhance presentation and flavor with extra thinly sliced green onions, delicate nori strips, or a sprinkle of toasted sesame seeds. A drizzle of sriracha or a tiny dot of wasabi mayo adds extra zing for spice lovers.
Side Dishes
Pair these crispy bites with light, refreshing sides such as a crisp seaweed salad or a simple cucumber sunomono. Offering Asian-inspired sides keeps the theme elegant and balanced. For something crunchy and fresh, serve alongside Fresh Spring Roll Lettuce Cups with Creamy Peanut Sauce—they complement each other wonderfully.
Creative Ways to Present
Arrange the crispy rice bites on a sleek platter lined with banana leaves or a rustic wooden board for an authentic touch. Serve with small dipping bowls of soy sauce or extra spicy mayo on the side for guests to customize their experience.
Make Ahead and Storage
Make-Ahead Instructions
Cook and season the sushi rice ahead of time; refrigerate it to firm up and shape it just before frying. Prepare the spicy tuna mixture up to a day in advance, ensuring it stays tightly covered in the fridge for freshness.
Storage
Store any leftover spicy tuna mixture in an airtight container in the refrigerator for up to 24 hours. The rice bites, once fried and cooled, are best eaten fresh but can be refrigerated separately for up to a day.
Freezing
Freezing is not recommended for this recipe as the rice texture and tuna freshness suffer. For best quality, enjoy fresh.
Reheating
To re-crisp leftover rice bites, gently warm them in a skillet over medium heat for a few minutes on each side. Avoid microwaving as this softens the crispy exterior.
Expert Tips for Success
- Use sushi-grade tuna only: It’s essential for safety and that melt-in-your-mouth texture.
- Keep your hands moist: When shaping rice, this keeps everything neat and prevents sticking.
- Rest the spicy tuna mix: Letting it sit in the refrigerator allows flavors to harmonize perfectly.
- Maintain medium-high heat for frying: It’s the sweet spot for crisp rice without burning.
- Serve immediately after assembly: The contrast between crispy rice and creamy tuna is at its best fresh.
- Adjust sriracha gradually: Start with less and add more if you like it hot.
- Use a non-stick skillet: This helps achieve a perfect crust without sticking or tearing.
Frequently Asked Questions
Can I use cooked tuna instead of sushi-grade raw tuna?
For safety and authentic flavor, sushi-grade raw tuna is recommended. Cooked tuna can be used but will give a different texture and flavor.
Why do I need to season the rice with rice vinegar?
Rice vinegar adds a classic slight tang and sweetness that balances the richness of the tuna and helps the rice hold together.
Can I make this recipe vegan or vegetarian?
Yes! You can substitute the spicy tuna mix with a spicy avocado mash or seasoned tofu for a delicious vegetarian alternative.
How spicy is this recipe?
The heat level depends on the amount of sriracha you use. Start with 1 tablespoon for mild spice and increase up to 2 tablespoons for a fiery kick.
What’s the best way to crisp the rice without deep-frying?
The recipe’s stovetop pan-frying with a small amount of oil crisps the rice nicely and is easier than deep-frying while still delivering great texture.
Can I prepare the rice bites in advance?
You can shape them ahead and refrigerate, but it’s best to fry just before serving to retain the signature crispy texture.
What should I serve with these spicy tuna crispy rice bites?
Light Asian-inspired sides or fresh salads work beautifully, and pairing with fresh lettuce cups or fried rice balls provides a nice variety of textures and flavors.
Final Thoughts
This No-Bake Japanese Spicy Tuna Crispy Rice Bites Recipe is a joy to make and even more delightful to share. The playful crunch of golden rice paired with creamy, spicy tuna topping creates an appetizer that feels like a celebration in every bite. It’s approachable yet impressive, inviting you to explore Japanese flavors from your own kitchen with confidence and warmth. Give it a try, and let these little bites bring big smiles to your table!
Related Recipes You’ll Love
If you enjoyed this recipe, you’ll also love these delicious recipes:
- Mediterranean Mezze Tapas Platter Recipe – Foodarohub – A vibrant assortment of Mediterranean delights, perfect for sharing and complementing any appetizer spread.
No-Bake Japanese Spicy Tuna Crispy Rice Bites Recipe

These No-Bake Japanese Spicy Tuna Crispy Rice Bites combine tender sushi rice with a flavorful spicy tuna topping for a delightful appetizer that’s both crispy and creamy.
- Prep Time: 30 minutes
- Cook Time: 6 minutes
- Total Time: 51 minutes
- Yield: 12 servings 1x
- Category: Appetizer
- Method: Frying
- Cuisine: Japanese
- Diet: Gluten Free
Ingredients
Rice
- 2 cups cooked sushi rice (400g)
- 2 tbsp rice vinegar (30 ml)
- Vegetable or canola oil for frying
Spicy Tuna Mix
- 6 oz sushi-grade fresh tuna, finely diced (170g)
- 3 tbsp Japanese mayonnaise (45 ml)
- 1–2 tbsp sriracha (15–30 ml), adjust to taste
- 2 green onions, thinly sliced
- 1 tbsp toasted sesame seeds (9g)
- 1 tsp soy sauce (5 ml)
Instructions
- Cook and Season the Rice (20 minutes): Rinse 1 cup sushi rice under cold water until clear, cook according to package instructions (~15 minutes). Transfer to a bowl and fold in 2 tbsp rice vinegar while warm. Spread out to cool to room temperature or refrigerate 15 minutes to firm up.
- Prepare the Spicy Tuna Mix (10 minutes): In a bowl, combine 6 oz finely diced sushi-grade tuna, 3 tbsp Japanese mayo, 1–2 tbsp sriracha, 1 tsp soy sauce, sliced green onions, and 1 tbsp toasted sesame seeds. Mix gently, cover, and refrigerate to let flavors meld.
- Shape the Rice Bites (10 minutes): Wet hands to prevent sticking. Scoop about 2 tbsp sushi rice and press into compact rectangular or oval shapes (~2 inches long, 1 inch wide). Place on parchment-lined tray and repeat.
- Crisp the Rice Bites (6-8 minutes): Heat 2–3 tbsp vegetable oil in a non-stick skillet over medium-high heat. Place rice bites spaced apart, press gently with spatula. Cook undisturbed 3-4 minutes until golden and crispy. Flip and crisp other side 3 minutes. Drain on paper towels.
- Assemble and Serve (5 minutes): Spoon about 1 tbsp spicy tuna mixture on each crispy rice bite. Garnish with extra green onions, sriracha drizzle, or toasted sesame seeds if desired. Serve immediately.
Notes
- Adjust sriracha quantity to taste for desired spiciness.
- Refrigerating rice helps it firm up and hold shape better.
- Wet hands before shaping rice to prevent sticking.
- Serve immediately for best texture.
Keywords: spicy tuna crispy rice bites, Japanese appetizer, no-bake sushi recipe, sushi rice bites, easy spicy tuna recipe


