
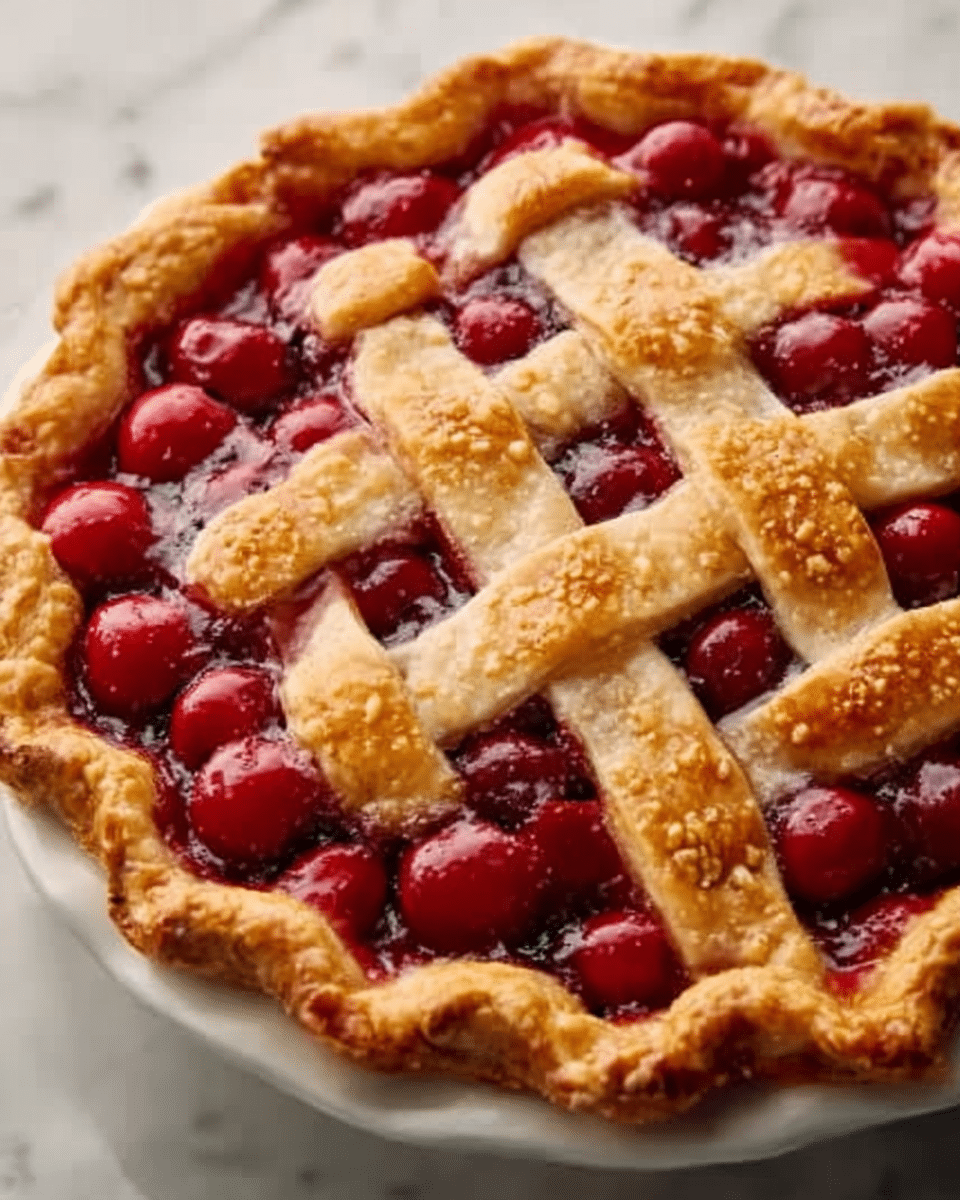
Old-Fashioned Poor Man’s Cherry Pie Recipe
I never thought I’d find an Old-Fashioned Poor Man’s Cherry Pie Recipe easier than this one—just imagine sinking your fork into a golden, flaky crust, bursting with juicy, sweet cherry filling that’s been kissed with a hint of vanilla and brightened by lemon juice. The aroma alone will transport you back to cozy family gatherings, filling your kitchen with warmth and nostalgia.
Why You’ll Love This Old-Fashioned Poor Man’s Cherry Pie Recipe
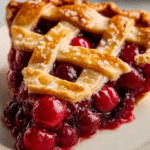
- Classic Comfort in Every Bite: This recipe delivers that perfect balance of tart cherries and sweet, luscious filling wrapped in a buttery, flaky crust.
- Simple Ingredients: Using pantry staples like sugar, flour, and a single pie crust makes this recipe accessible and budget-friendly, yet remarkably delicious.
- Perfect for Any Occasion: Whether you’re hosting a Sunday dinner or craving a cozy treat, this pie fits effortlessly into your plans without fuss.
- Inviting Presentation: The option to top with a second crust or a lattice weave gives you a charming, homemade look that impresses every time.
- Flexible and Personalizable: Easily swap fresh or canned cherries and add a buttery dotting on top to create your own signature touch for this timeless dessert.
Why This Old-Fashioned Poor Man’s Cherry Pie Recipe Works
This recipe shines because it embraces classic baking methods that bring out the best in simple ingredients. The cherry filling is thickened perfectly with just two tablespoons of flour, ensuring a luscious, clingy texture without being gluey. Combining lemon juice and vanilla extract elevates the cherries’ natural brightness and warmth, layering flavor beautifully. Baking at a high temperature of 425°F allows the crust to become crisp and golden, sealing in the juicy filling and creating that perfect contrast between tender fruit and flaky pastry.
Ingredients You’ll Need

Gather your all-time favorite pie components and a burst of summertime cherries, whether fresh from the market or from the pantry, to create this irresistible Old-Fashioned Poor Man’s Cherry Pie Recipe.
- 1 pie crust (homemade or store-bought): The golden base for all the cherry goodness, ready to flake and crisp beautifully.
- 2 cups cherries (pitted, fresh or canned): Juicy and vibrant, these provide the bold fruity star of the show.
- 1 cup sugar: Sweetens the cherries just right, balancing their natural tartness.
- 2 tablespoons flour: The magic thickener that holds everything together without a gummy texture.
- 1 tablespoon lemon juice: Adds a refreshing brightness that lifts the filling.
- 1 teaspoon vanilla extract: A warm, comforting note that enriches the cherry flavor.
- 1 tablespoon butter (for topping): Dotted on top for extra richness and a delicate finish.
- 1 egg (for egg wash, optional): Brushed on the crust for a shiny, golden glaze.
Ingredient Substitutions & Tips
- Pie crust: Use a store-bought crust for convenience or homemade for extra crispness and flavor.
- Cherries: Opt for frozen if fresh are out of season, just make sure to thaw and drain excess liquid.
- Sugar: Try brown sugar for a deeper, caramel-like note.
- Butter: Use vegan butter to keep this recipe dairy-free if needed, and the crust still bakes beautifully.
👨🍳 Pro Tips for Perfect Results
- Tip 1: Always preheat your oven fully to 425°F before baking to ensure the crust crisps up nicely.
- Tip 2: Pit cherries carefully to avoid any bitterness seeping into the filling.
- Tip 3: Use an egg wash lightly on the top crust for a beautiful golden finish that shines.
- Tip 4: Let your pie rest and cool completely before slicing to allow the filling to set perfectly.
- Tip 5: Experiment with lattice topping for an elegant twist that also lets the filling peek through.
How to Make Old-Fashioned Poor Man’s Cherry Pie Recipe
Step 1: Preheat the Oven
First things first, set your oven to a sizzling 425°F (220°C). This high heat jump-starts that flaky crust magic, giving it a golden crisp you’ll love.
💡 Pro Tip: Use an oven thermometer if you have one — oven temperatures can be tricky!
Step 2: Mix the Cherry Filling
In a big mixing bowl, combine 2 cups of pitted cherries with sugar, flour, lemon juice, and a splash of vanilla extract. Stir it gently, folding the ingredients together to maintain juicy chunks that sing with flavor.
💡 Pro Tip: Taste your filling here; adjust sugar if you prefer a sweeter or tarter pie.
Step 3: Prepare the Pie Crust
Roll out your pie crust and gently press it into your pie dish, making sure it hugs every curve. This forms a sturdy yet tender shell for your cherry treasure.
💡 Pro Tip: Chill your crust in the fridge before filling for firmer handling!
Step 4: Add the Cherry Mixture
Pour your vibrant cherry filling into the crust, spreading it evenly. Dot the surface with small pieces of butter; these melt down to rich pockets of flavor in the bake.
💡 Pro Tip: Distribute butter evenly for the best buttery touch in every bite.
Step 5: Top It Off
Roll out a second crust for the top or craft a lattice with strips of dough for that classic look. This protective layer seals in all the juicy goodness.
💡 Pro Tip: Don’t forget to cut steam vents if using a solid top crust to prevent bubbling over.
Step 6: Egg Wash for Shine
Brush the top crust with a beaten egg to give your pie that irresistible golden glaze sure to catch the eye before that first bite.
💡 Pro Tip: A light brush is enough; too much egg can cause the crust to burn.
Step 7: Bake to Perfection
Slide your pie into the preheated oven and bake for 30 to 35 minutes. Keep an eye on the crust’s edges, turning a gorgeous golden brown as the filling bubbles invitingly beneath.
💡 Pro Tip: Cover edges with foil halfway through baking if they brown too quickly.
Step 8: Cool Before Serving
Allow the pie to cool completely after baking. This resting period gives the filling time to thicken beautifully, making slicing neat and easy.
💡 Pro Tip: Patience pays off here — warm pie tends to be a little too juicy for perfect slices.
Common Mistakes to Avoid
Learn from these common pitfalls:
- Overfilling the Pie: Too much filling can cause spills and soggy crust.
- Skipping the Flour Thickener: Without it, your pie filling might be runny and not set properly.
- Incorrect Oven Temp: Baking at too low a temperature results in a pale, soft crust.
- Not Venting the Crust: Failing to let steam escape can create a messy pie with bubbling over.
- Cutting the Pie Too Soon: Slicing before cooling may cause the filling to ooze out.
- Forgetting to Butter the Filling: Butter adds richness and a lovely finish to the filling’s surface.
Delicious Variations to Try
Once you’ve mastered the classic Old-Fashioned Poor Man’s Cherry Pie Recipe, here are some ideas to keep the magic going:
Almond Cherry Twist
Add a teaspoon of almond extract to the cherry filling for a nutty depth that complements the tartness beautifully.
Mixed Berry Medley
Swap half the cherries for blueberries or raspberries to create a colorful, vibrant filling bursting with summer flavors.
Honey-Sweetened Pie
Replace sugar with natural honey for a floral, less processed sweetness that pairs wonderfully with the lemon juice.
Gluten-Free Crust
Use your favorite gluten-free pie dough to keep this a friendly treat for sensitive stomachs without compromising flavor or texture.
Mini Cherry Hand Pies
Transform this filling into adorable handheld pies — perfect for picnics or lunchboxes. For a similar fruit treat, try our Mini Fruit Tarts with Vanilla Pudding and Fresh Fruit Recipe.
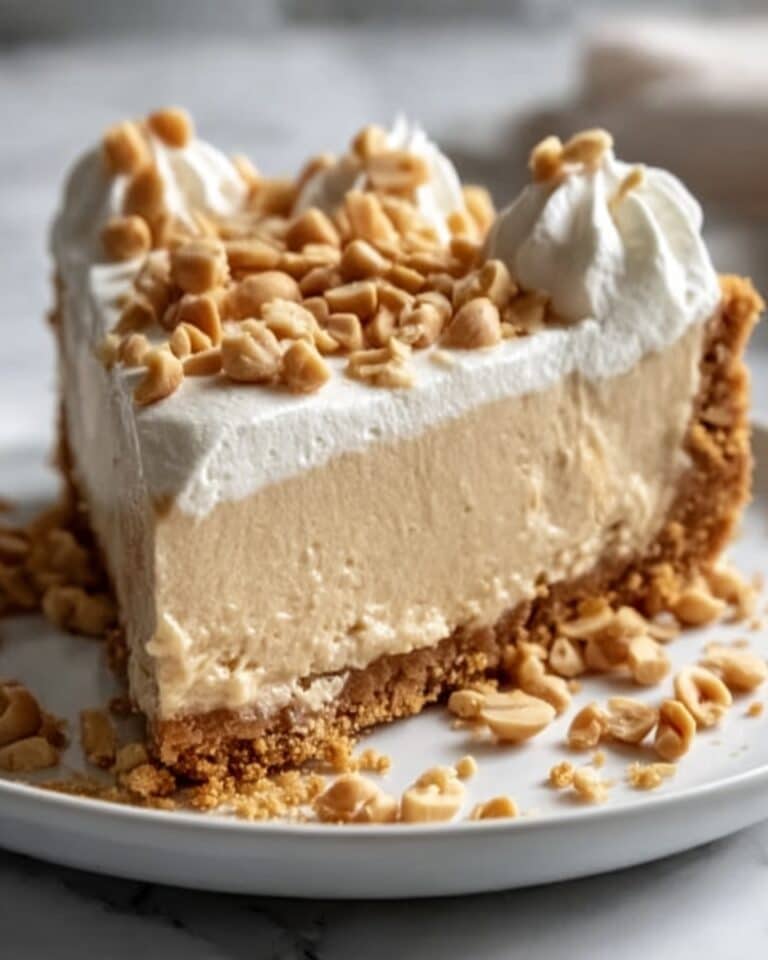
No-Bake Cherry Cheesecake Parfaits
Use leftover cherry pie filling layered with creamy cheesecake for an easy dessert alternative. Check out our No-Bake Cheesecake Parfaits with Cherry Pie Filling Recipe for inspiration.
How to Serve Old-Fashioned Poor Man’s Cherry Pie Recipe
Garnishes
Top your pie slices with a dollop of whipped cream or a scoop of vanilla ice cream to add a creamy contrast to the tart cherries.
Side Dishes
Serve alongside a warm cup of freshly brewed coffee or black tea to complement the pie’s sweet and tangy flavors.
Creative Ways to Present
Present your pie slices on rustic wooden boards or bright ceramic plates to showcase the pie’s inviting golden crust and ruby filling. For an extra festive touch, sprinkle powdered sugar lightly over the top before serving.
Make Ahead and Storage
Make-Ahead Instructions
You can prepare the cherry filling and crust separately a day in advance. Store the filling tightly covered in the fridge and assemble just before baking.
Storage
Keep leftover pie tightly wrapped in the refrigerator for up to 3 days to maintain freshness and flavor.
Freezing
This pie freezes well; wrap tightly in plastic wrap and foil, then freeze for up to 2 months. Thaw overnight in the fridge before reheating.
Reheating
Warm slices gently in a 350°F oven for about 10 minutes to restore crispness and melt any chilled butter pockets back into silky goodness.
Expert Tips for Success
- Use fresh or quality canned cherries for best flavor.
- Always pit cherries to avoid bitter bites.
- Roll pie dough evenly for uniform baking.
- Apply egg wash sparingly to avoid burning the crust.
- Cover crust edges during baking if they brown too fast.
- Let the pie cool fully to set the filling before slicing.
- Taste filling mixture and adjust sweetness before baking.
Frequently Asked Questions
Can I use frozen cherries instead of fresh?
Yes! Just make sure to thaw and drain them well to prevent a watery filling.
Is it necessary to use lemon juice?
Absolutely — lemon juice brightens the cherry flavors and balances their sweetness wonderfully.
Can I make this pie without a second crust?
Yes, an open-faced pie or crumb topping works, but a top crust or lattice helps seal juicy filling and adds classic charm.
How do I prevent the crust from getting soggy?
Precook or chill the crust before filling, use thickening agents like flour as in this recipe, and bake at a high temperature to crisp the edges.
Can I prepare this pie ahead of time?
You can assemble it beforehand and refrigerate, then bake when ready to serve for fresher crust results.
What’s the best way to store leftover pie?
Keep leftovers covered in the fridge for up to three days, and reheat before serving for best texture and flavor.
Can I add spices like cinnamon or nutmeg?
Absolutely! A pinch of warm spices can enhance the cherry filling’s flavor if you want a little extra warmth.
Final Thoughts
This Old-Fashioned Poor Man’s Cherry Pie Recipe brings together the charm of homemade baking and the comfort of simple ingredients, wrapping it all up in a flaky, buttery crust that shouts warm hospitality. It’s perfect for family dinners, celebrations, or whenever your heart craves a slice of sweet nostalgia. I hope you find joy in every bite, just as I have every time I bake this classic dessert. Happy pie-making!
Related Recipes You’ll Love
If you enjoyed this recipe, you’ll also love these delicious recipes:
- Mini Fruit Tarts with Vanilla Pudding and Fresh Fruit Recipe – Foodarohub – Light and colorful fruit tarts perfect for showcasing fresh seasonal bounty with creamy vanilla pudding.
- No-Bake Cheesecake Parfaits with Cherry Pie Filling Recipe – Foodarohub – Effortless layered cheesecake parfaits featuring luscious cherry pie filling, great for a quick no-bake treat.
Related Recipes You’ll Love
If you enjoyed this recipe, you’ll also love these delicious recipes:
- Fresh Strawberry Pie with Whipped Cream Recipe – Foodarohub – A bright, summery pie bursting with fresh strawberries and topped with fluffy whipped cream for pure delight.
Old-Fashioned Poor Man’s Cherry Pie Recipe
This Old-Fashioned Poor Man’s Cherry Pie is a classic, easy-to-make dessert featuring a sweet cherry filling and a buttery crust, perfect for any occasion.
- Prep Time: 20 minutes
- Cook Time: 35 minutes
- Total Time: 1 hour 15 minutes
- Yield: 8 servings 1x
- Category: Dessert
- Method: Baking
- Cuisine: American
- Diet: Vegetarian
Ingredients
Pie
- 1 pie crust (homemade or store-bought)
- 2 cups cherries (pitted, fresh or canned)
- 1 cup sugar
- 2 tablespoons flour
- 1 tablespoon lemon juice
- 1 teaspoon vanilla extract
- 1 tablespoon butter (for topping)
- 1 egg (for egg wash, optional)
Instructions
- Preheat your oven to 425°F (220°C).
- Combine the cherries, sugar, flour, lemon juice, and vanilla extract in a mixing bowl.
- Roll out the pie crust and place it into your pie dish.
- Pour the cherry mixture into the crust and dot with butter.
- Roll out a second pie crust for the top or create a lattice design.
- Brush the top crust with beaten egg for a glossy finish.
- Bake in the preheated oven for 30 to 35 minutes.
- Allow the pie to cool before slicing.
Notes
- Brushing the top crust with beaten egg creates a glossy finish.
- Allow the pie to cool before slicing for better serving.
Keywords: cherry pie, old-fashioned cherry pie, easy cherry pie, homemade pie, fruit pie
