
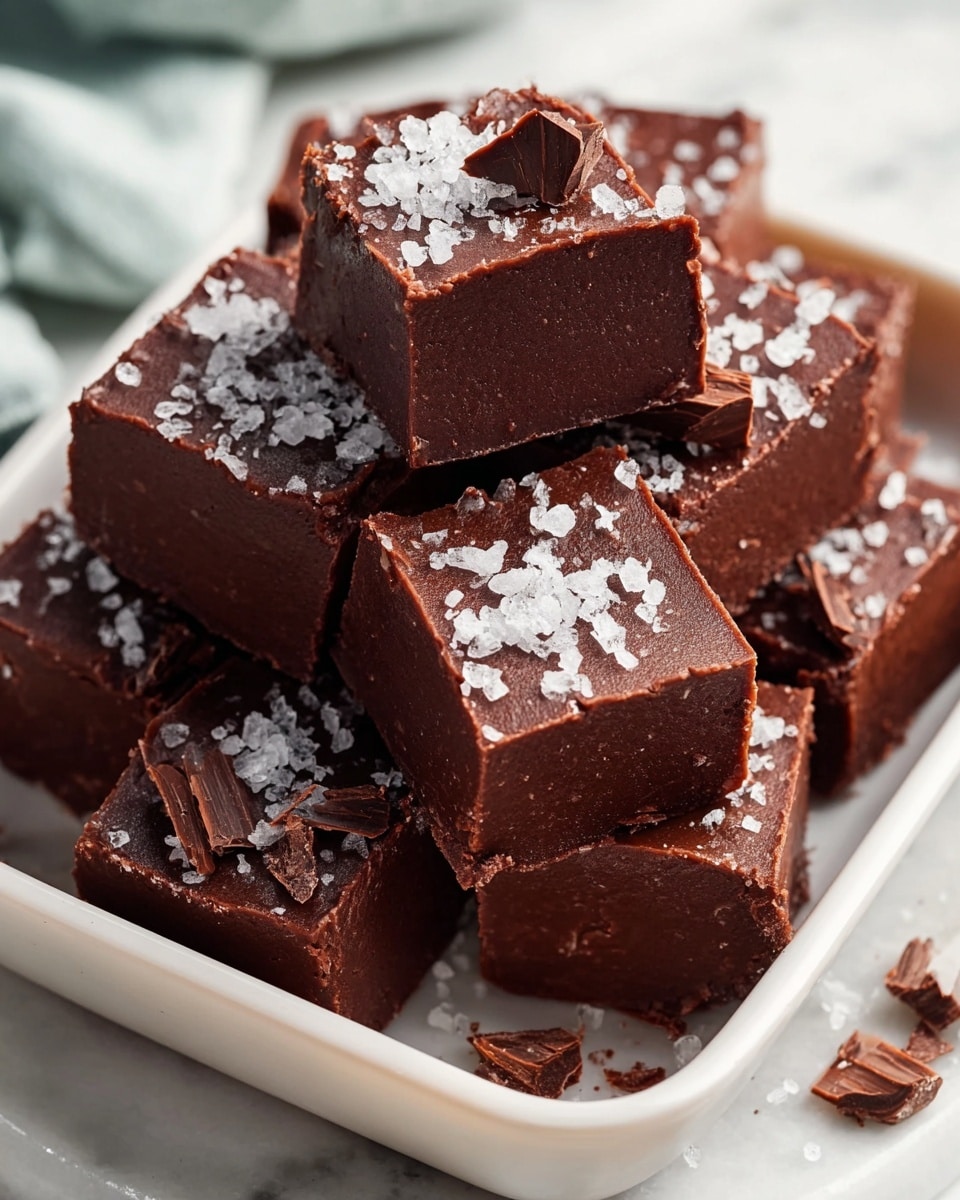
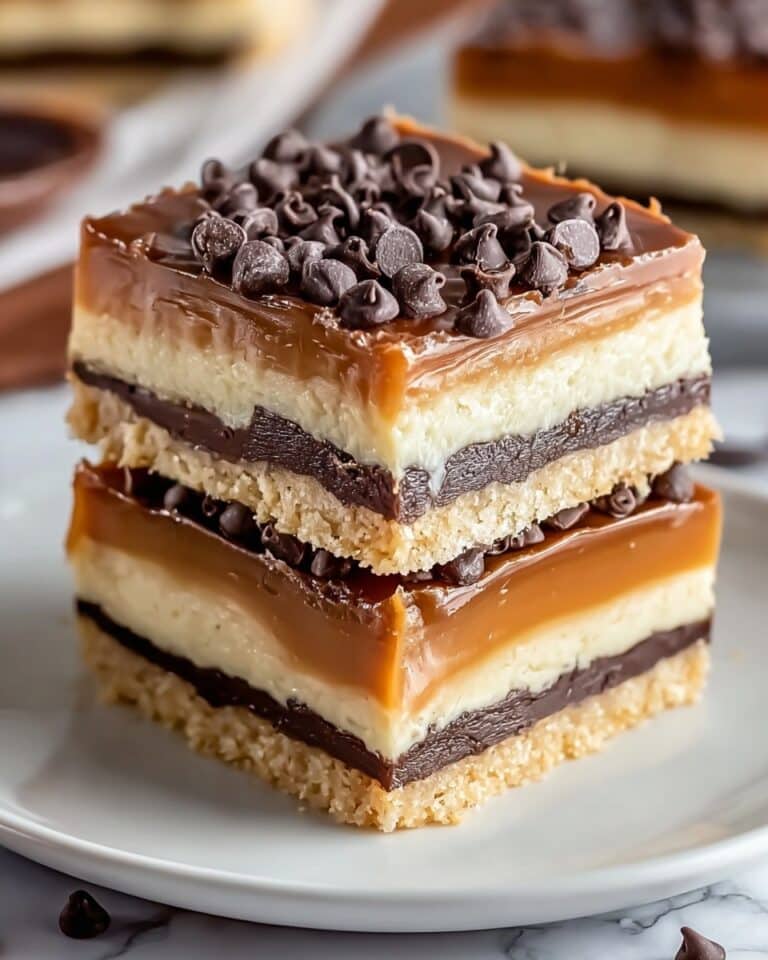
Old-Time Fudge Recipe
I never thought I’d find an Old-Time Fudge recipe easier than this one, yet here we are, with a batch of rich, creamy chocolate fudge that practically melts in your mouth. The moment you start stirring the cocoa and sugar with whole milk, your kitchen fills with that nostalgic aroma that instantly transports you to cozy family gatherings and sweet holiday moments. If you’re craving that perfect classic treat that’s both indulgent and comforting, this recipe has got you covered.
Why You’ll Love This Old-Time Fudge Recipe
- Decadent Chocolate Flavor: This fudge blends Dutch-processed cocoa and sugar to create a deep, luscious chocolate experience that’s genuinely old-fashioned and indulgent.
- Simple Ingredients: All you need are staple pantry items—granulated sugar, unsweetened cocoa, whole milk, butter, and vanilla—for an authentic homemade taste.
- Perfect Texture: With a careful cooking method on the stovetop, this recipe yields a fudge that’s creamy yet firm enough to slice into beautiful squares.
- Slow and Steady Approach: Although the process takes a bit over an hour and a half, this patient method helps develop that classic fudge consistency you’ll adore.
- Customizable Flavors: Once mastered, this Old-Time Fudge Recipe invites you to add your own twists while keeping the nostalgic essence intact.
Why This Old-Time Fudge Recipe Works
The magic behind this Old-Time Fudge recipe lies in its methodical stovetop technique and smart ingredient choices. Using Dutch-processed cocoa powder gives the fudge a rich, consistent chocolate flavor that stands out. The recipe carefully balances boiling and cooking times—first bringing the sugary cocoa mixture to a strong boil, then lowering the heat to reach the precise temperature of 234 degrees Fahrenheit (112 degrees Celsius). This temperature is the secret to getting that perfect fudge texture. Cooling the mixture to just the right warmth before beating it ensures the fudge loses its gloss and firms up beautifully. These thoughtful steps guarantee success every time you make this cherished classic.
Ingredients You’ll Need
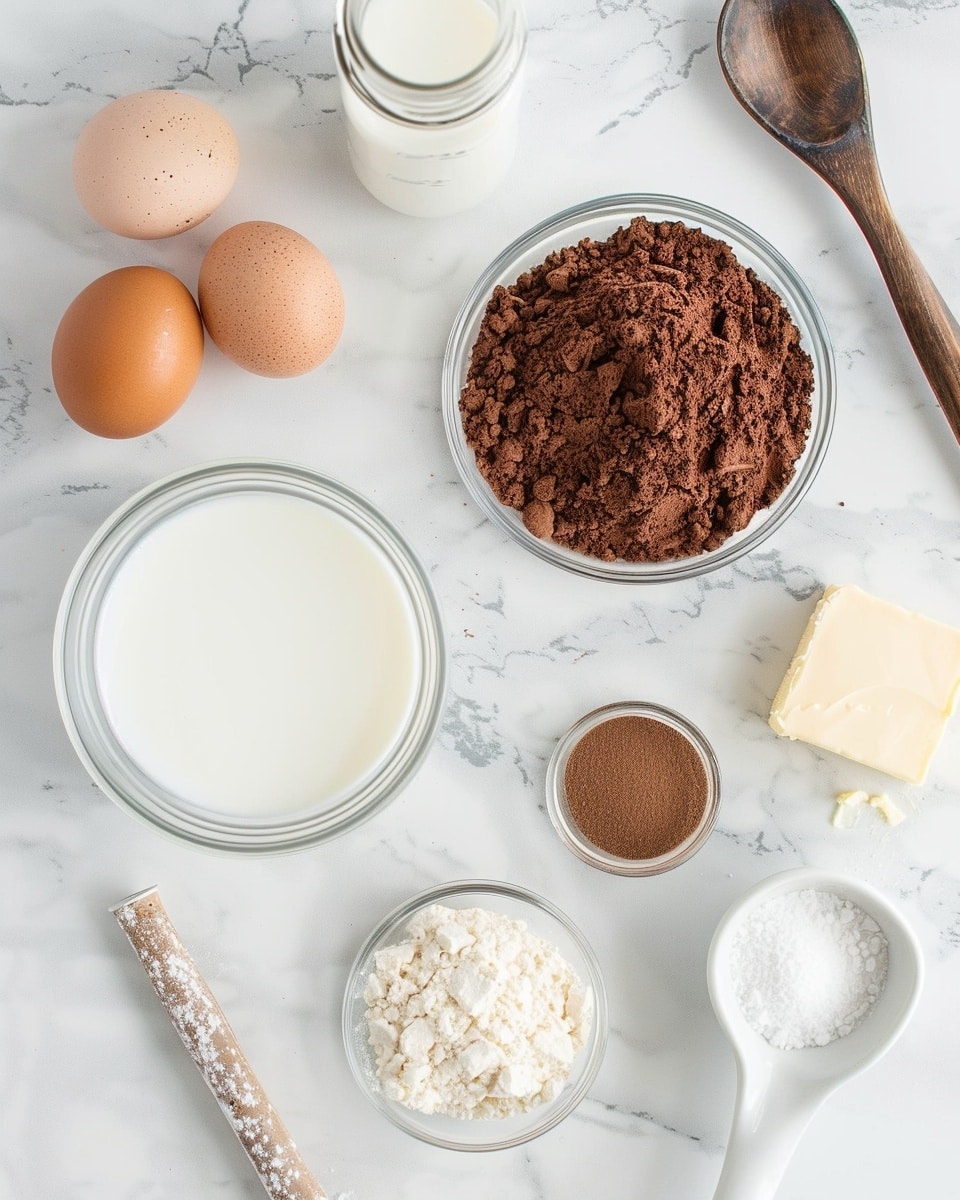
Get ready to gather some timeless ingredients that transform simple staples into an irresistible treat. Each one plays a crucial part in creating the old-fashioned charm and creamy texture of this Old-Time Fudge Recipe.
- 3 cups (600g) granulated sugar: The backbone of sweetness that caramelizes perfectly for fudge.
- 2/3 cup (60g) unsweetened cocoa (Dutch processed): Offers rich chocolate depth with a smooth finish.
- 1/8 teaspoon salt: Enhances the chocolate flavor and balances the sweetness.
- 1 1/2 cups (360ml) whole milk: Provides creamy richness and helps create the perfect fudge texture.
- 1/4 cup (56g) salted butter (room temperature): Adds luscious creaminess; if you switch to unsalted butter, just bump salt to 1/4 teaspoon.
- 1 teaspoon vanilla extract: Rounds out the flavor with a warm, fragrant note.
Ingredient Substitutions & Tips
- Unsweetened Cocoa: You can use natural cocoa, but Dutch-processed is best for a smoother, less bitter taste.
- Butter: Unsalted butter can be swapped, just add a bit more salt as called for in the notes.
- Milk: Whole milk gives the best texture, but a rich cream or evaporated milk can be used sparingly for a denser fudge.
- Vanilla Extract: Pure vanilla is ideal, but if unavailable, imitation vanilla works in a pinch.
👨🍳 Pro Tips for Perfect Results
- Use a wooden spoon: It’s gentle on your saucepan and won’t react with your ingredients like metal can.
- Watch your temperature carefully: 234°F (112°C) is the fudge sweet spot, so a candy thermometer is your best friend.
- Cool without stirring: Letting the mixture sit after adding butter allows it to set properly before beating.
- Beat vigorously at the right moment: When the fudge reaches about 110°F (43°C), beating creates the perfect crystalline texture.
- Patience is key: For the best texture, let your fudge cool completely, ideally overnight, before slicing.
How to Make Old-Time Fudge Recipe
Step 1: Prepare Pan
First, line an 8-inch square pan with buttered parchment paper to make removing the fudge later a breeze. This simple prep ensures clean edges and easy slicing.
💡 Pro Tip: Butter the parchment generously so the fudge won’t stick.
Step 2: Combine Ingredients
In a medium saucepan, blend together sugar, cocoa, and salt, then stir in the whole milk using a wooden spoon. Avoid metal to keep flavors pure and your cookware happy.
💡 Pro Tip: Mix until the cocoa is fully incorporated for consistent chocolate flavor.
Step 3: Boil Mixture
Set your stovetop to medium and stir constantly until the mixture comes to a strong boil, which takes about 15 minutes. Your kitchen will fill with that fudgy, rich chocolate scent that pulls you in.
💡 Pro Tip: Keep stirring to prevent burning and to encourage even cooking.
Step 4: Cook to Temperature
Turn the heat down to medium-low and let the mixture cook without stirring this time. You’re aiming for it to reach 234°F (112°C), a process that takes roughly 30 minutes. This slow, steady cooking is the secret to perfect fudge consistency.
💡 Pro Tip: Use a candy thermometer and resist the urge to stir; trust the process.
Step 5: Add Butter and Vanilla
Remove the saucepan from heat and add the butter and vanilla extract, but leave them undisturbed. Allow the fudge to cool to room temperature, around 30 minutes, giving the butter time to enrich the chocolate without melting fully.
💡 Pro Tip: Let the mixture sit still, it’s an important step before beating.
Step 6: Beat Fudge
Once the fudge reaches about 110°F (43°C), grab your wooden spoon and beat energetically for 6 to 8 minutes until the glossy shine starts to fade and the mixture thickens.
💡 Pro Tip: Beat with intention—this changes the texture completely, turning liquid into creamy fudge.
Step 7: Set Fudge
Spread the fudge quickly into your prepared pan. Smooth it out and let it cool fully, preferably leaving it overnight at room temperature. This patience pays off with a perfect firm-yet-creamy bite.
💡 Pro Tip: Cover loosely with parchment or foil to avoid crusting on top.
Step 8: Serve
Once cooled and set, slice your Old-Time Fudge into beautiful squares and prepare to indulge. Each piece is a rich little bite of nostalgic, creamy chocolate bliss.
💡 Pro Tip: Store cut fudge in an airtight container to keep it fresh.
Common Mistakes to Avoid
Learn from these common pitfalls:
- Using a metal spoon: Can react with ingredients and affect taste; always use wooden or heat-safe plastic spoons.
- Not reaching the right temperature: Under or overheating ruins texture — aim exactly for 234°F (112°C).
- Stirring during the final cook: Disturbs the sugar crystals formation needed for smooth fudge.
- Skipping the cooling step before beating: Fudge won’t set correctly, leaving it greasy or grainy.
- Beating too little or too late: The fudge won’t lose its gloss and develop creamy texture without proper timing.
- Cutting fudge too soon: It needs overnight cooling for clean slices and perfect bite.
Delicious Variations to Try
Once you’ve mastered the classic Old-Time Fudge Recipe, why not explore fun flavor twists to keep your sweet tooth delighted?
Nutty Classic
Add 1 cup of chopped walnuts or pecans into the fudge right after beating for a delightful crunch contrast that complements the creamy chocolate elegantly.
Mint Chocolate
Stir 1/2 teaspoon peppermint extract with the vanilla for a refreshing twist on tradition that wakes up the palate with every bite.
Peanut Butter Swirl
Gently fold in dollops of smooth peanut butter after the butter and vanilla step to create a gorgeous marbled effect and delicious flavor pairing.
Coconut Infusion
Sprinkle shredded unsweetened coconut on top before the fudge sets for a tropical hint and alluring texture.
Caramel Drizzle
Drizzle homemade or store-bought caramel over the fudge after spreading and lightly swirl with a knife for a luscious decorative touch.
For a delightful complementary dessert, pair your Old-Time Fudge with our Irresistible S’mores Cupcakes Recipe for a chocolate extravaganza perfect for any occasion!
How to Serve Old-Time Fudge Recipe
Garnishes
Dress your fudge squares with a light dusting of cocoa powder, a few sea salt flakes, or a sprinkle of finely chopped nuts for added flair and texture.
Side Dishes
Serve alongside fresh fruit like raspberries or sliced strawberries to cut through the richness, or offer a cup of warm coffee or tea to complement the fudge’s deep chocolate notes.
Creative Ways to Present
Arrange fudge squares on a beautiful wooden board or tiered cake stand for parties. Wrap individual pieces in parchment and tie with twine for charming homemade gifts. For celebrations, top with edible gold leaf or tiny edible flowers to elevate the presentation.
You can also impress guests by serving this fudge alongside the zesty Orange Shortbread with Dark Chocolate Recipe for a perfect dessert duo that blends citrus brightness with chocolaty richness.
Make Ahead and Storage
Make-Ahead Instructions
This Old-Time Fudge Recipe is perfect to make a day or two ahead of your event. Let it cool completely, slice, and store in an airtight container at room temperature or in the fridge for convenience.
Storage
Keep fudge in an airtight container at room temperature for up to one week. For longer storage, refrigeration extends freshness but may slightly firm the fudge.
Freezing
You can freeze fudge wrapped tightly in plastic wrap and stored in a freezer-safe container for up to 2 months. Thaw in the refrigerator overnight before serving.
Reheating
Fudge is best enjoyed chilled or at room temperature, but if it feels too firm, let it sit out a bit to soften or warm gently for a few seconds in the microwave, watching carefully.
Expert Tips for Success
- Always use a reliable candy thermometer for precise temperature control.
- Wooden spoons stir gently yet effectively without damaging your pan or flavor.
- Patience during cooling ensures the fudge solidifies with ideal texture.
- Beating at the right temperature triggers the sugar crystal transformation that creates creamy fudge.
- Room temperature butter blends better, delivering smooth richness.
- Choose Dutch-processed cocoa for that authentic, intense chocolate taste.
- If your fudge is too soft, next time extend cooking by a few more minutes before removing from heat.
Frequently Asked Questions
Can I use unsweetened natural cocoa instead of Dutch-processed?
Yes, though Dutch-processed cocoa offers a smoother, less bitter taste that’s ideal for this fudge. If you use natural cocoa, expect a slightly tangier finish.
Why does the fudge need to cool before beating?
Cooling allows the sugar temperature to drop to a level where beating forms the proper sugar crystals, producing a creamy texture instead of grainy or sticky fudge.
How do I know when the fudge is ready to be removed from heat?
When the candy thermometer reads 234°F (112°C) and the mixture stays at a steady gentle boil, it’s time to remove it from heat and add butter and vanilla.
Can I make this recipe dairy-free?
You can try substituting whole milk with coconut milk and butter with coconut oil, but texture and flavor may vary from classic fudge.
Why is my fudge grainy?
Grainy fudge often results from incorrect cooking temperature or premature stirring. Make sure to use a candy thermometer and avoid stirring during the final cooking phase.
What’s the best way to cut the fudge?
Use a sharp knife and cut fudge once it’s completely cooled and set. You can warm the knife blade in hot water, then dry it for smooth, clean cuts.
Can I add mix-ins like nuts or dried fruit?
Absolutely! Fold them in after beating the fudge, then spread the mixture into the pan for a personalized touch.
Final Thoughts
This Old-Time Fudge Recipe is like a warm hug from the past, giving you that timeless chocolate pleasure made easy at home. The rich flavor, the creamy texture, and the satisfying process of crafting it yourself are experiences worth savoring. Whether you’re making it for family, friends, or a special occasion, this recipe promises joy in every bite. So tie on your apron, gather those simple ingredients, and dive into a classic that never goes out of style.
Related Recipes You’ll Love
If you enjoyed this recipe, you’ll also love these delicious recipes:
- Mini Lemon Cakes with Lavender Glaze Recipe – Foodarohub – Light, zesty lemon cakes topped with a delicate lavender glaze, perfect for afternoon tea or dessert.
Old-Time Fudge Recipe
Recreate the magic of classic homemade fudge with this easy, reliable Old-Time Fudge recipe. Experience rich, creamy chocolate perfection that’s ideal for any occasion.
- Prep Time: 15 minutes
- Cook Time: 30 minutes
- Total Time: 2 hours
- Yield: Not specified
- Category: Dessert
- Method: Stovetop
- Cuisine: American
Ingredients
Ingredients
- 3 cups (600g) granulated sugar
- 2/3 cup (60g) unsweetened cocoa (Dutch processed)
- 1/8 teaspoon salt
- 1 1/2 cups (360ml) whole milk
- 1/4 cup (56g) salted butter (room temperature) *If using unsalted butter, increase salt to 1/4 teaspoon
- 1 teaspoon vanilla extract
Instructions
- Prepare pan: Line an 8-inch square pan with buttered parchment paper for easy removal later.
- Combine ingredients: In a medium saucepan, combine the sugar, cocoa, and salt. Add the milk and stir with a wooden spoon (avoid metal spoons).
- Boil mixture: Cook over medium heat, stirring constantly, until the mixture reaches a strong boil (about 15 minutes).
- Cook to temperature: Lower the heat to medium-low and cook without stirring until the temperature reaches 234°F (112°C) — around 30 minutes.
- Add butter and vanilla: Remove from heat and add the butter and vanilla extract, but don’t stir. Let the mixture cool to room temperature (about 30 minutes).
- Beat fudge: Once the mixture reaches 110°F (43°C), use a wooden spoon to beat the fudge for 6-8 minutes until it starts losing its gloss.
- Set fudge: Quickly spread the fudge into the prepared pan and let it cool completely, preferably overnight at room temperature.
- Serve: Once cooled, cut the fudge into squares and enjoy!
Notes
- If using unsalted butter, increase salt to 1/4 teaspoon.
- Use a wooden spoon to avoid reaction with cocoa.
- Let fudge cool completely, preferably overnight, for best texture.
Keywords: old time fudge, homemade fudge recipe, classic fudge, chocolate fudge, easy fudge recipe


